
Desert Online General Trading LLC
Dubai, United Arab Emirates
Desert Online General Trading LLC
Dubai, United Arab Emirates

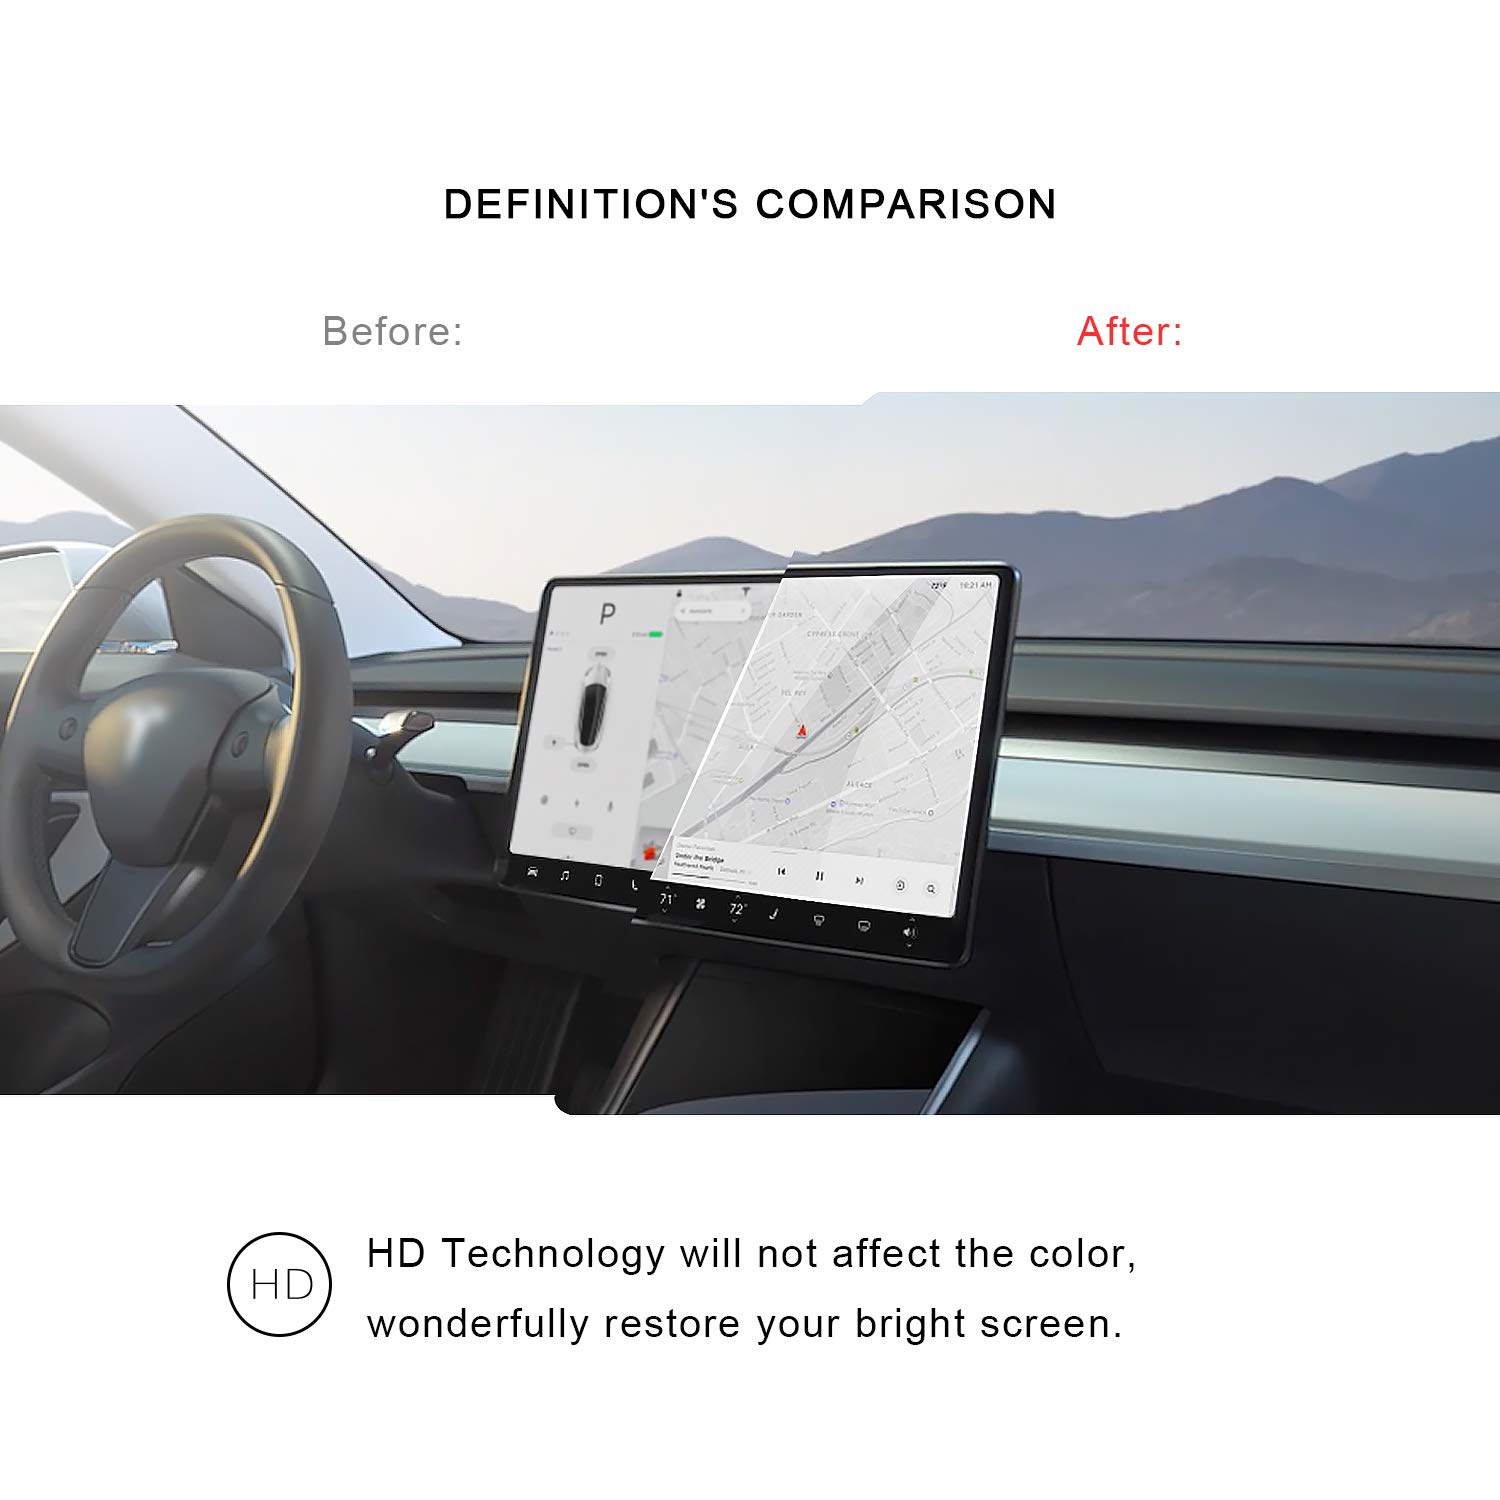


🛡️ Shield your Tesla’s brain with precision and style!
This Tesla Model 3 & Model Y 15" touchscreen protector offers laser-cut precision fit for 2018-2022 models, featuring ultra-durable 9H tempered glass that resists scratches and shocks. Its oleophobic coating minimizes fingerprints and smudges, ensuring a clear, smooth navigation experience while preserving original display clarity and touch sensitivity.


| Item Weight | 1.04 pounds |
| Package Dimensions | 15.43 x 10.12 x 0.59 inches |
| Item model number | 2018-2022 Tesla Model 3/Model Y |
| Is Discontinued By Manufacturer | No |
| Display Size | 15 Inches |
| Voice command | Touchscreen |
J**.
Awesome product for the price! (Or: Look, Ma! No Bubbles!)
Bought this because I noticed how close things get to the screen when I'm reaching across to put things in the passenger seat or passenger footwell. Also read on one of the forums that someone cracked their screen when hitting their phone on it when reaching down to put it in the cradle. Since EVERYTHING is controlled through the center console, I figured this small bit of extra safety would be worth it. Wanted clear as I have little to no glare issues normally.Fit is near perfect, with the corners a little more rounded than the screen, and trace space at the bottom of the screen. Does not perfectly follow the slight curve at the bottom of the screen, but it's not noticeable unless you're looking for it. Side to side dimensions are perfect. This will stand off just a bit from the screen as the screen is perfectly flush with it's frame. I like that the edges of the protector have a slight rounded bevel.Clarity is perfect. No touch screen issues at all. Obviously, there is no glare reduction as this is not matte, but I did not buy it for that purpose. No issues when wearing my polarized sunglasses. Can't comment on durability or longevity as I only just installed it, but if this is at all like the multitudes of phone screen protectors out there, there should be no problem.Packaging included a small suction cup for easier holding of the protector and 4 sets of "install materials" including alcohol wipe, lint free cloth, and dust stickers. Protector itself has an adhesive cover on the back that you pull of just before you adhere it to the screen, but nothing on the front surface (which I guess it doesn't need given it's hardness and that it's glass).I was able to install it problem free with no dust that I could see trapped underneath. I set the screen for clean mode, used a lamp in the passenger seat to shine on the screen to better see any residual dust, and also used my own screen cleaner spray (any glasses cleaner spray) and a microfiber cloth. I also used the "hinge method", using painters tape to hold the top edge once I aligned it to the screen. After getting the screen clean, I think static from the plastic adhesive cover kept attracting more dust - not sure if wiping the back of the screen would help or add more static. Anyways, I lifted it up, took the back cover off, checked again for dust on the screen, and then slowly lowered it back to the screen. I suggest pressing on the center of the screen to start the sticking (it kind of sticks itself), and then press out from there to keep bubbles from appearing. I had none.Overall I am super happy with the product (moreso that I was able to install it with no trapped dust!),and as of right now I would buy it again if I ever need a replacement, and I will be recommending this product to my friends (if they feel this is necessary).
N**R
Easy to install, fits well
It was easy to install using some masking tape on the top to hold it aligned while removing/peeling the clear mask. Here are the steps I following.1. First put the screen in screen cleaning mode, and clean the screen with microfiber and Alcohol. Made sure there are no streaks.2. Aligned screen protector on top, and applied small masking tape in the center.3. Adjusted the screen protector, and applied the masking tape full length to screen protector and going over top of the screen and to backside.4. Lifted the screen protector from bottom, cleaned one more time and blew little floating particles and now everything very clean.5. Remove the clear making which toward screen on the screen protector.6. Bent the screen protector little on the top, and started pushing towards screen and going down. This way there are no air bubles trapped under. Don't fear if you need to lift and again and reapply.7. if there are any Small pockets of air, start pushing those towards edges and out. Did not need any tools for this.And you are done. I did not have any particles or airbubles at all. Alignment was pretty good, may be 1 mm off/up on the right. This is pretty much invisible now.I did not have any problems using screen right away, no phantom touches, or usage issues. I do not see it being any more reflective than the main screen. Finger prints, I have to watch is in few days and see how much it collects.Not sure about truthfulness of 9H rating and all, but I am hoping it will help preserve screen during smaller accidents!!
A**N
Good fit. Slightly more reflective. Solved phantom touch issue with a reboot
Was an easy install, having experience with phone screen protectors. Other reviewers are correct, it seems there is a difference top vs. bottom so test test fit it first. I found it easiest to use the suction cup in the top corner and align the opposite corner with my free hand, handling the edges. Climate off (hold the fan icon for a few seconds to turn off) and also enter “screen clean mode before cleaning the screen and begin the application immediately after removing the protective film. It takes a firm finger to press out any bubbles but I achieved a nearly perfect result.After installation I had the “phantom touch” issue where it would randomly tap and scroll. A reset (hold both steering wheel buttons until screen goes black) solved the problem. Don’t touch or clean the screen during the reset but once it lights back up there are no problems.The only difference now driving with this protector is it has a slight more reflective finish, but no so much as to be a problem.I’m pleased with my purchase.
M**A
Good protection, not precision cut.
The install went great but the cut is not as precise as I would have liked. Overall good protection. I just wish the cut was better. The top of the screen has a slight curve but the screen protector is perfectly straight. This means that there is about 1-2mm of open space in the corners and around the edges. For the price and ease of install, I give it 3 stars.Install tips:Turn off your HVAC and put the car in screen cleaning modeFollow the instructions, the YouTube video link is broken so just make sure you clean your screen.I used compressed air to get all the dust off. Line up the protector and take two pieces of tape to tape it to the top of the screen. This will keep the screen in place while you remove the back plastic before sticking it on. blow the screen off again with the air. this is so that and static dust doesn't get caught. Then slowly pull the back plastic cover off and apply. run your finder horizontally across the screen. Use the microfiber cloth to smooth out the bubbles. boom done.
Trustpilot
1 month ago
2 months ago