Some deliveries may take a little longer than usual due to regional shipping conditions.

DOWNLOAD THE APP


Customer Services
Copyright © 2025 Desertcart Holdings Limited
DOWNLOAD THE APP


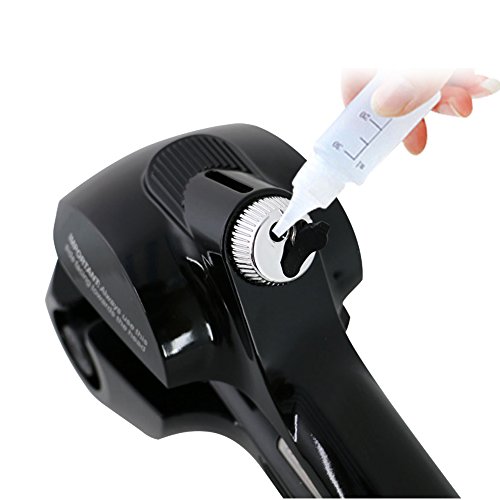
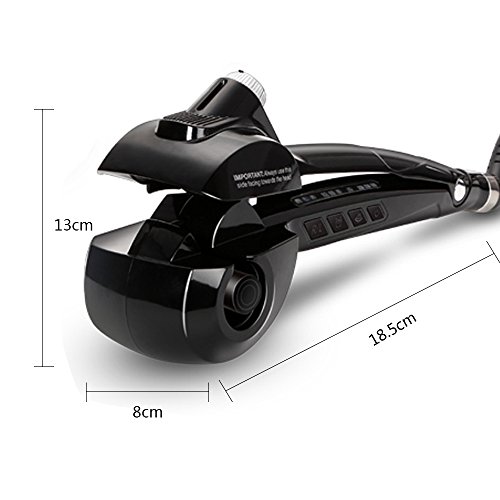


Colour:Black Use the tutorial: The first step: after the power is turned on, the red light starts to flash, and the temperature is selected according to the hair quality, and the red light is always bright after reaching the predetermined temperature. |(190°C) Suitable for soft and dyed hair,||(210°C) Suitable for normal hair,|||(230°C) Suitable for rough and self-rolling hair. Step 2: Set the time and choose the curl effect. 0 is a custom type, no sound, only reminded after the hair is entangled for 15 seconds. 8 means 8 seconds, natural wave/loose type,10 means 10 seconds, soft curls/moderate,12 means 12 seconds, stylish glamorous/tight type Step 3: Set the direction of the curl. R: When the hair on the right side of the face is rolled, it is placed in the R position and the inner roll; when the hair on the left side of the roll is placed in the R position, the outer roll is rolled. L: When the hair on the left side of the face is rolled, it is placed in the L position, and the inner volume is rolled; when the hair on the right side of the roll is placed in the L position, the outer volume is rolled. A: Automatic file, one turn left and right turn alternately, the most natural roll method. Step 4: Make sure the roll opening position (with button) is toward the hair. Step 5: Choose a hair with a width of 1-3 cm and carefully put it into the curling iron. More than 3 cm, the curler sounds a warning tone and automatically stops working. Step 6: Fix the curler at the starting position of the curl you want, make sure the hair is straight and straight through the reel, then close the handle, the curler will automatically start working and give your hair a perfect, long-lasting curl. modeling. Step 7: When you hear the "didididi" continuous sound, release the handle to let the curls slide naturally and gently, and remove the curling iron. Note: If you do not release the handle, drag the curler directly, the curl will restore straight hair.
Trustpilot
2 weeks ago
2 weeks ago