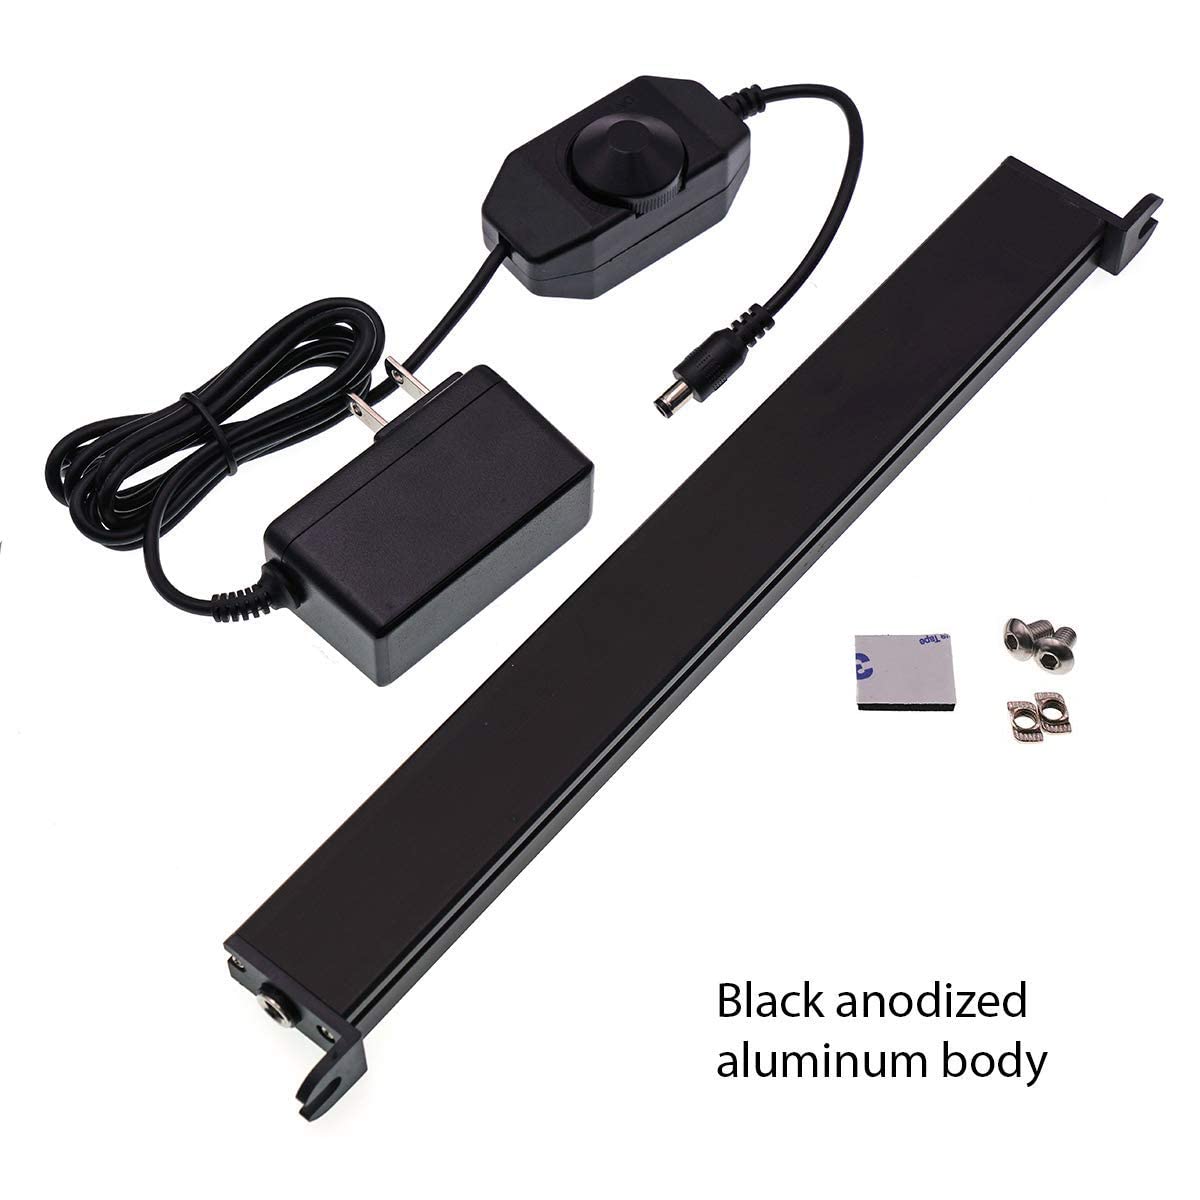
Light Up Your Creativity! 💡
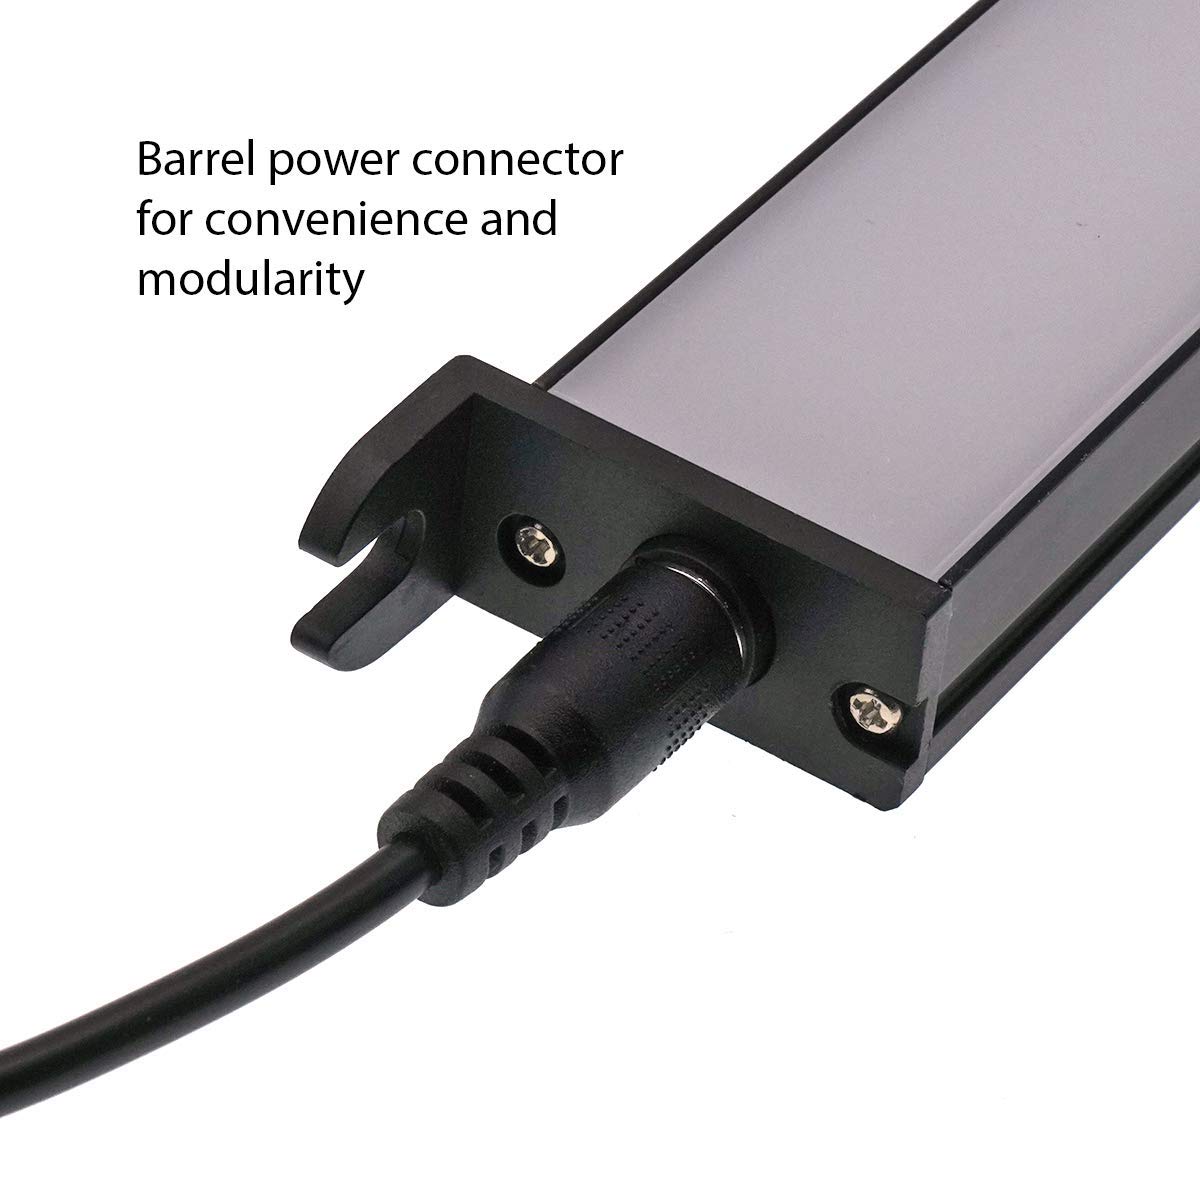
The Gulfcoast Robotics 24V Premium White LED Light Bar Kit is designed for Creality Ender 3 Neo, Ender 3 V2, CR10, and Voxelab Aquila 3D printers. This complete LED lighting solution features an easy plug-and-play installation, a customizable dimmer switch, and a durable aluminum housing that enhances longevity. With a UL certified wall adapter, it ensures safe and efficient operation, making it the perfect upgrade for your 3D printing setup.
B**I
Lights up my bed like a Christmas tree.
It was pretty easy to install, just screw the nut and bolt together, and slide in the rail on the top of the printer, then slide the light into that and tighten. Plug it in and done.This is NICE and bright. I have the housing they sell for this, and in the inside is reflective, so easily 3x the light from this too, not that it is needed, this thing can get BRIGHT.
T**.
This "entry level" printer provides incredible print results for its price point
This is my first foray into 3D printers, after having researched for a few years and waiting for prices to come down. Assembly was easy enough; I am a mechanical designer so the assembly made sense to me. The instructions are not very technical so searching out YouTube videos is helpful, even if you do have good working mechanical knowledge. One thing that you want to pay close attention to is making certain that you get the "X" gantry squared with the bed and that the wheels of the gantry trams are freely rotating and not binding. Here is a very good YouTube tutorial on how to do this: https://www.youtube.com/watch?v=4bFYH0X3qjk&list=PLljXispfSSi-RQbin3U7fTWYPIlIXLSjV&index=6&t=11s&ab_channel=TheEdgeofTechOne of the things that I really like about this printer is the ability to upgrade to a larger print surface in the future, and the fact that Creality made this printer for "tinkerers" like me. This is a fantastic printer to learn both 3D printing basics on, as well as how to physically upgrade the printer itself. I searched out a lot of useful upgrades that you can print yourself to add to it, and used the time spent printing these upgrades to understand how the printer works and how to fine-tune it so that when I started running my own designs (as well as more intricate models), I would better understand how things "worked". I am glad that I did my learning this way, as I have now gotten my printer set up and dialed in nearly perfectly. I rarely level (tram) the bed, and I wipe down the magnetic build sheet every 4 or 5 prints with 91% isopropyl alcohol. Speaking of the magnetic build sheet; I really like that feature as well. I did order (2) glass beds, but have not installed them as I have no need to at this point. The magnetic sheet has not failed me yet and it makes part removal as easy as it could be; just remove the sheet from the bed after the print is completed and simply flex it. The parts pop right off. I also have had no need for any sort of adhesive because my initial layers always run well.Here is a list of purchased upgrades:Glass Printer Bed 235x235x3.8mm Borosilicate Glass (not used)All metal extruder and 'hotend' with Capricorn tubingYellow bed-leveling springs with new aluminum adjustment wheelsUpgraded Motherboard Silent Mainboard V4.2.7 with TMC2225 Driver Marlin 2.0.1I also purchased an LED lamp that attaches across the top horizontal T-Slot rail and plugs into the main power cables via a 'piggyback' inline plug system.[Gulfcoast Robotics] 24V Premium White LED Light Upgrade for Creality Ender 3 / Ender 3 Pro 3DThe rest of the upgrades I have done are things that I have found on Thingiverse that I can print and add myself.This printer has surpassed my expectations by a long shot. I am more than pleased by the print quality. I never would have thought this quality possible for a printer that is sub $500, let alone half that price.
F**E
Just what the doctor ordered
I was planning on making a custom led mount using those rolls of led strips and 3d printing mounts for it and hand-wiring them to the power supply with some step down converters and then I came across this as I was searching for a replacement hotend. Of course this costs a bit more than my custom led mount, but not by much and it makes the job way easier.Super easy to install, super bright, and even has a dimmer.Unlike most of the reviews, I don't really have an issue with the cable length. Maybe they've lengthened it or maybe I got lucky, but it's really not as short as I was expecting it to be based off of the other reviews I've read. I mean sure it could be like 6 inches longer to give it a bit more slack and make it easier to find a spot for the on-off / dimmer switch, but it's not the end of the world.This thing is bright! In the first picture I've posted along with this review, it was 2am and (obviously) dark outside and I turned off all the lights in the room (and subsequently every other room in the house) and the only light in the picture is coming from the street lights right out the window and the glow of my Ender 3 Pro's blue LCD screen. In the second picture I have the Gulfcoast Robotics LED light turn all the way up. It essentially lights up the entire room and I can see every wall and make my way throughout the room easily.And of course the third picture is just a front view of the printer with the light all the way up and no other lights on to show a profile of how much it lights the printer up. I absolutely love this thing and it has easily become one of my favorite upgrades to my Ender 3 Pro so far. Now I don't have to use the room lighting (which is terribly warm lighting as well as a 60 watt bulb) or use my tiny lamp with a 13 watt CFL bulb taking up an extra wall plug. It's powered directly from the printer without needing to solder anything and plenty bright allowing me to keep an eye on the printer with my webcam via OctoPrint without wasting much electricity.A word of caution though, this thing gets very hot. I made the mistake of resting my hand on the top of the LED fixture after it had been on for at least 10 minutes or so and woo boy did that sting! I mean it makes sense what with 24V going through these extremely powerful LEDs.Overall, I am more than satisfied with this purchase and highly recommend it if you are thinking of adding a light fixture to your Ender 3 or Ender 3 Pro. Best $37 I've spent on my printer!
B**H
Bright Light but with compatibility issues
Update: Gulfcoast fully backed their product and helped me get the right part for my printer, much appreciated.Update: I reached out to Gulfcoast Robotics support and they were very responsive. They had me check a few things but were unable to determine where the issue was for sure. The best guess was it looked like my Ender 3 Pro had +/- wiring backward from what they expected so the passthrough XT60 connector would have been sending -24v to the light instead of +24v. Unfortunately the best result was me returning through amazon, both units and re-ordering a spade connector model that I can connect directly to the power supply. I'd like to give this 5 stars if it just worked, but its been quite a hassle to get a working light.Installation was very quick on my Ender 3 Pro, no problem but the light didn't work. Returned and got a replacement, this also didn't work. I checked voltages at the plug and LED. The plug was getting 24 volts but the led was getting -24v, meaning the LED board was wired backward. I didn't want to return the second one when it was such an easy fix so re-soldered the LED board the right way, now it lights up and it is very bright. The dimmer switch however does nothing, its on always, can't dim or turn off the light, it only on full brightness when the printer is on. The brightness is good and I like the ease of installation, but how did 2 of these get past QA wired backward AND with a bad dimmer switch?
Trustpilot
1 day ago
5 days ago