💡 Light up smarter, save bigger—your workspace deserves the upgrade!
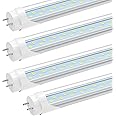
The JESLED T8 3FT LED Tube Light delivers 2520 lumens of bright, daylight-white illumination at just 18 watts, replacing traditional 45W fluorescent tubes with up to 66% energy savings. Featuring plug-and-play or ballast bypass installation, it fits standard F30T8/T10/T12 fixtures for effortless LED conversion. With a lifespan exceeding 50,000 hours, this 4-pack ensures long-term, flicker-free lighting ideal for professional and home environments.


| Brand | JESLED |
| Light Type | LED |
| Special Feature | Energy Efficient |
| Wattage | 18 watts |
| Bulb Shape Size | T8 |
| Bulb Base | G13 |
| Incandescent Equivalent Wattage | 45 Watts |
| Specific Uses For Product | Lamp |
| Light Color | Bright White |
| Voltage | 100277 Volts (AC) |
| Unit Count | 4.0 Count |
| Color Temperature | 6000 Kelvin |
| Number of Items | 4 |
| Brightness | 2520 Lumen |
| Shape | Tubular(T) |
| Material | copper |
| Model Name | JD-G13SP090-CR-6K-4P |
| Connectivity Technology | Remove Ballast |
| Indoor/Outdoor Usage | Indoor |
| Controller Type | Push Button |
| Power Source | Corded Electric |
| Color Rendering Index | 80 |
| Power Consumption | 18 Watts |
| Item Package Quantity | 1 |
| Light Source Type | LED |
| Item Weight | 3 Pounds |
| Light Source Wattage | 18 Watts |
| Control Method | App |
| White Brightness | 2520 Lumens |
| Efficiency | 140 lumens/watt |
| Manufacturer | JESLED Lighting |
| Part Number | JW-T83FT-G13-A2-TC |
| Item Weight | 3 pounds |
| Package Dimensions | 37.64 x 3.07 x 2.99 inches |
| Item model number | SWT81218A2090 |
| Style | 3FT-4Pack |
| Color | Clear, Daylight White |
| Special Features | Energy Efficient |
| Batteries Included? | No |
| Batteries Required? | No |
| Wattage | 18 Watts |
A**Y
works with ballast
Quick shipping. Plug and play. Installed in a very old fixture with ballast works fine. It is bright.
R**.
Easy conversion of aquarium Fluorescent to LED
This was my experience replacing the light tube in my 24" 20Watt aquarium fluorescent light. I chose the 6000K color temperature of this replacement to simulate the full sunlight spectrum. Unlike other "daylight" lamps, this particular light is not excessively blue or purplish in color. I also expected the brightness level to be higher than that of aquarium specific lamps.My aquarium light hood was originally manufactured with a ballast and a starter. This was a common method of wiring these fluorescent light hoods. The inclusion of an automatic starter device, instead of the push-to-light switch, allowed the use of a timer to control the lights. I had already replaced the FL tube with an LED type. The original replacement unit did not require that the ballast be removed, just the starter. This time around, I bit the bullet and decided to try this type of LED replacement tube. There are three basic types of LED replacement tubes. Besides the ones that do not require the removal of the ballast, there two types that involve a wiring modification. One kind of replacement LED lamp is powered from just the two pins on one end of the tube. This may require the replacement of the actual sockets on the fixture, and I felt this would involve additional work and wiring. I also did not like that the light tube has to then be inserted in a specific orientation for it to work.The other type is what it is represented here. The lamp is powered by running one wire from the AC to each socket. Removing the ballast and the starter from the circuit was a rather simple modification. The existing switch and socket wiring was long enough to connect to each of the lamp and no additional parts were required. I went ahead and also removed the socket for the original starter and, since the fixture is subject to moisture, I sealed all of the access and mounting holes leading to the exterior. The light was never meant to be waterproof, but I didn't want any water accidentally spilled on it, to have a direct path to the circuitry inside.Ok so, how did it work out? The tube lit right up without any flickering or vibration (hum?) noise. My aquarium is 24" inches high. The light is bright enough to properly illuminate the substrate. It works very well for my application. I would certainly recommend it for this or any other application where you can make the necessary modifications to the fixture.
E**K
Happy I made the switch from Kitchen Flourescents to LED!
I'm so happy I switched out the kitchen fluorescent lights to these LED lights. I researched whether they would fit in the current kitchen sockets and they did. I watched DIY videos to convert fluorescent to LED, but opted to hire an electrician to make the switch. It took him less than a half hour to install 8 new lights and switch the ballast. Light is VERY bright, which I'm fine with in the kitchen. I wish they were dimmable, but that may have more to do with my electirical system set-up. Very pleased with this purchase. Good value. I can't speak to longevity because they've only been up a couple months. But supposedly, the LED life span is similar to fluorescents, which lasted nearly 10 years.
D**V
Great replacement for fluorescent tubes
I LOVE these LED replacements for my fluorescent tube fixture! They are SO bright - just what I wanted in my laundry room. I have a ballast fixture and matched the ballast to the models listed and they work perfectly. There is a very small delay from when I switch on the light to when the lights turn on, but it is so small it doesn't matter. And the price is about the same as the fluorescents from a big box store.
K**R
FALSE ADVERTIZING, NOT PLUG AND PLAY
I bought these lamps so I wouldn't need to rewire all my fixtures. After changing all the lamps, they started to go out a fixture at a time. The ballasts were fine, they worked when I removed the florescent lamps. If I moved the lamps, they would work again.I surrendered and started rewiring the fixtures. As soon as I did, they worked. Also, they were much brighter than when the ballasts were hooked up. It was noticeable as soon as I rewired the first one.If you plan to leave the ballasts wired in, pick a different lamp.
J**S
Almost Perfect
I needed to upgrade my florescent lights to LED. These looked perfect until I tried to install them. My mistake, but these 24" bulbs cannot fit into my 18" fixtures.I was able to return them (thank you Amazon) and get the right size. Now I do have LED lights under my counter, just not with this (too long) bulbs. Again, it was my fault for ordering the wrong length.
A**G
Very bright
Easy install and super bright! Only needed one in my kitchen and left the other side empty. Sturdy lamps will last a long time.
Z**O
Brighten the kitchen
They are a little briter than the others and hopefully they will last longer.
Trustpilot
1 week ago
1 day ago