We remain fully operational. Our teams are working around the clock to ensure your deliveries continue safely.

DOWNLOAD THE APP


Customer Services
Copyright © 2025 Desertcart Holdings Limited
DOWNLOAD THE APP

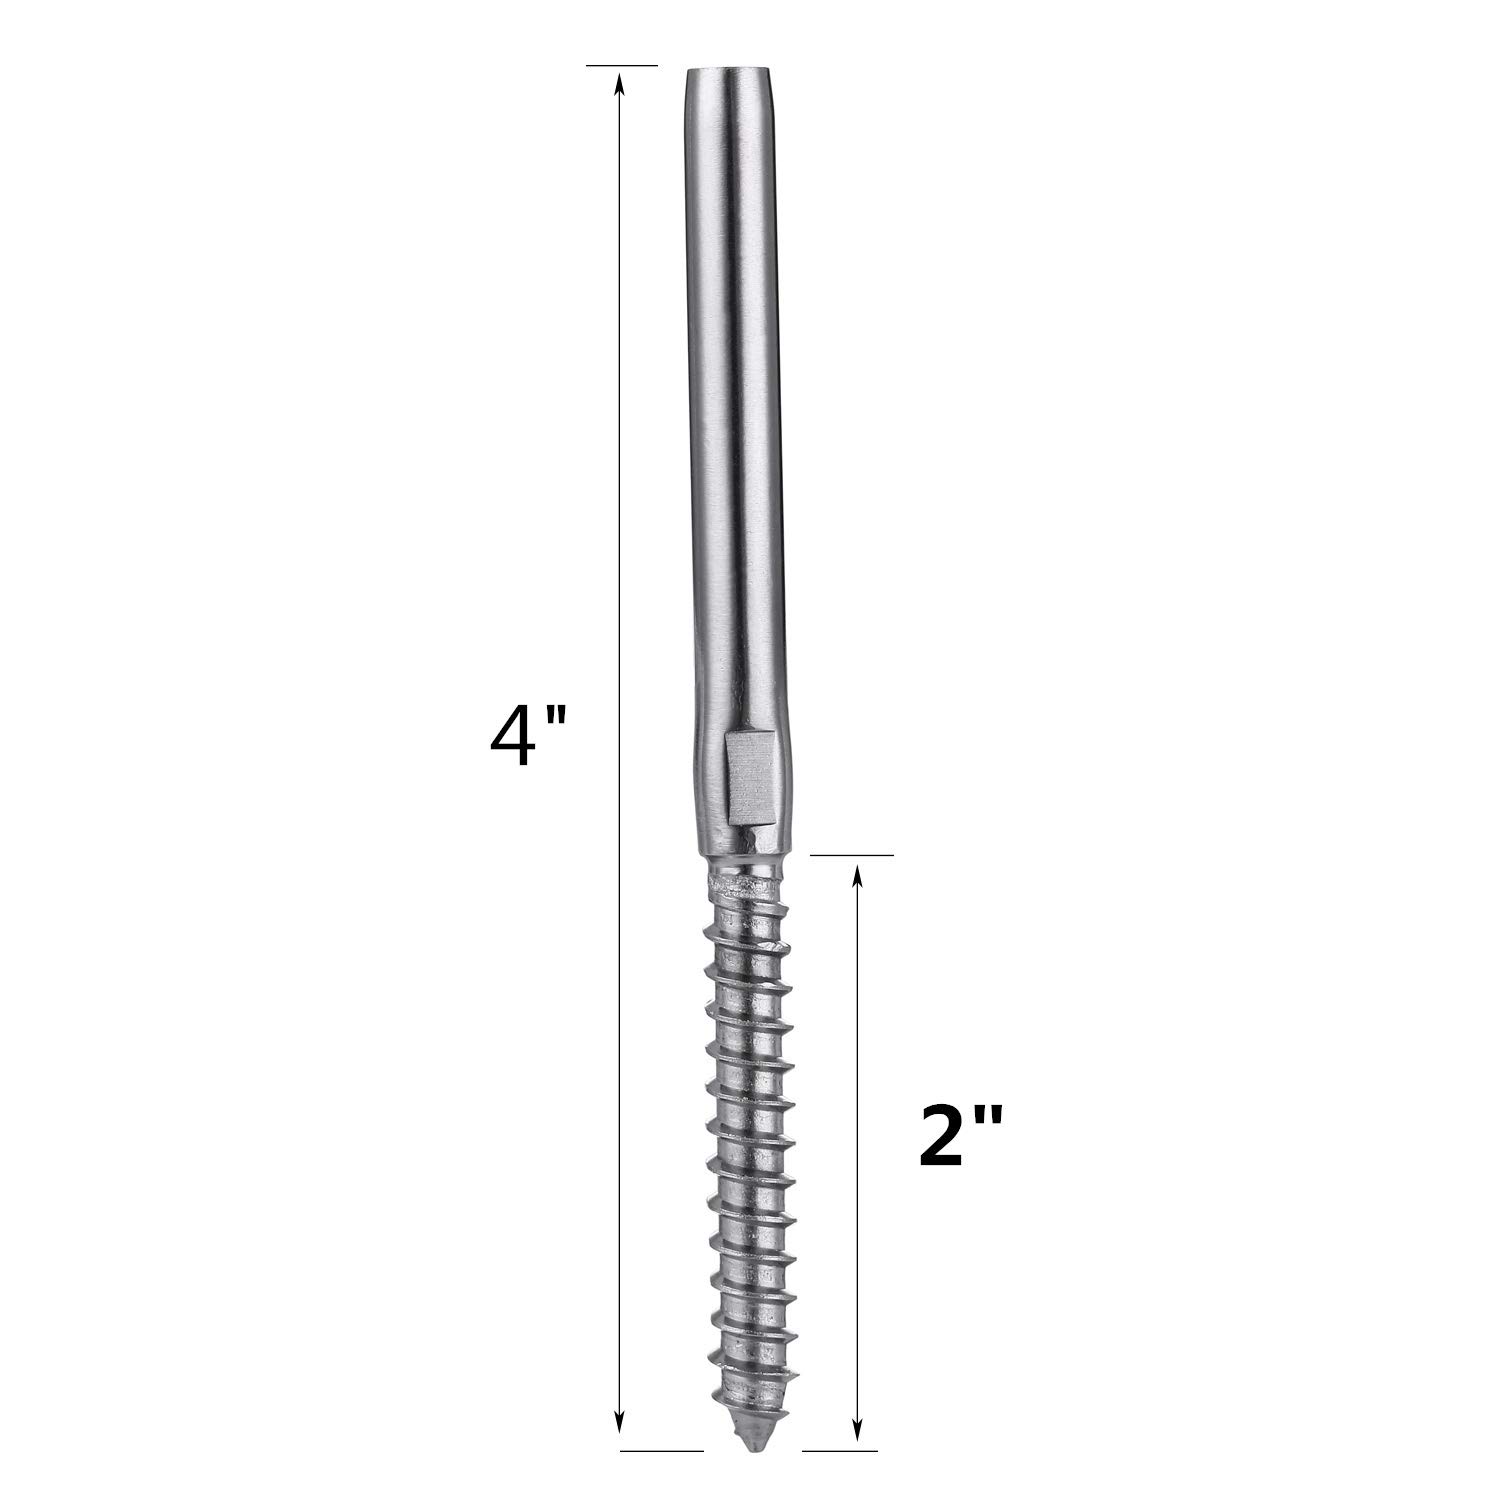
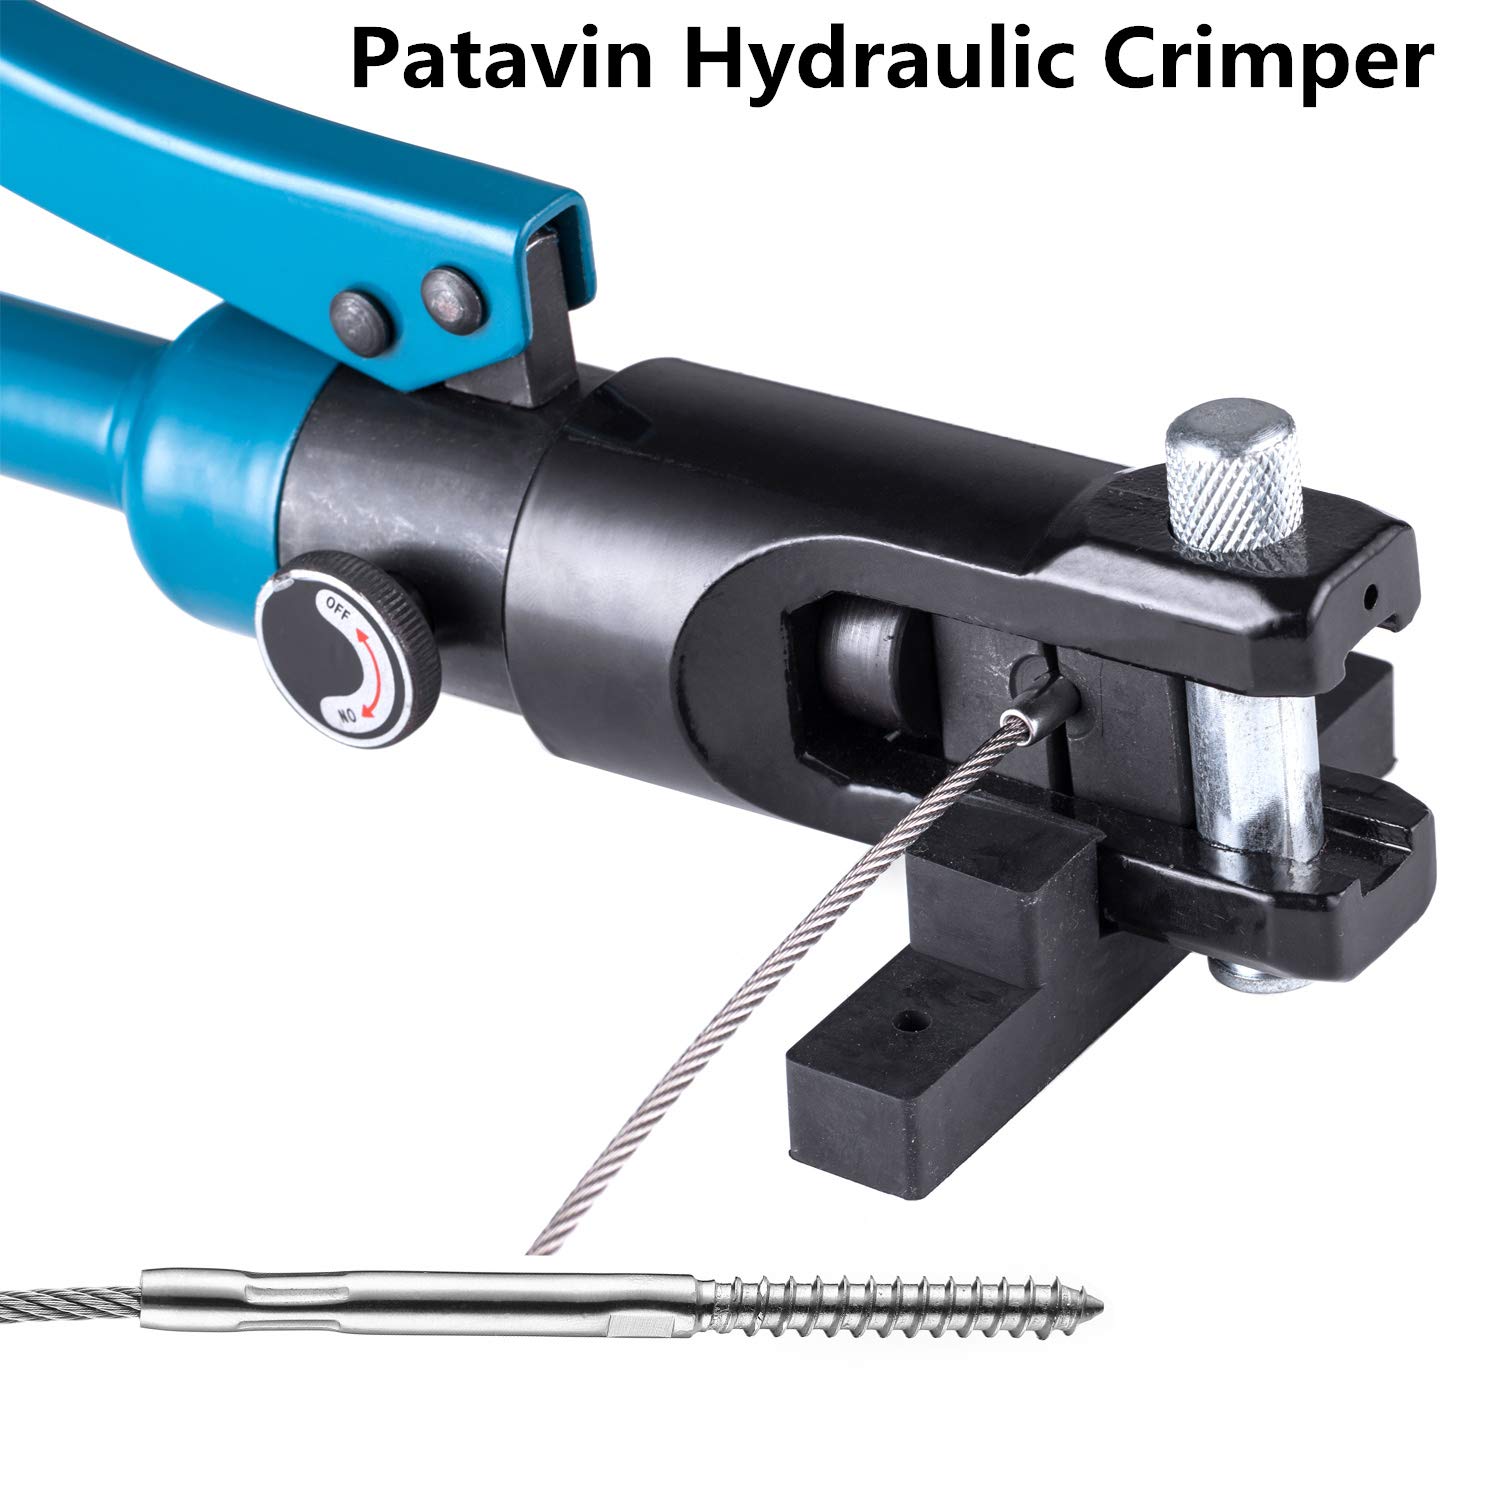


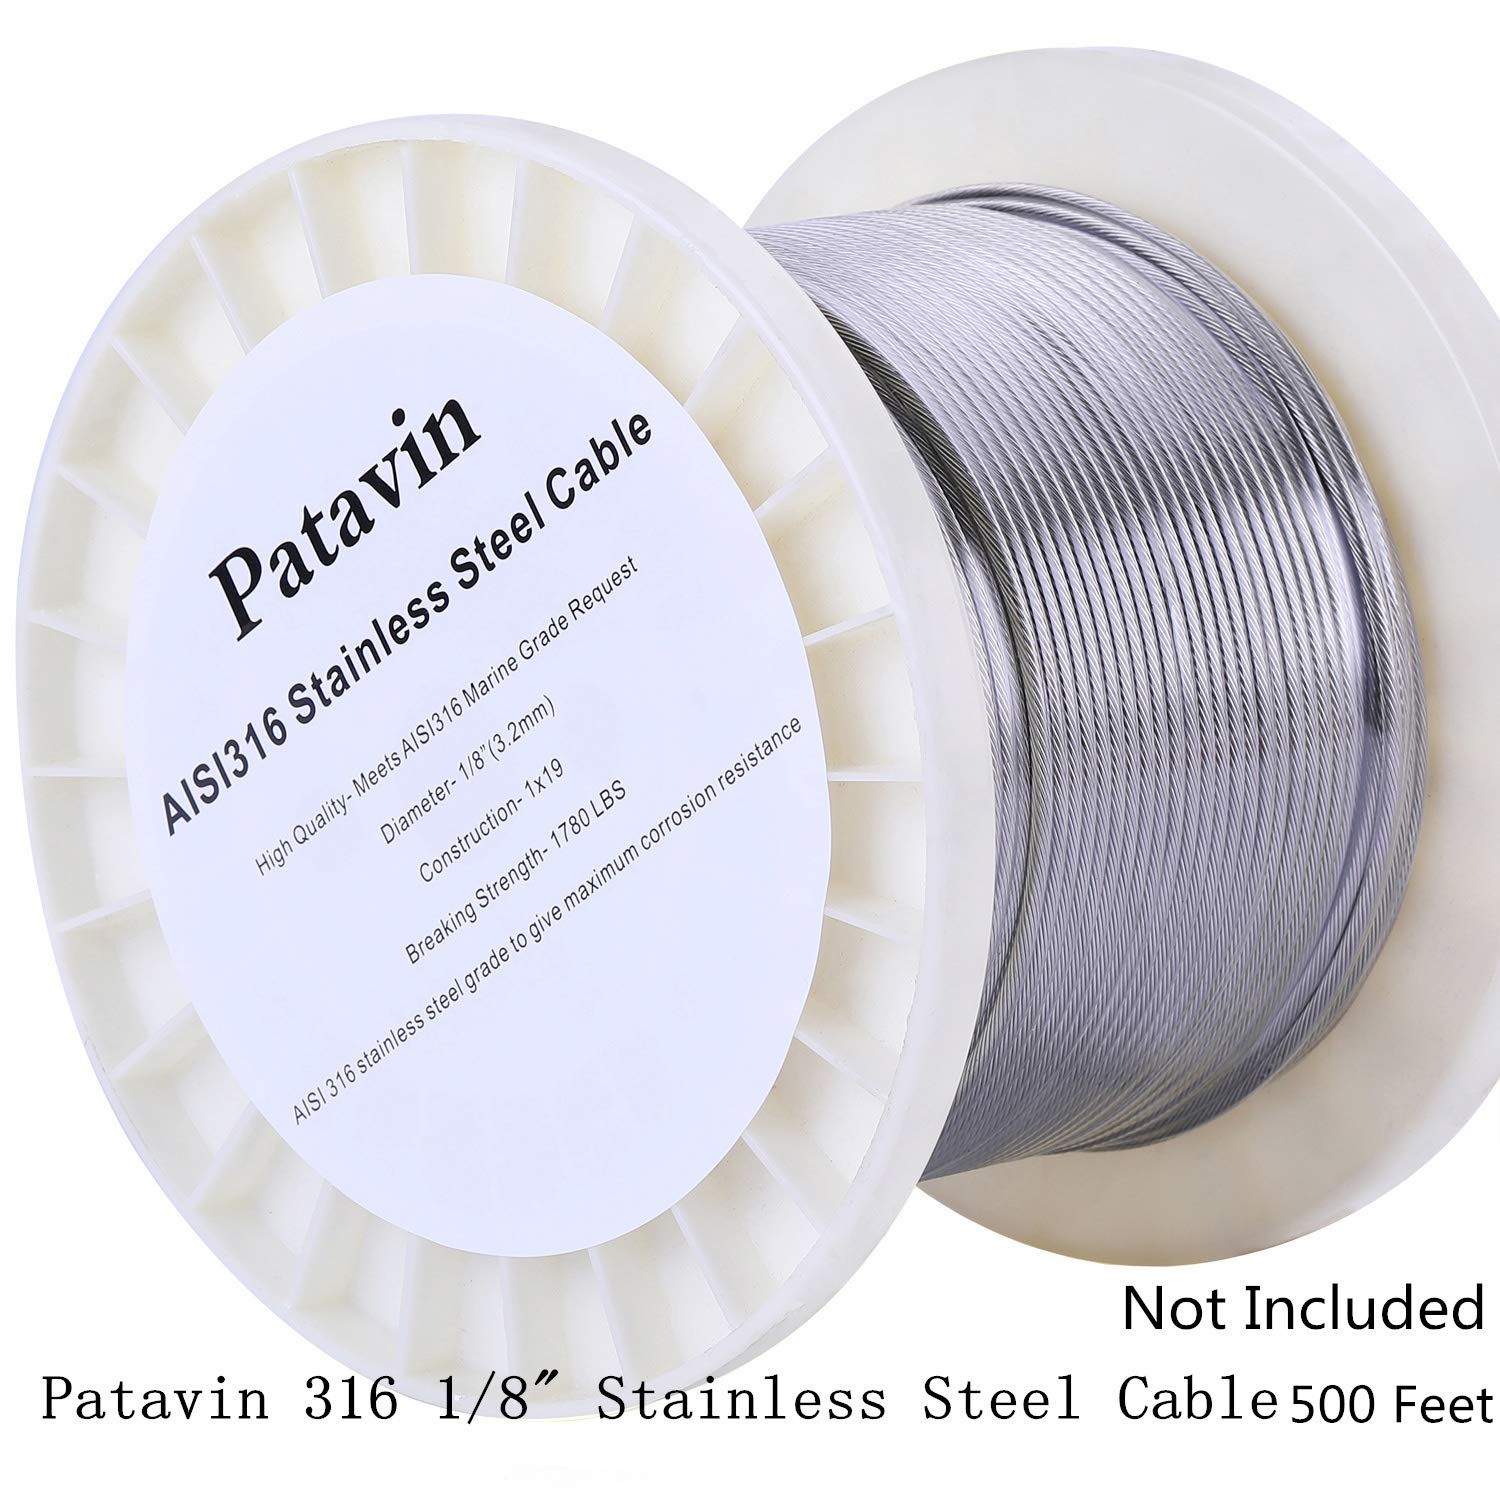
Size Name:30 Pairs Specification: - (Left & Right) hand Thread - Total length: 3.5”/9 cm, Thread length:2”/3.8 cm - Fitting for cable: 1/8" -Patavin cable Swager tool is required -316 marine grade stainless steel What included: 30pcs x Left hand thread 30pcs x Right Hand Thread 1pcs x Pre-hole drill 5mm Recommend to Use together with Patavin 1/8 316 stainless steel cable 400 feet type 1x 19
D**O
Nice economic alternative
Great for the price. You should invest in the swage hydraulic. Crimping tool definitely made it easier. Very streamline.
A**Y
I love the look!
I love these! The only reason I gave 4 stars for ease of installation is due to the installation learning curve.
I**N
Difficult to use
They were a little difficult to figure out and keep track of left and right pieces. It would be nice if the were premarked.
A**T
Easy to install
Simple to use install and adjust, no issues.
C**E
Did the job.
Arrived when promised and worked well
E**S
Clean Lines and Minimalist Look.
I really like these for the clean looks this method of attachment can achieve.You will need a crimping tool such as a hydraulic crimper to attach the cable to them.These are a great way to simplify cable rail installations.You will need to thread each side a little at a time as well as the same amount to keep the cable from developing a twist.It is also very important that the wood you will be anchoring them into is structurally sound and dense. These put a lot of tension on the wood and screw thread.It is also important to cut the cable short enough that you don't fully seat the screws. The cable will relax and stretch over a few weeks. You will want to be able to take up the slack and re-tighten them after this "break-in" period.Other than those few simple tips it usually isn't that hard to install.
R**T
Cost effective solution, high quality stainless, but tricky to implement.
When I first ordered these, I thought this was by far the easiest approach to create a cable railing. In theory it is, but in practice it is tricky to do well. First, you have to make sure you have one right turn and one left turn lag screw on both ends. That may seem simple, but it is easy to screw up and after attaching the lag screw to the cable using a hydraulic crimper, there is no going back. In contrast, almost all the other methods of putting up cable railing are less prone to irreversible mistakes. In addition to the above problem, installing these requires you to jump back and forth between the posts to screw the lag screws in while remembering which way to turn them. Thus, these are cheaper than the other methods, but much harder to use.The above issues are important to note and thus I recommend you buy extra in anticipation of possible errors. But in the end, these look great because of the simplicity and symmetry of the installation. And because they are much less expensive than the other methods, you can buy extra and sill save money.
F**R
great value
hard to imagine they make such nice stainless components for this price point...I love the look of these in stair railings.... I hope they stand up over time... high humidy here..If you never used these, u gotta try them, u get such a professional look... and yet, even a DIY can do it...sometimes drilling the holes on an angle is the hard part... but an angle setter for your drill is all that is requires for that.Been buying from this maker the last few months, all high quality components...
A**R
Don't use the drill bit that came with the package for soft wood.
It's a good system and economical. If you are drilling pilot holes in soft wood like my cedar posts. Do not use the drill bit that came with it. It is to large and when tightening just a little it will pull the scew out and strip the hole.I went 2 bit sizes down and it worked better.
Trustpilot
1 month ago
3 weeks ago