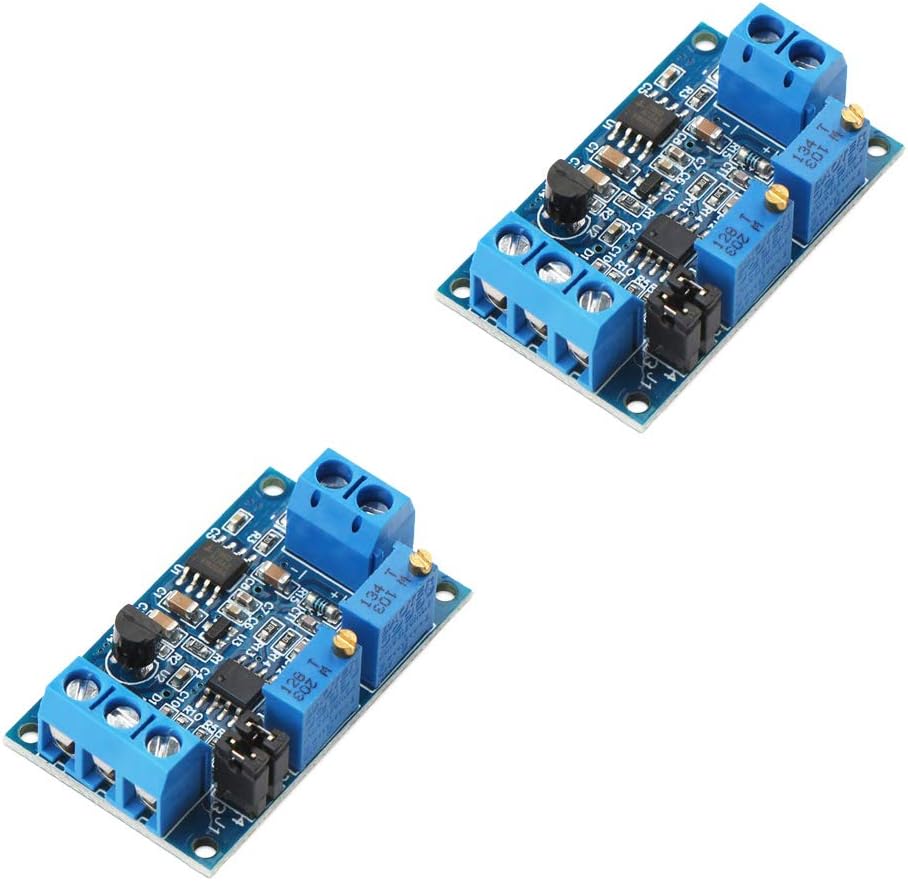
🔌 Power Up Your Projects with Precision!
The Ximimark 2Pcs Current to Voltage Converter Module is an essential tool for converting current signals (4-20mA, 0-20mA) into precise voltage outputs (0-3.3V, 0-5V, 0-10V). With a wide supply voltage range and high-precision components, this module ensures minimal temperature drift and exceptional stability, making it ideal for industrial applications.
A**R
How to not blow this board up!
I too blew up a board trying to get it working, then I figured out the problem. The board itself has a common ground between the power input, and the sensor input. It is therefore possible to run the board and the sensor off the same PSU, just make sure that your sensor is wired between the PSU + and the sensor input +. Do not connect anything to the sensor input ground.This is working perfectly for me now.In the diagram, ignore the second board - this is a buck converter to supply 5VDC to my ESP32.
S**M
Works well, but not with an ESP12 or ESP32
It works well and accurately when wired correctly. 1. The current loop side and the voltage sensor (e.g. Arduino) must be powered independently. They cannot share the same ground line, otherwise you can burn up this board or produce inaccurate readings. . 2. On the sensor side, the supply voltage (VCC) must be at least 7 volts or more, even if you are only interested a VOUT range of 3.3 volts. If VCC is less that 7 volts, it will not measure accurately. Because of the above mentioned two items, this board is not very useful hooking up to a ESP12 or ESP32, which has only 5 and 3.3 volts available. You cannot use the current loop's 12 volt for VCC because the loop and sensor sides must be isolated.
B**H
A very good signal converter with a small footprint.
We used this Signal converter to translate a current Signal to a voltage signal so that our data acquisition system, which only had voltage inputs, could read What are sensor was out putting. This little device has a lot of options for voltage Output. It also allows for easy scaling/spanning. I am very impressed with this device.
M**S
0 documentation that works
I would love it if there could be proper documentation for these boards because I needed 0-3,3v output however in trying every configuration of the jumper caps (starting with no shorts for my 4-20ma signal) the voltage always stayed in the same range from 0-5v sad I would have loved the product otherwise
K**N
The diagram shows the current measured from +24VDC :(
Worked out of the chute with a common 24V power supply for both sensor and converter:The diagram shows the current measured from +24VDC!Should be from sensor - to converter + then converter - to 24VDC ground.
A**.
Lessons Learned - Works as advertised
I initially tried using a buck converter to simplify my power supply setup and convert the 24VDC to 9VDC to power the Arduino and output side of the converter. After destroying 2 boards I realized there must be an issue electrically with that approach (not an EE so trying to figure out why wasn't good use of my time) and then I used 2 separate (isolated) power supplies (24V for loop, 9V for Arduino/converter output). This worked well and I was able to adjust my zero and span to achieve 0-5V output for reading my pressure sensor output. I think the seller should revise the description to include a note about the requirement for isolated power supplies to help hackers like myself. The 1-star deduction is for this omission and the lack of a complete loop picture as I have provided with my post.
J**S
Good product works great
Great product works well.
T**R
works search hw-685 for instructions
works search hw-685 on google for instructions.
Trustpilot
2 weeks ago
3 weeks ago