


🌬️ Elevate your comfort with a touch of control!
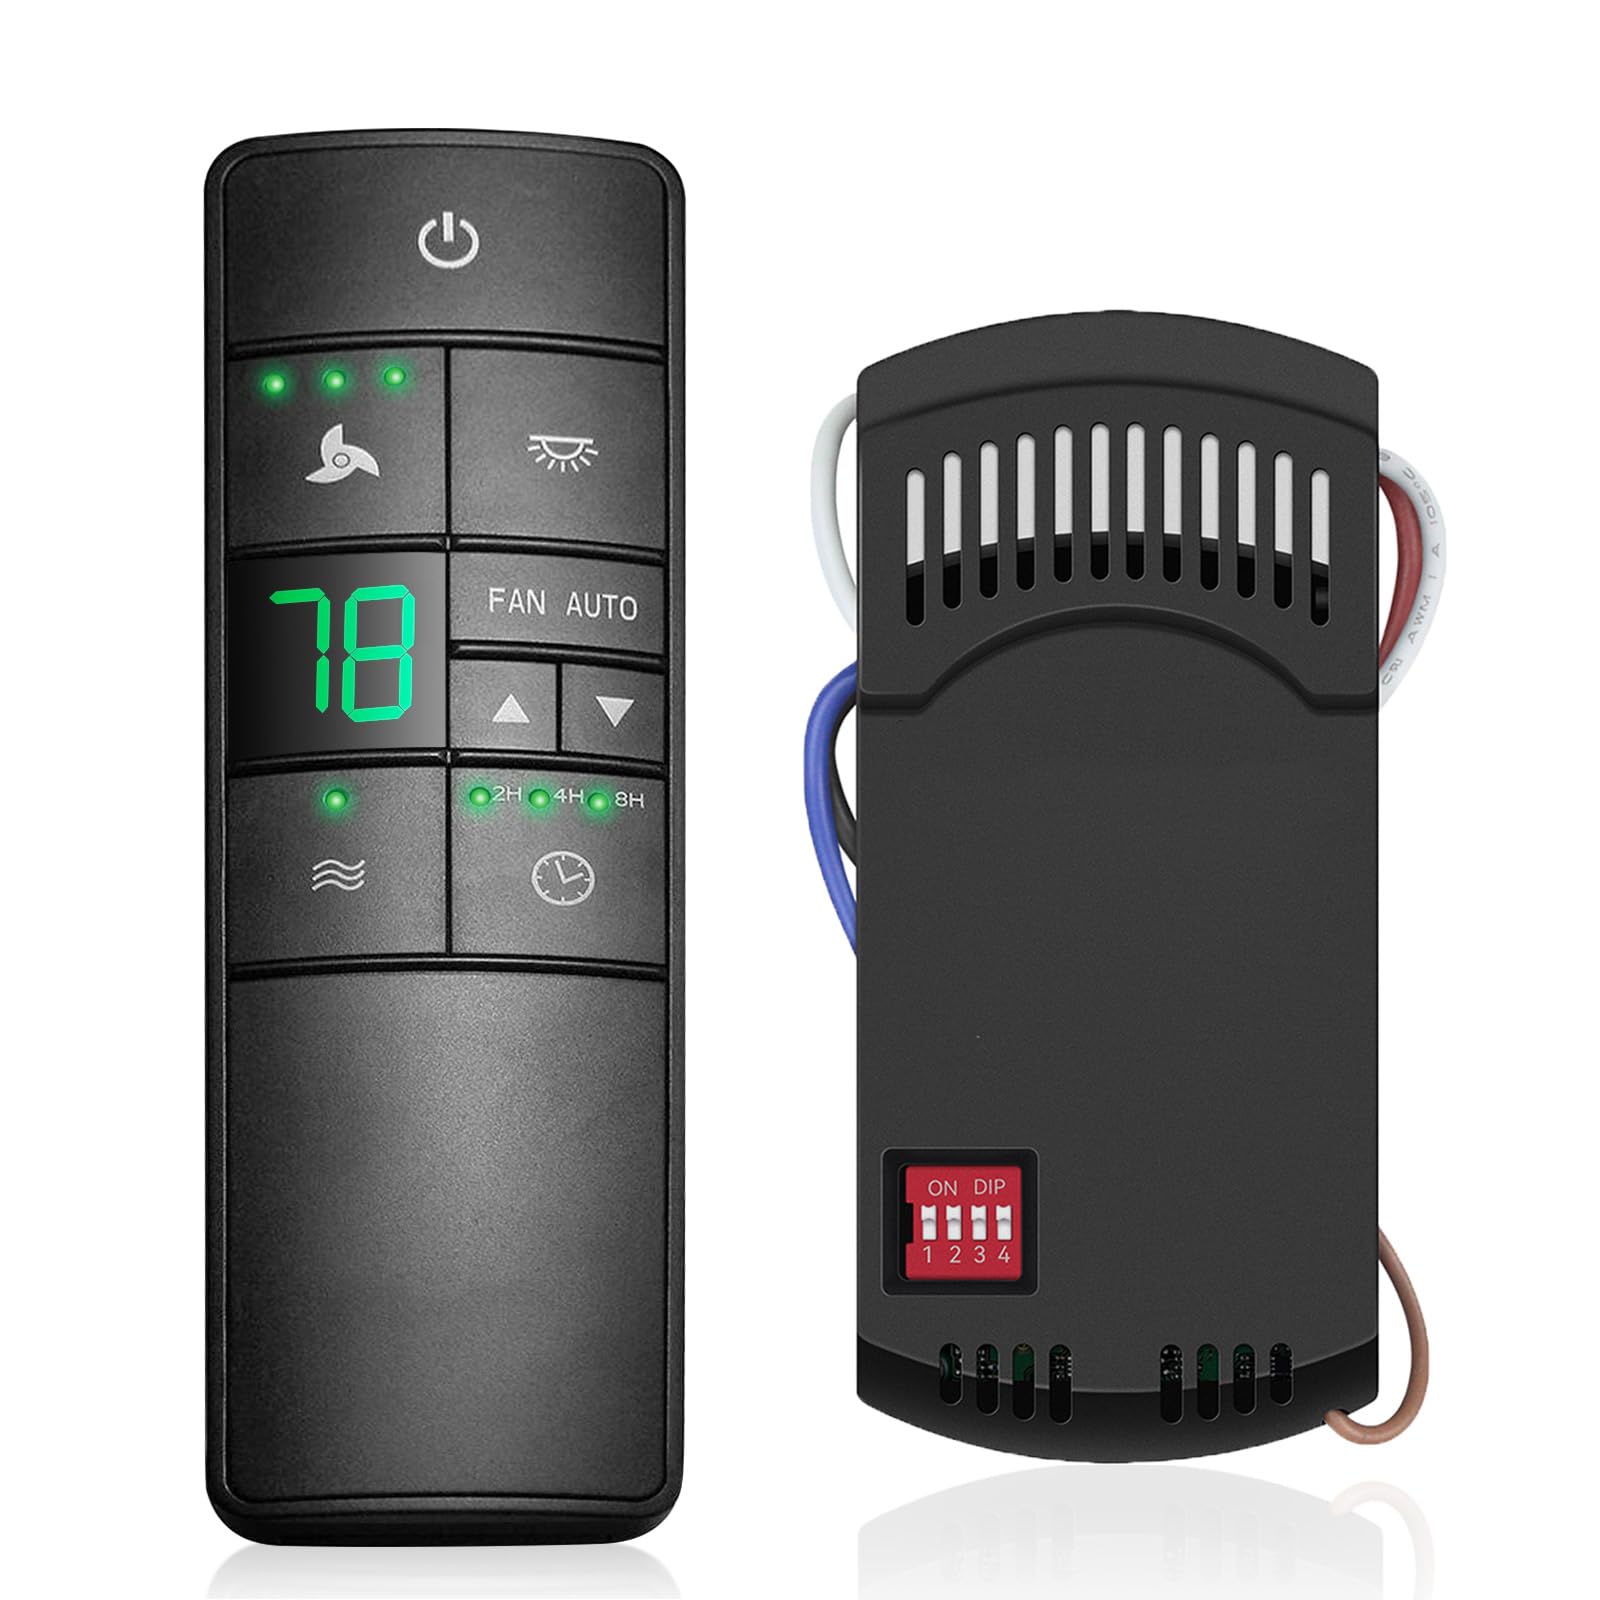
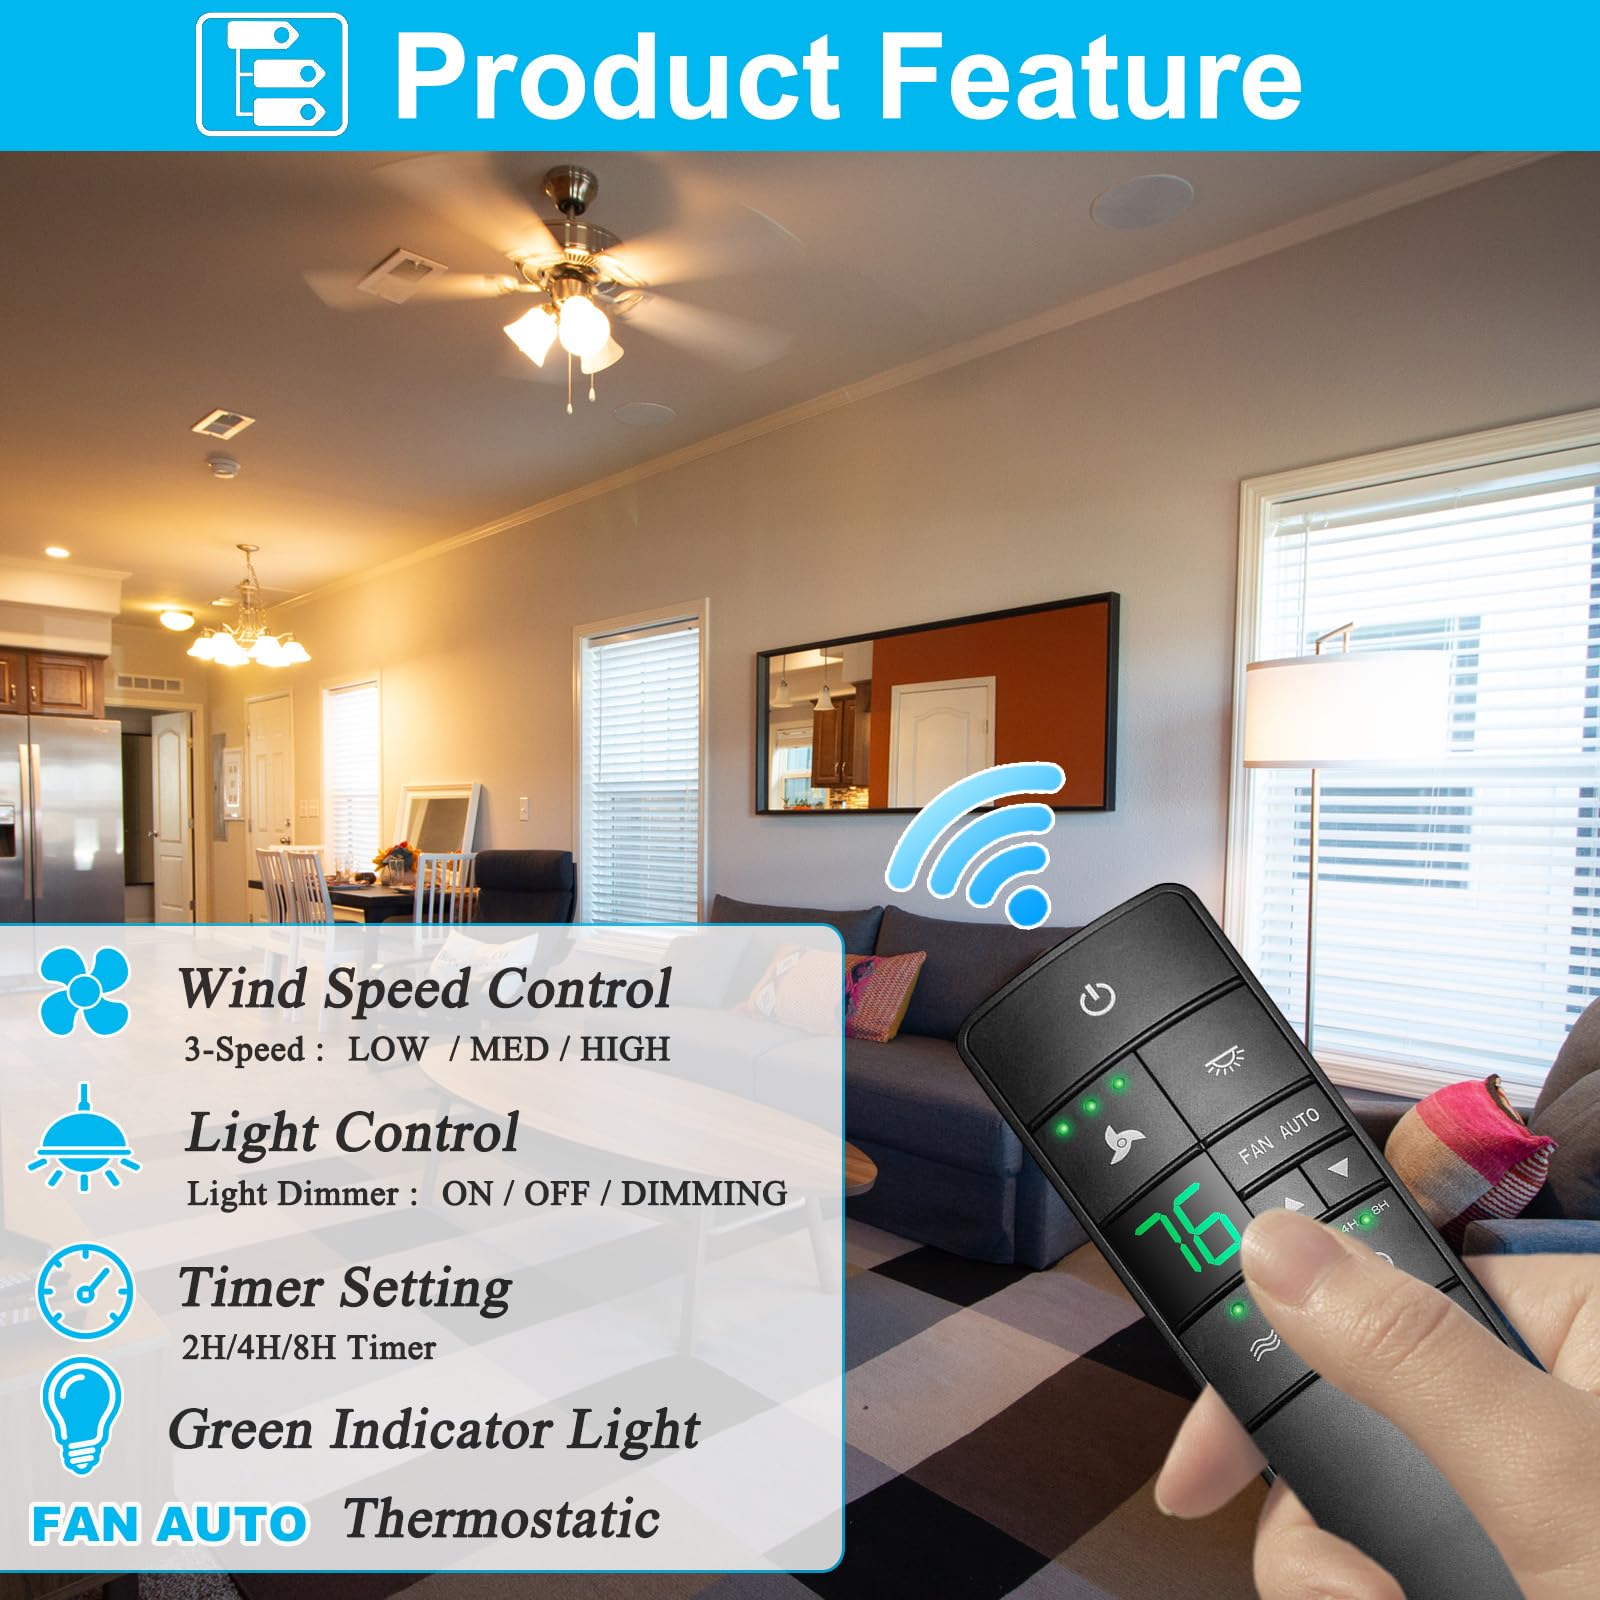
The 3-Speed Universal Ceiling Fan Remote Control Kit is designed for compatibility with a wide range of ceiling fans, offering features like 3-speed control, a thermostatic setting for temperature regulation, light dimming capabilities, and convenient timer options. With a maximum range of 60 feet, this wireless remote ensures you can adjust your fan settings from anywhere in the room.


| Color | Black |
| Item Dimensions L x W x H | 1.57"L x 4.8"W x 5.7"H |
| Controller Type | wireless |
| Maximum Range | 60 Feet |
| Compatible Devices | Fan |
| Connectivity Technology | Radio Frequency |
| Special Features | Universal, 3 speed, light dimmer, thermostatic, timer, walk away time delay |
| Maximum Number of Supported Devices | 5 |
J**N
Works!
My remote controlled fan wasn’t working anymore. It got worse and worse to respond to commands. Then completely stopped doing anything. I had just replaced the batteries in the remote. It was no help. I finally decided to replace the remote and so had to figure out what one to get.I picked this Remote. It has a lot of features my old remote didn’t support which is nice. Besides the digital temp reading on the remote. It has this comfortable Breeze feature which will sped up and slow down the fan to make it feel more like you are outside. It has a timer function. It has an auto fan function based on the temperature. You can dim your light if you want.It wasn’t that hard to take my fan down and install the new module in the place of the old one and mount the fan back onto the ceiling. My fan base has a hook to hold the fan up in one of the screw holes you removed the screws from. This want you can hand it and remove the main power wires. Then unhook and pull the fan down. I guess I could have done it hanging up, but it was just easier to take it down. After all you had to remove the main power wires anyway. Then you just swap the controller unit. 2 wires for the fan motor and 1 wire for the light. It’s all color coded. Except the new used a red wire instead of a black wire for main power. Not a big deal. Once done, hang back on hook, connect the main power wires, unhook, and mount to base and install the screws. On my, 2 of the screws you never remove, just unscrew enough to twist off and twist back on. The other 2 are just screw holes, at least on my fan.Of course you need to make sure you turn the power off going to the fan!!! It was a pretty easy job. A ladder, tall enough to reach the fan and a Philips screwdriver. For the fan. If you want to mount the remote holder to the wall, you need a few other basic tools. Really, it’s all pretty easy.I wanted to keep the fan as the fan blades match my new wall cabinets in color. The light I found a LED replacement a few years ago from the halogen bulb it used to use. Those ran hot and really didn’t last long. The LED is much better.How well will this new remote last? We shall see. The original one lasted 12 years. This is a cheaper fan from my other 3 ceiling fans. The other 3 fan remotes still work fine.One last thing, if you use BOND to make your ceiling fans smart, allowing it to with with Google and Amazon control, it does seem to recognize this fan unit when you go to program it. Then you can use the Hoobs plugin for Apple HomeKit support. You can control your fan and the fan light with your voice.
V**E
High Quality Fan Remote Control & Receiver - Quick & Easy Install
I seldom bother to write product reviews, but this "Universal Ceiling Fan Remote Control Kit" impressed me so much that I want to share my experience.ABOUT MY FAN:My particular 5-blade fan was purchased more than a decade ago, not sure of its make or model -- but this kit is "UNIVERSAL" and claimed to fit 95% of ALL ceiling fans -- so I decided to order it and see. I am a techie person and am comfortable with home wiring, just to mention it up front. If you are not familiar with house wiring, you MAY want to consider having a professional do the work. BTW, the kit comes with ALL of the necessary screws, wire caps, nuts, and hardware -- no need for a surprise visit to the local hardware store. The remote control unit itself feels nice in your hand, the buttons are the soft rubber type and are responsive to the touch, once the system is installed. My old fan needed lights - so I purchased the light kit from a local Home Depot, and installed that to the bottom of my old fan, before proceeding with the remote kit install.REMOTE RECEIVER WIRING:The wiring is pretty straightforward -- the instruction sheet (which I have enlarged and uploaded here) is plainly written and easy to understand. All the wires are clearly marked (two incoming power - red and white, then three controller wires: white/black/blue, and a 4" brown antenna wire - which you let stick outside of the fan canopy cover, to allow for greater operational distance for the remote itself. These wires are pre-stripped, ready to go.HOW TO FIT THE RECEIVER UNIT IN THE CANOPY:The yellow receiver unit is specially shaped to snuggle inside of the canopy cover -- placed upside down, so the contours of the receiver match the shape of the cover. See the illustration attached. The receiver is approx: 4-1/2 inches long, by 2 inches wide, by 1 inch deep. This "JUST" fits inside the standard 5" diameter canopy cover. Yes, it is a close fit. Yes, you have to manipulate the wires carefully out of the way so the cover can fit -- at first, it seems nearly impossible, but with patience, it can be done. If the widest opening of your canopy cover is 5-inches (or more) you can do it !!! :-) They supply slightly smaller wire caps (nuts) -- every little bit of saved space helps. The whole installation of the fan & receiver took me about 15-minutes.IMPORTANT NOTE: Both the receiver and the remote have tiny micro-switches you have to adjust in a pattern that matches each other -- they have to be "paired", otherwise the remote will not talk to the receiver - it will seem "dead". Sometimes people give negative reviews -- when it is their fault they didn't set the unit up correctly in the first place! Be careful when you read reviews. There can be operator error! :-) ..... The instructions are clear about setting this tiny little switches. You will need a standard 9-volt battery for the remote. This particular remote is designed to control 3 different fan speeds and turn the light(s) on and off --- this unit will NOT dim the lights. Again there are often improper negative reviews about no light dimming -- this is unfair, as it is not supposed to dim lights! Be sure your electrical connections are secure -- loose wires will cause problems in the future! As far as how long this should "work" -- It honestly should give many years of good service. If not, I will return and submit a new (bad) review! For now, I'm incredibly pleased with this remote kit.
A**N
Perfect Match Recommend.
The remote arrived packaged well and undamaged. I matched the remote settings to my old remote and it worked seamlessly with the ceiling fan. The quality is as good as the old factory remote. Recommend.
S**R
Worked like a charm
The remote device replaced one that stopped working. It fit as advertised, was easy to install in less then 45 minutes and the price was 1/5th the cost of the original manufacturer's replacement.
C**
Great Product
Shipped fast, Well Packaged, Product as described, Would buy from again.
R**S
Perfect replacement for dead unit.
My existing Westinghouse branded ceiling fan stopped working. I troubleshot the problem down to the electronic receiver/speed controller. We recently had a severe lighting storm that may have been the cause of the failure although the exact timing of the failure is not known. This unit has a slightly different shape than the original but fit perfectly and wired up identically. Installation was as easy as it could be considering I had to take the fan just about all the way apart to get this refitted. There are other options for similar units on Amazon. This one had next day Prime delivery and a reasonable price. Both of those factors influenced my decision to purchase this specific product. Zero regrets. I have a working fan again for very little cost.
R**Y
Work's Great Making My Ceiling Fan Easy To Control
I installed a new ceiling fan and wanted to make it a remote control fan and the fan is in a high location. Installing the unit into the base of the fan under the ceiling cover plate was a little tight, but was done fairly easy. Remote for fan speeds and light adjustment work great. Very happy.
S**R
Good product
I installed 4 of them they were easy to install all the material was with them that you need to install them and they are working well very good product
Trustpilot
3 weeks ago
1 month ago

