🧵 Stitch Your Dreams into Reality!
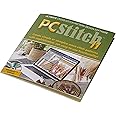
The M & R Technologies PC Pro Cross Stitch Software Version 11 is a user-friendly tool designed for creating beautiful home art projects. With its compact dimensions of 19.3 x 13.72 x 3.56 cm and a vibrant multicolor palette, this software is perfect for both beginners and seasoned crafters. Proudly made in the USA, it combines quality and convenience for all your creative needs.
| Brand | M & R Technologies |
| Model Number | 073974 |
| Colour | Multicolor |
| Product Dimensions | 19.3 x 13.72 x 3.56 cm; 0.28 g |
| Material | Nicht zutreffend |
| Special Features | Einfache Verwendung und Lagerung, entworfen für Kunstwerke zu Hause |
| Item Weight | 0.28 g |
B**B
Converting Photos to Cross Stitch
I have tried to answer a user's question about converting photos to cross stitch in PC Stitch but, unfortunately, my rather long answer was rejected so here it is as a review.Yes, you can convert photos etc. from the Internet but it depends how computer savvy you are. I have recently been reading reviews for this software & it is sad to see how many people buy PC Stitch (which is mostly excellent, by the way) & are disappointed by the results they get.I would suggest that you bear the following in mind:If you are hoping to turn family photos into cross stitch, that is about as advanced as it gets & I would not advise you to start there.A photo from a camera or internet is made up of millions of dots called pixels. A typical picture from the internet has about 100 pixels per inch horizontally but your Aida cloth or canvas has, typically, 14 stitches. That means that a 4 x 6" picture will be about 7 times that size in cross stitch if you want a faithful copy of each pixel. You can get the PC Stitch software to make you a pattern that size & the results will be good as you are converting one to one, pixel to stitch. However, it's too big for most of us & that is where the problems start, as seriously downsizing a pattern leads to loss of detail & a hot mess. You are aiming for as close a match as possible between no. of pixels per inch & no. of stitches per inch with a pattern that won't take you a decade to stitch and/or be big enough to replace the carpet.This is what I do (I haven't been doing this for long but I'm pleased with the results I've had. I do have a background in IT but basic knowledge is sufficient):Easy way: Copy your internet photo to the clipboard. Open PC Stitch, press Import/Export & then Import using clipboard option. Two screens will open, the left is your imported image & the right is a preview screen for the cross stitch. Look for the actual pixel dimensions of the image at the top on the left hand side & then look for the size box below. You will see that the default size after conversion is 100 stitches width. Change this to the actual width in pixels of the original image. The default cloth count is 14: change this if necessary. If you now tick preview, you will get the one-to-one conversion described above. HUGE, usually! Reduce the preview to 50 or 25% to see it better. At this stage, you could press OK & the software would automatically generate your enormous pattern, together with colour palette.Go to the Home menu & reduce the pattern to about 1% to see quite a nice representation of the original image. It won't be exactly the same as colours etc. might need tweaking. If you already have the program, try it & see!Click on Home/Pattern Properties to confirm that the pattern is the same size, in stitches, as the original image was in pixels. This step is just for you to experiment & get a feel for what the software does – in most cases you will import the image & then crop it seriously before viewing the preview & then the actual pattern. If you view the pattern & then want to do more work on the imported image, click Import again & the Resume the Last Imported Image option to get back to the preview screens.Crop the left hand picture to get a much smaller image. Use the top Crop button on the left hand side & make a rectangle over an interesting part of the picture. Press the lower Crop button &, if your rectangle was small enough, the preview will give you a cross stitch picture of reasonable quality at a stitchable size. There is always a trade-off between size & quality as there is such a difference between pixel & stitch size.. The program will always give you default width of 100 stitches but you can change this. The height will vary automatically as you experiment with different crops. You can undo a trial crop. Other options are available for changing Contrast etc. but I would leave these for now. The preview often looks poor at 100% but much better at 50% & even better when you convert it to a pattern. Use Home/Display & Home/Pattern Options for a clearer vision of how the finished work will look.More sophisticated copying: Download Paint.NET (This is not the same as Microsoft Paint but it is still free). Copy your internet photo here & prepare it by using the Image box to set the sampling method for conversion (supersampling is a good general one) &14ct or whatever for target picture. You can also crop the picture here & add more refinements than in PC Stitch. Then, copy this prepared picture into PC Stitch & proceed as before with Import & Preview.Overall, I've probably made this sound very complicated. When I started, I worked through the tutorials first. They aren't great but it's a start. Embroidering cute bunnies etc. is not my style, but I urge you to go through all the tutorials. Grit your teeth & produce the pattern for the "sweet" embroidered Christmas towel! You'll learn a lot & you don't have to actually make it. I also drafted some simple geometric designs to master the basics of the program before I tried any conversions from the internet. I have done loom beading in the past & find that many bead loom patterns online also look beautiful in cross stitch after copying manually to PC Stitch. I make the finished work into bracelets usually. I wouldn't try the photo conversion stuff until you can create your own basic patterns & find your way round the comprehensive, but confusing, menus.Finally, if you find what I have written bewildering, look at the Youtube videos on converting photos to cross stitch using PC Stitch. They don't cover everything but all these resources together should help you to produce an acceptable pattern. A lot of trial & error is required but it's worth the effort. One thought I have had is that, contrary to usual practice, you might be better off if you can obtain a low-resolution photo as the downsizing will be less. I might do some experimenting with that.My experience of PC Stitch after using it for a few weeks is that it is an excellent piece of software, much better than I had expected. I particularly like the fact that you can create your own palette from the stash of flosses you have in your workbox. Once you've constructed your palette, the program will use this, if you wish, when presenting a palette of colours for any of your patterns. You can delete flosses, change the details of them or, with a little more effort, add new flosses. It saves a lot of time searching for the right colours. The complete range of DMC Stranded Cotton (and Anchor etc.) is also available for reference & that, too, is useful. When drafting patterns, the repeat facility for a section of the pattern saves time.When working the cross stitch, there is an option on the palette to highlight the colour you are working on. This can be useful but the only thing I don't like is that the selector arrow can easily change the colour of one or more stitches accidentally. I need some way of selecting the row I'm working on without damaging the online pattern. For this reason, I tend to use my printed version of the pattern &, again, the options are numerous & take a while to learn. I can now produce a coloured printout with symbols & details of colour nos. & ids, & produce it at a size that is comfortable to read. Wonderful!There are so many options that I'm still finding new things after quite a few weeks. There is definitely a learning curve with the program but I'm really enjoying my cross stitch "journey". My sewing teacher from many years ago (Mrs Wagner, Shaftesbury, if you want to know) would be weeping with joy at my progress!
C**L
Top Notch
Everything I expected from this programme, it delivered. I can recommend it to anyone who wishes to make their own patterns. Easy to use, with excellent results.
J**H
I am very pleased with the programme which does everything advertised fairly easily
I bought this to replace a very old charting programme that does not work on modern versions of windows (I am currently using Windows 8.1). I am very pleased with the programme which does everything advertised fairly easily, the only minor hitch wad that the post office asked for an adfitional payment of £15 customs charge that I had not expected, however I contacted the company and they refunded this charge as soon as I emailed them a copy of my receipt from the post office, I will now be cautious of ordering from outside the UK in the future.
A**R
Works with latest windows updates
Works on windows 11 with recent windows updatesMy old software I've had since the 90s suddenly stopped working when my laptop did a windows update.This has saved my slice and sanity. It's similar to my old Jane greenoff one some features are better some are not so great nut atleast I can still keep making my charts
M**M
Not easy
This is not easy to use ,with my own desgins ,it adds more colour then are in the pattern ,not helpful at all.
M**Y
Cross Stitch Software
This a very good program.
I**N
So far easy to use
Seems good value and generated pattern from photo easily. The function that allows you to generate an order for all colours required for your pattern very useful. However being American software order is directed to American store. Not tried that route yet for ordering threads. It would have been useful to have facility to order from uk. If that is possible in software I've not found it yet but certainly the default is American store.
G**E
Love!!!
Had this program years ago, needed to upgrade for Windows 10, easy to use.
Trustpilot
1 day ago
2 days ago