🚗 Wrap It Up: Your headlights deserve a glow-up!
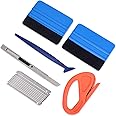
The VViViD Air-Tint Extra-Wide Headlight Taillight Vinyl Tint Wrap is a revolutionary product designed for easy installation and superior performance. Measuring 16 inches by 48 inches, this vinyl wrap features an air-release membrane for a dry application, making it user-friendly for both professionals and DIY enthusiasts. With self-healing properties, it ensures that minor scratches disappear with heat, while its automotive-grade cast vinyl is scratch-resistant and chemical-safe, protecting your vehicle's lights. The package includes essential tools like a yellow detailer squeegee and two anti-scratch black felt edge decals, making it a complete solution for enhancing your vehicle's appearance.
J**H
Easy to use as long as you take your time.
Just wrapped my headlights and tail lights a few days ago so I cant really post much about longevity of the product.As far as using it on headlights I do not suggest the Dark Smoke for headlight use unless you enjoy barely being able to see. You can see in my last pic how much light passes through and it isnt much and that's with 6500k LED bulbs installed. Dont get me wrong in the daylight it makes the truck look good but functionality is a no go.I will be wrapping them with the light smoke instead to see if it's any better.I wrapped my tail lights and it does allow enough light to transmit through but again thats with upgraded LED lighting. I'm not sure about standard bulbs being used how well the driver behind you would see your brake lights during the day.All in all I would say this is a good product. Definitely worth the price. As long as you take your time and use a heat gun it does come out nice. This is my first time ever wrapping headlights and tail lights. I opted to remove my fixtures and wrap them so that I could have more vinyl on the backside to ensure there would be less likelihood of it peeling.
B**.
Very dark!
Clean glossy black finish. Went on super easy. Dark smoke might be too dark for some but it’s great for me!
C**R
Garbage.
Was hoping to wrap a helmet visor and figured this would be a professional product. This is not as described and does not apply anything like in the instructions or video. Half the product had creased imbedded in the film. At first I figured, well if stretches like they show then as soon as I "heat and stretch" maybe all the little veiny creases will disappear. I don't know what product they use in the video, but it is not the same product I received. This film has basically zero stretch and only shrivels and curls when heated leaving wilted looking surface. It behaves more like heat shrink and any attempt to "stretch" the film across the surface will only causes even more severe wrinkles. Multiple attempts ranging from a little heat (worried I would over heat), to a little more heat (because a little heat didn't work), to a lot of heat (thinking I wasn't heating enough). I even took a test sample, heated the crap out of it and trying to pull it/stretch it, and it basically resists stretching and only shrivels and wrinkles.If you get a film that isn't creased AND you're working on a mostly flat surface with almost no contour, I'm sure you can make it work by starting in the center and working the air out. I wouldn't recommend using any heat, nor applying the film to anything with much or any curvature.I'm glad I didn't waste a lot of money, only time, but lesson learned. Obviously I'll have to be more selective in the future for when I think I'm buying a quality brand.
K**N
Review after a year or two
After a year or two, it doesnt look as clean as it does when it was first put on. Also it begins to crack, so I need to redo them. They do look good though and the tint is a great way to change the look of your taillights. Quite difficult to put on if you do not have much experience.
R**5
Memphis Shades
I used VVIVED tint film to shade the lower half of my "Memphis Shades" motorcycle windshield. After two attempts at using other tint film brands, I was ready to give up on the idea of covering my windshield.While applying the VVIVED film, I immediately noticed a difference, so I rolled the film out and laid it down on my windshield. The windshield being flat, of course, made the job easy, but I laid the film out on the windscreen with zero wrinkles and only a few tiny air bubbles. I used a heat gun but had no felt-covered squeegees, so I just used my fingers to roll out the air bubbles. Then, I went back over the entire windshield with the heat gun, using my fingers, a microfiber cloth, and viola; what a beautiful finish. Too much heat and pressure on the microfiber cloth will leave some scratching, so work the film under light pressure when using the cloth. Just have the correct tools, which I didn't have, LOL. Anyway, good stuff...
I**Z
Tough to use on curves
Good - This works great on straight lines or slight curves.Bad - The material is extremely sticky, will wrinkle, heat doesn't help but instead it makes it worst. The film is really thick and tough to get a clean cut sometimes. I tried to cut a piece that was about the size of my headlight. I tried a few times and each time the same thing would happen, when you go from the straight to a curve or vice versa, wrinkles. Not bubble wrinkles either these were full on wrinkles. The paper I received started out fine when I went to do my indicators and side mirrors, front and rear badges, slight curves. But anything that flares out, has a bubble, like most headlights these days, will wrinkle. I tried to see if you can install it wet but didn't find anything on it. Maybe with water it might be easier to work with but even then, the paper comes with lines that run up and down. You will get them either at the front of the roll or towards the end. I am waiting until I have more time off to see if wet has any success.While it looks great on the image, I want the person who installed that film on that Suby to do my forte GT, cause my lights are very similar.The pieces that I did do look really nice, but some pieces took several attempts and these were mostly straight lines.One tip I learned while working with this film, if you decide to try it,Push the film towards where you plan on cutting it out, the excess film should be lifted up and not up against anything at this point. Use your push tool (flat thing to lay the film down) as far as you can without cutting the film then using you finger nail or something similar, try to make the line you plan on cutting, then cut. You can then use your blade to clean up any excess. But be warned, those wrinkles don't come out.
J**U
NA
NA
Trustpilot
1 day ago
2 days ago