Desert Online General Trading LLC
Dubai, United Arab Emirates
Desert Online General Trading LLC
Dubai, United Arab Emirates


🚀 Double your storage, halve your wait—dock like a pro!
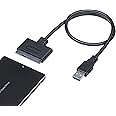
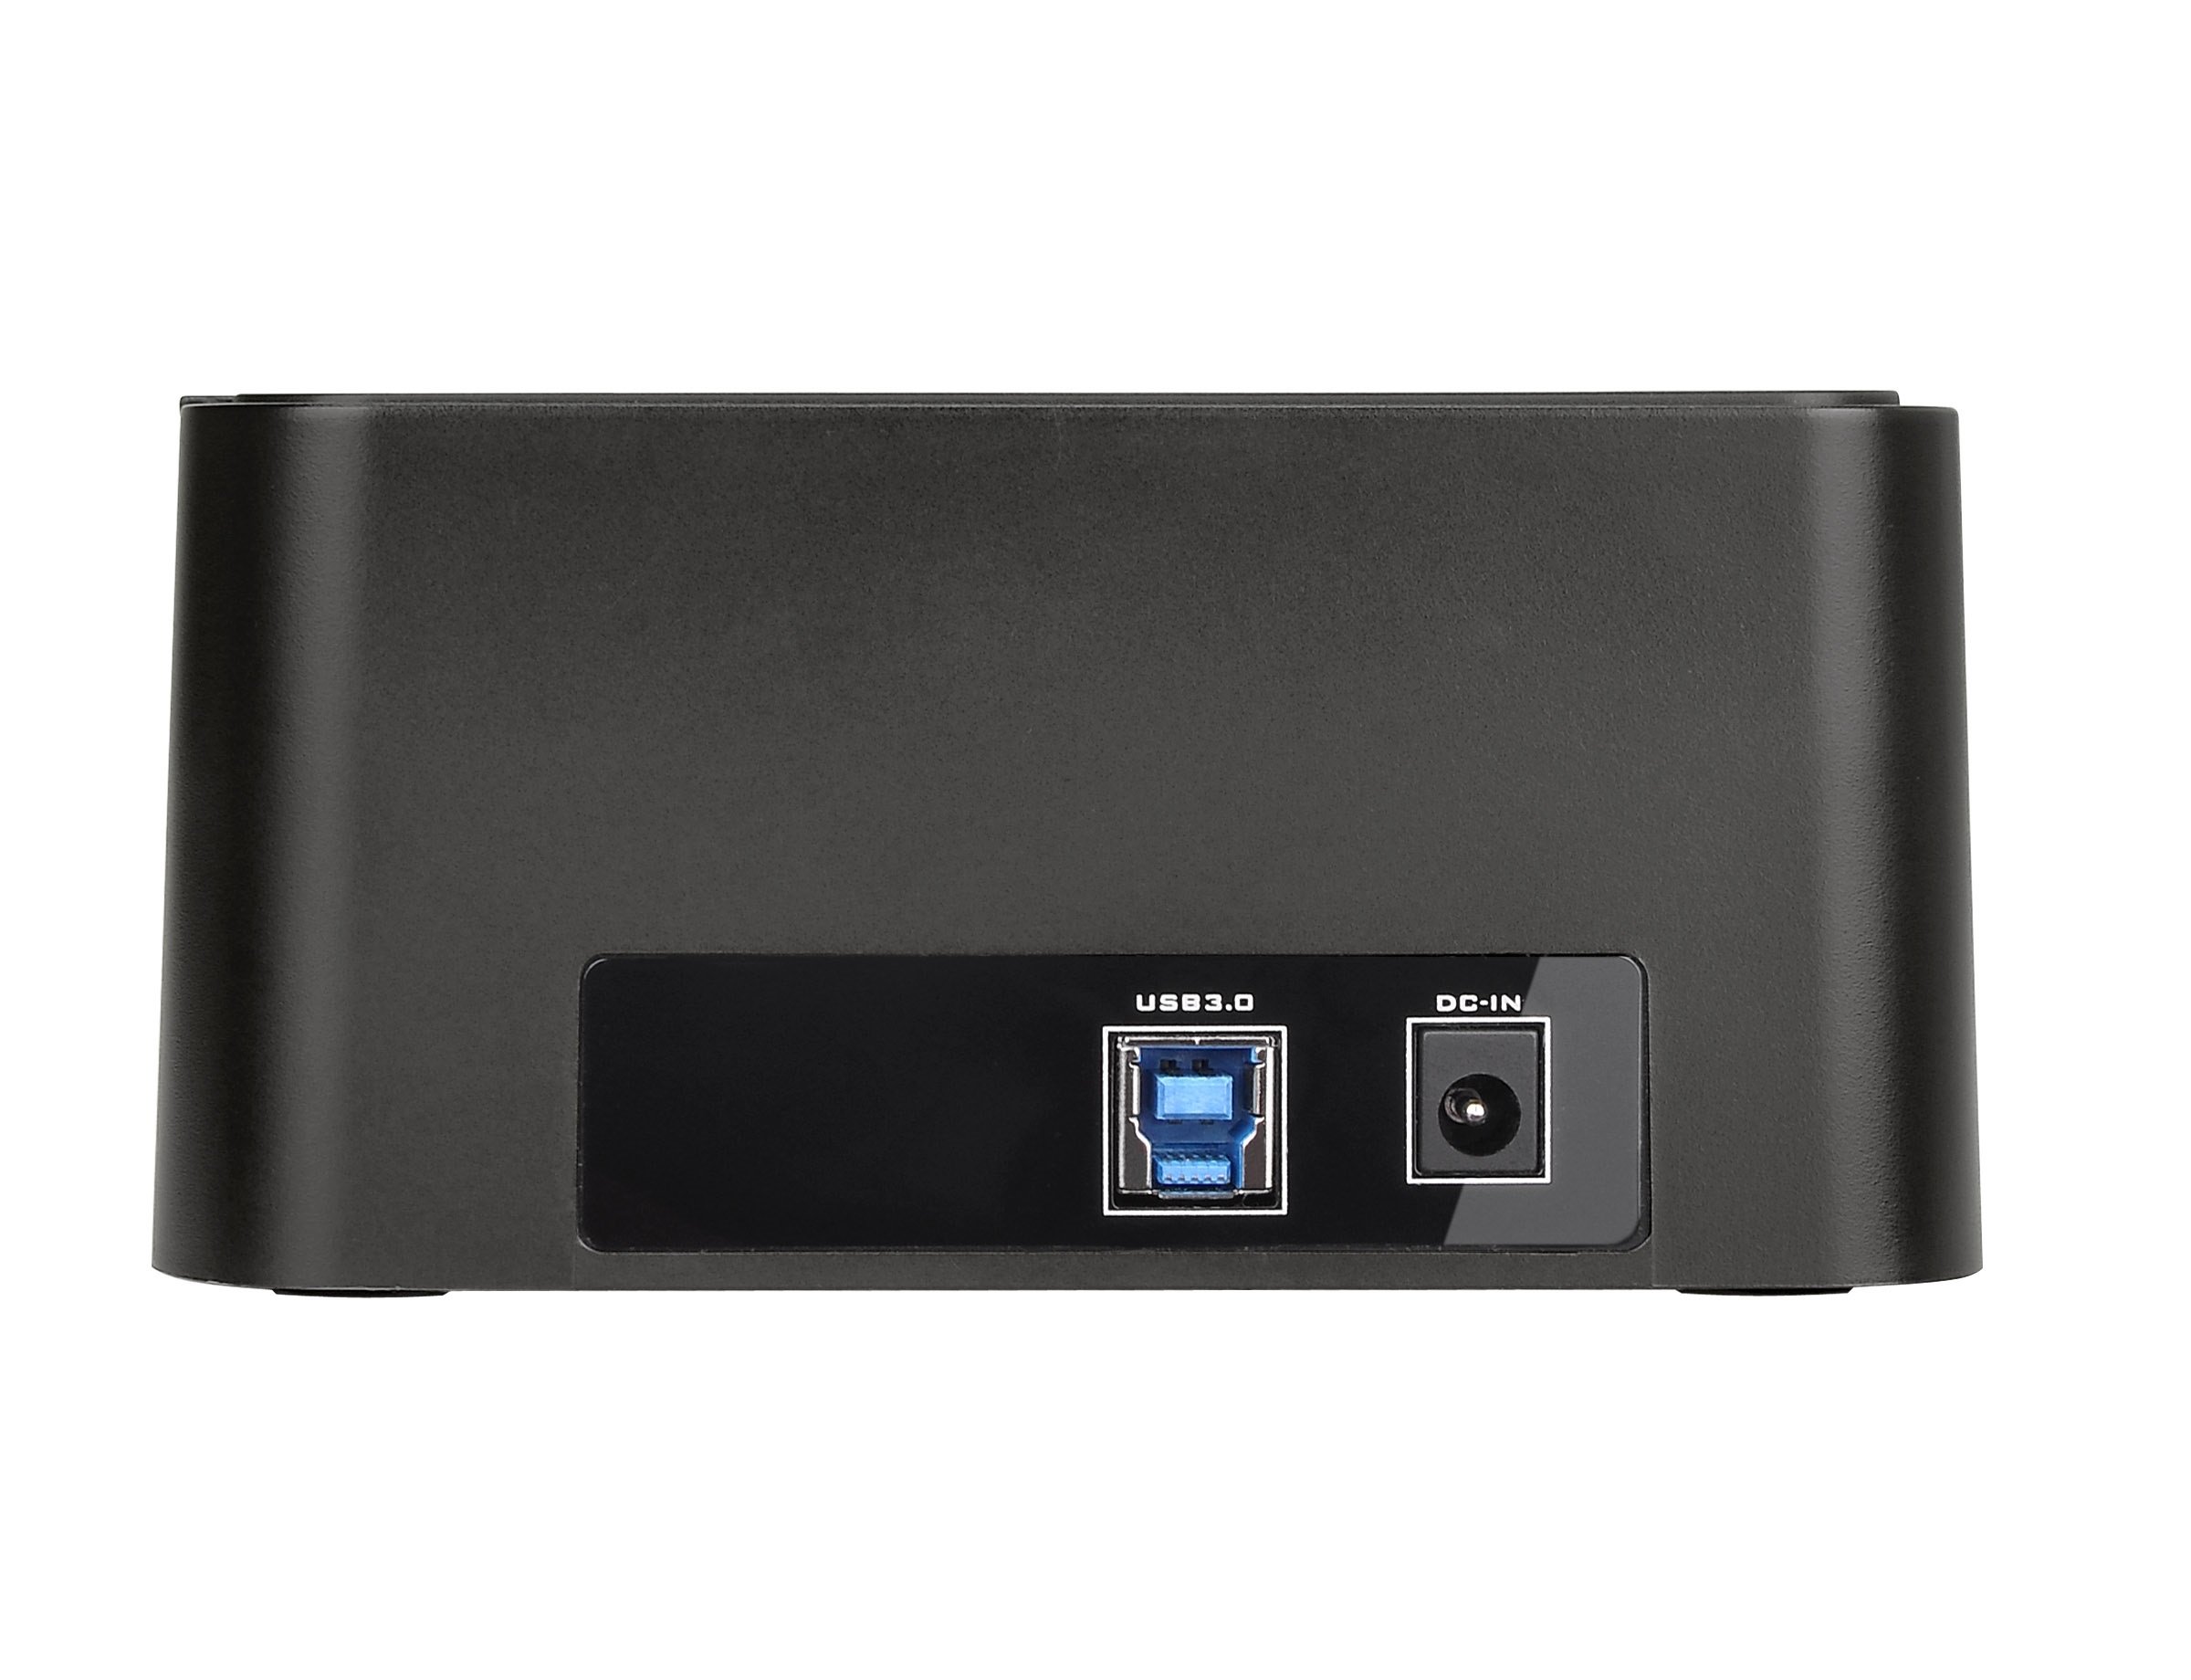
The Thermaltake BlacX Duet ST0014U-D is a sleek external hard drive docking station supporting dual 2.5" and 3.5" SATA I/II/III drives. Featuring USB 3.0 SuperSpeed for blazing 5.0 Gbps transfers, hot-swap capability for instant drive exchange, and plug & play compatibility with Windows and Mac OS, it’s designed for professionals demanding fast, flexible, and reliable storage access.


| Material | ABS Plastic |
| Item Weight | 1.07 Pounds |
| Compatible Devices | 2.5/3.5 inch SATA I, II, III hard drives |
| Hard Disk Form Factor | 2.5 Inches |
| Max Number of Supported Devices | 2 |
| Data Transfer Rate | 3 Gigabits Per Second |
| Global Trade Identification Number | 00841163064702 |
| Manufacturer | Thermaltake USA Direct |
| UPC | 841163064702 |
| Number of USB 2.0 Ports | 1 |
| Series | ST0014U-D |
| Item model number | ST0014U-D |
| Item Weight | 1.07 pounds |
| Product Dimensions | 5.55 x 4.76 x 2.72 inches |
| Item Dimensions LxWxH | 5.55 x 4.76 x 2.72 inches |
| ASIN | B01J4XNLN6 |
| Is Discontinued By Manufacturer | No |
| Date First Available | July 27, 2016 |
G**N
Works Great Every Time
This is actually the second of these docking stations I've purchased. Both work just fine. I use them for backing up (cloning) my laptop hard drive, not for general storage. I used the first one for several years, cloning the C: drive, alternating every week to one of two 2.5" hard drives. That way, if the C: fails, I have two backups. Since the drives are the same as used in my laptop, I can simply open up the laptop and switch out the bad drive. I also have a second, identical, laptop in case the laptop itself fails.This seemed like a foolproof backup plan until recently. The following is long, but I hope it will help others develop a more robust backup plan.I clone my C: drive rather than just backup selected data. Sure, it's great to save important data, but there is a lot of pain associated with re-installing an operating system and all your apps. Cloning solves this problem by making an exact copy of the entire drive.I use Acronis True Image for cloning as I have done for a number of years, using the oldest of the two backups as the clone. Shortly into the last cloning process, Acronis said the drive "couldn't be cloned to". I should have stopped right there but I didn't. Not to worry, I stuck the second clone drive into the enclosure and, again, Acronis refused to clone.I was pretty sure the drives were okay when I started because I always look at them after cloning. But, both backup drives were useless, most likely because Acronis had wiped something out, like the MBR or directory. Acronis was probably corrupted, as I've seen happen in previous versions.I'll just pay the toll and install the latest version of Acronis True Image. Easier said than done. It wouldn't install and said I had to do something "manually". But what? I've had this problem with previous versions and somehow got them to install and run. So, I then downloaded and ran Acronis's "cleaner" software. This didn't help. Somewhere in this process, Acronis wiped out my C: drive so I could no longer boot my laptop. Now, I am really in deep do-do, three drives corrupted!I fired up my backup laptop with this docking station attached. Putting the C: drive in this docking station, I could see that a lot of my files were intact. The other two clone drives wouldn't even show up. I found backup and recovery software from a company called EaseUS. I downloaded a trial version of the recovery software. It found tons of files on the two clones. But, I did't think it could create a bootable drive.My next idea was to run the Windows 8 "repair" function. But, I didn't have a disk to run it from! Being cheap and stupid, I had simply downloaded W8 the first day it was offered and paid only about $50. So, I ordered another copy of W8, paying $150 this time.I didn't want to trying repairing the C: drive since it had the best and only chance of recovering anything. That's why I ordered a second of these docking stations as well as the EaseUS cloning software as well as another hard drive. With two of these stations attached to my backup laptop, I was able to clone the C:. The clone went back into the laptop and the repair process began. W8 couldn't repair C:. I found disk errors and fixed these. In the end, I had to re-install W8. Now, the C: was back. But, thanks W8, for wiping out all of the apps I had installed. Fortunately, my mail and other data was intact.So, lessons learned, not in any order:1) Don't just install software by "running" the installer from a web server. Download the program and save it somewhere in a folder. Save order numbers, user names, and serials in the same folder.2) Make sure you have a Windows disk so you can run the "repair" option without repurchasing. It also allows you to run DOS commands and that is how I ran "CHKDSK" to fix disk errors.3) Never, ever, use Acronis True Image. Over the years, it has saved me several times, but, I've had enough. They come out with a new, buggy, version every year just to generate cash. They change the GUI which adds confusion and add functions I never use and would never trust. Look at EaseUS Todo Backup for cloning. Their s/w is cheap and upgrades are free. There are lots of backup programs out there, but, for some reason, not all do cloning.4) Once, things start going "south", STOP!5) Consider other places to store critical data including APP installation files and serial numbers. I have a networked RAID drive that I use to backup some C: data (not clone to). Use GOODSYNC to backup up data automatically. This helped me recover some things from the RAID drive, but, I wasn't "religious" about telling GOODSYNC what to backup so I didn't have everything I needed at my fingertips.6) Consider using software like ROBOFORM for storing passwords and other account data. There's an app for the IPAD which "syncs" data with your laptop version. While I was trying to get my laptop up, I was still able to use my IPAD to access my bank account and pay bills and order needed stuff from Amazon.7) Consider purchasing a duplicate computer. Otherwise, you probably won't be able to install the clones if the primary computer fails. Costly, but it can save your bacon. A desktop I had a number of years ago failed and with no secondary computer I didn't have any internet access to order repair parts!
R**E
Computer repair dream!!!
I say repair, but it could be multi-use implied in any case...This think will talk to any SATA drive that you throw at it. Simple as that.Not owning a computer with a ESATA port I can't exactly comment as to it's complete functionality though. In that, I am under the understanding that you will always have to have some form of AC power source to feed the 12 volt power adapter to your brick.Always erring on the side of caution (especially with costly electronics) I never ventured to run the BlacX without it's power adapter, definitely when it came to the 3.5 HDD. Their power requirements will simply kill a motherboard trying to spin up from the USB port, if it will even try. The 2.5 on the other hand "might". I just didn't try it. Like I said, I've always had the power adapter plugged in.As for transfer rates... this could get ugly. I'm not a MIT computer geek with measuring devices that rival the Vulcan genius hierarchy, so to ask me how it ranks in moving a 1GB from the hard drive off my computer to one on this device is like asking me how one hamster loads it's jowls in relation to another. So I'll try it this way... I took an 8GB movie from my computer through a USB 2 portal and through it onto a 2TB HDD on the BlacX. It took about 5 min. I leave it to your interpretation as to whether or not that was any good. I was in a hurry to watch the movie & thought it was relatively quick for being an old man.Another example. Same computer, same USB 2 portal. 2TB drive needed to be formatted to NTSC. Process took about... Uh oh... senior moment... I think it took 3 hours, maybe slightly more using XP's NTSC formatting procedure. Again, I leave that to your interpretation. Again, using this device.I had originally owned the BlacX device before this one, without the ESATA port and LOVED it. Having been witnessed by another individual and bugged to sell it to him I lost out on using it for a while until coming across this one on the illustrious Amazon and this truly great price (and that isn't a shameless plug either, Best Buy is smoking their own stash for what they're selling this for).I beat the crud out of my original BlacX and that guy still bought it. I KNOW I'm going to get years of use out of this one too. Don't wait to pass go, get off the couch, get in the floor boards of the car and get the change together and get one of these things. Trust me, you can definitely use one of these! You don't NEED an external case for a HDD, all you need is the HDD. THIS is what you need!You can 'hot swap', stack drives, hook it up to drive readable TVs, any computer... You don't need an enclosure, unless you just HAVE to be fruity fashion, but I would rather have the bucks for drive space...Buy this thing!
Trustpilot
2 weeks ago
2 weeks ago
2 months ago
3 days ago