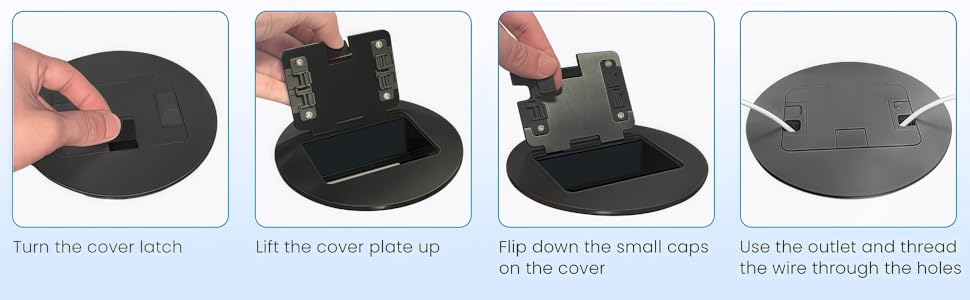
To install this thing you will need the following: 1) 5/32 drill bit for metal and a drill of course, 2) Eight of 4mm screws that are 10mm long (or however long needed to fully screw through washers/bracket/box/locknut), 3) Eight of 4mm washers, 4) Four 4mm nylon lock nuts, 5) A step drill bit that goes up to 1 1/8" diameter, 6) One 3/4" plastic push-in connector for the electrical box knockout hole. INSTRUCTIONS: Because the provided hardware and pre-drilled holes will NOT work (try it and you will see why not), you need to use the L-brackets as templates to locate and mark drill holes on the sides of the box running lengthwise with the outlet, making sure the top of the L-bracket (the open slot part) is flush with the top of the box. Once all 4 holes are marked, use the 5/32" drill bit to drill holes in those locations. NEXT: Decide where your romex cable will come from and knock out the appropriate knock out in the electrical box. Then clamp box down securely to a workbench or table and using the step bit, widen the knock-out hole (BUT NOT THE FULL 1 1/8"), stop widening the hole well before you reach 1 1/8"). Insert your 3/4" plastic push connector. If hole is still to small, widen it a little more with the step bit. If you accidentally make it too large, just use another knock-out hole and try again but this time being more careful not to make the hole too big. NEXT: Attach the L-brackets to the holes you drilled earlier using a washer right at the screw and another washer right at the locknut. Tighten securely using wrench and philips screwdriver (or whatever matches the head of your screw). NEXT: The rest is basic floor outlet installation. BUT KNOW THIS: YOUR HOLE MUST BE EXACTLY THE OUTLINE OF THE BOX WITH NO OVERAGE CUTS OR THE BEAUTIFUL OUTLET PLATE COVER WILL NOT COVER THE OVERAGE CUTS. ALSO... you'll need to notch out small areas along the perimeter of your square hole so all screws protruding from the electrical box can slide on through along with the box. There are a total of 8 screw heads protruding (the 4 holding in the bottom outlet tray, and the 4 used to mount the L-brackets). Just use wood filler to match your floors if you need to patch any overage cuts. ALSO NOTE: BEFORE you cut your hole, be darn sure that you locate the hole above open space, NOT over a joist or blocking or pipes or other structures. I hope this saves you time. NOTE: All of this is worth doing because the design of this floor outlet is THE BEST once it's installed. Despite the fact that they didn't make it easy to install. Good luck! I give 4 stars because I love this floor outlet once it's in. But the fact that they designed it such that so much customization is needed to install it is why it doesn't get 5 stars (and in fact should only get 2 or 3 stars)... I give 4 though because the outlet depth and attractive & functional outlet cover I like so much.