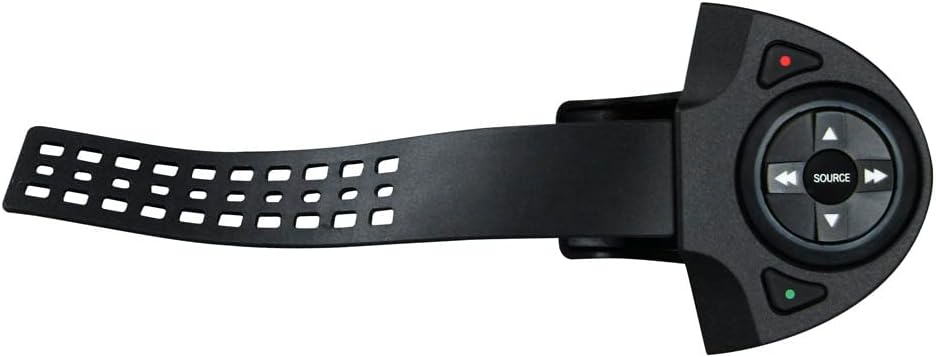
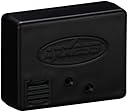
Metra Electronics Axxess Universal RF Steering Wheel Control Add-On Interface, Standard Packaging (RFASWC)
Details
- ColorBlack
- MaterialPlastic
- BrandMetra
- Fit TypeUniversal Fit
- Vehicle Service TypePassenger Car
- UPC086429234547
Desertcart purchases this item on your behalf and handles shipping, customs, and support to Australia.
Details
- ColorBlack
- MaterialPlastic
- BrandMetra
Description
🚗 Take command of your drive—wireless control at your fingertips!
- TAILOR YOUR CONTROLS - Easily remap buttons to match your driving style
- EFFORTLESS COMPATIBILITY - Works with most aftermarket stereos featuring steering wheel control inputs
- FLEXIBLE MOUNTING OPTIONS - Attach the interface anywhere on your steering wheel for ultimate convenience
- PREPROGRAMMED FOR INSTANT USE - Volume, Seek, and Source buttons ready out-of-the-box
- SEAMLESS WIRELESS INTEGRATION - Add steering wheel controls without rewiring your ride
The Metra Electronics Axxess RF Steering Wheel Control Add-On Interface (RFASWC) is a universal wireless module designed to retrofit steering wheel controls to vehicles lacking factory buttons. Preprogrammed with essential functions like volume and track seek, it offers customizable button mapping and mounts flexibly on any steering wheel. Compatible with most aftermarket stereos, it enhances driving safety and convenience by enabling hands-on audio control without complex installation.
Specifications
| Asin | B0052HXPAI |
| Customer Reviews | 3.8 3.8 out of 5 stars (63) 3.8 out of 5 stars |
| Date First Available | May 24, 2011 |
| Item Model Number | RFASWC |
| Item Weight | 5 ounces |
| Product Dimensions | 27 x 19 x 8 inches |
| Warranty | 1 year limited manufacturer |
| Weight | 6.4 ounces |
Reviews
User
Works great, very happy
I’ve been upgrading my 2000 Ford Explorer and added a BOSS touchscreen stereo. It already had the ability to connect to existing steering wheel controls but, obviously mine does not have any.I thought it was extremely easy to install but, I am experienced with these sorts of applications. My stereo already had a input for steering wheel controls so that made it easy too.It easily mounted to my steering wheel and buttons work right away. I have not tried to reprogram a couple of buttons yet so I will update when I figure that out. I will search YouTube because the written instructions are missing a little something!
User
Works Very Well - Try Using Zip Ties.
Let's get some obvious cons out of the way...The included installation instructions leave out some important details - like an image that depicts the location of the LED and Reset Button on the RFASWC Interface. From the front on the Interface, the holes for each look identical, and if the LED doesn't light up, it's difficult to tell one from the other. Please note that the Reset Button is the hole in the middle, under the "X" in "AXXESS". The LED is the hole on the right side, under the "S". On the left side is the USB Port cover.The instructions clearly point out that the red wire is to be connected to a 12 volt accessory wire, and that the black wire is to be connected to ground. However there is a third wire, not mentioned in the instructions, that is black with a light green stripe - please note that this the antenna, so just leave it as is.The rubber strap works to attach the RFASWC Transmitter to the steering wheel, but by no means does the strap keep the Transmitter securely in place. With the rubber strap, the Transmitter is going to wiggle and move whenever you press a button. Also, as pointed out by another reviewer, once you cut the strap, it'll be very difficult to reuse it when the time comes to change the battery, because it'll be too short to thread through the slot in the back of the Transmitter.The first RFASWC that I ordered came DOA - the Interface was inoperable. So as to not waste time, I ordered a second RFASWC before returning the first. Returning the first RFASWC was very easy and free, through Amazon. All I had to do was print out a Return Authorization Label, put the label and RFASWC in the box and tape it shut. In fact, UPS just picked it up from my home today, and provided me with a receipt and tracking number.All that said, now for the pros...Metra Electronics Customer Service was helpful. I called and spoke to a rep who kindly explained that the black/green wire is the antenna - he actually had the product in his hand. I sent an email regarding the DOA Interface and within one day had a 10 email exchange with a rep to troubleshoot.The RFASWC Harness was easy to install. It doesn't get any easier than red wire to 12v accessory and black wire to ground. My JVC radio had a 3.5 mm female connector for SWC, to which it was easy to connect the 3.5 mm male from the Harness.There is an excellent workaround for the rubber strap - use two 7" zip ties, preferably ones that are smooth on one side. You may want to practice first, so buy a bag of zip ties. First take out the screws on the back of the RFASWC Transmitter. Remove the circuit board, rubber buttons and rubber strap. Here's where you may waste a few zip ties practicing... Don't put the two halves of the Transmitter together all the way. With the smooth side of the zip tie facing out, thread the tail end of the zip tie through the front half of the Transmitter, around the steering wheel, into the slot in the back half of the Transmitter, and back through the head of the zip tie, pulling the tail through the opening in the back half of the Transmitter, but don't tighten the zip tie all the way. Remember, this part is just practice to see how to thread the zip tie through the Transmitter. Now attach the two halves of the Transmitter and then tighten the zip tie. If you like the results, cut off the zip tie and prepare to do the procedure again with two zip ties. This time, place the rubber buttons into the halves of the Transmitter and hold them in place from the outside with some tape. I wrapped some self-fusing silicone sealing tape around my steering wheel, where I planned to attach the Transmitter, just to protect the leather and provide some extra grip. Thread two zip ties, tail first, through the front of the Transmitter, around the steering wheel, through the slot in the back of the Transmitter, though the heads of the zip ties and out the back of the Transmitter. Put the circuit board back inside the Transmitter and the secure the two halves together with the two outside screws. Position the Transmitter exactly where you want it on the steering wheel and then tighten the zip ties. Cut off the excess length from the zip ties and screw in the strap cover. I did this, and let me tell you, not only does it look better than the rubber strap, the Transmitter does not move at all... it is very tight. And when the time comes to change the battery, all I'll need are two more zip ties. If you are handy, I highly recommend using zip ties to secure the Transmitter to the steering wheel.The RFASWC Interface paired with JVC radio within seconds. It was very easy to orient the buttons on the RFASWC Transmitter an to marry it to the RFASWC Interface. The steering wheel control works flawlessly for volume, seeking and mute. I have not tried to reprogram any of the buttons.I have a Ford F350, lifted about a foot with leaf springs, riding on 385/65R22.5 super singles, which makes for a very bumpy ride on rough roads. The radio is an aftermarket JVC KW-NT500HDT, which has a touch screen. It was difficult to hold the steering wheel with one hand, and reach over to the radio to press the touch screen with my other hand, and touch the button I wanted. Often with one bump, I'd press the wrong button. This Steering Wheel control makes it much easier for me to control the radio while driving.I'd give this RFASWC 5 stars if there was a better way to attach the Transmitter to the steering wheel, right out of the box. Overall it's still a good product.
User
Pricey but works.
I installed the receiver behind the dash and it still receives the signal instantly. If I want to reprogram the buttons, I have to remove the receiver and push a button. Some people complained of the volume control sliding around, no matter how much they tightened it down. I added a little piece of Velcro at the bottom and it stays put. The phone answer and hangup buttons on the remote don't seem to be programmed from the factory. I will have to remove the receiver from behind the dash and reprogram them. I am linking it to a JVC KDW510HDT nav receiver and was a simple set up.
User
AVOID!!!
More garbage from the car stereo industry!! The remote must be very close to the control in order for it to read and even then, it does not always work! I went through two of these. Same garbage. I had to open the remote and change the battery to make sure that wasn't the issue. Didn't help at all. The remote still slides around the steering wheel even with the adhesive. IMPOSSIBLE...let me say that again to be clear....IMPOSSIBLE to custom program. The instructions are not clear in the slightest bit. Even my car stereo installer gave up on it. DO NOT BUY!
User
Good!
Super easy to install, just connect the power (red) cable to your stereo's power cable, ground to chassis, and 3.5mm jack to the stereo's swc port! Works great, without updating the device you have plenty of features at the palm of your hand (volume, skip, source, mute, end call) only feature I wish was pre-included was the pause button, but there is a "mute" button which serves a similar purpose as it lowers the volume to like 5%. My stereo unit was a Pioneer double din
User
Read this if you want to remap your buttons
This unit does what it says, and to my knowledge is the only aftermarket RF-based steering wheel control solution on the market. It also can work exactly the way you want it IF you know how. Unfortunately, the manual from Metra is missing significant information, and even contains instructions for functions that are not-existent in the unit itself. (Clearly the manual was written entirely separately from the device's development) There simply is no excuse for such avoidable errors - particularly for something this expensive. I would rate 5 stars if not for the trouble in setting up the unit, specifically remapping buttons.The manual references the reset button - but doesn't actually show you where it is. Yes, seriously. The reset button is the pin hole in the middle of the unit - the other, identical-looking pin hole is actually the LED.I recommend replacing the battery before installing on your wheel. Others report that the built-in battery fails quickly, and it looks like it will be difficult to re-install after you cut the rubber band. For just a few bucks, you can get a new Energizer battery here on Amazon. (Size 2032 - always make sure you buy batteries sold by Amazon and not 3rd parties to avoid fakes) For those looking to re-install the unit after cutting, you can tie a string to the end of the band, and pull it through the slot until you latch it to the hooks.OK - now the biggest issue with this unit - remapping the buttons. The remap process in the manual has to be the worst representation I've ever seen in a manual. Make sure you remap the buttons before you put your receiver back in the dash - you really need to see the LED on this unit to do it right. That said, there are 3 key pieces of information not in the manual you need to know to make the remap process work.First - ****You only have one try at remapping the buttons after you go through the initial setup process.**** If you do not remap the buttons properly on that one try, you will need to reset the unit and try again. (Put the igniition in the ON positon and put a paperclip in the reset pin hole and hold for a few seconds until the LED blinks quickly then turns solid) Why on earth this should be needed, I have no idea. But it absolutely is. If you try to remap the buttons again without a reset, you will end up with buttons doing random functions. A stupid and terrible bug in the software. This took me a long time to figure out, so I hope it saves whoever reads this the time and frustration.Second - Simply forget about the section in the remap chapter about assigning the buttons to their default buttons by holding volume down for 25 seconds after putting the ignition on. This function is simply not programmed in to the unit, and nothing will happen if you try it. (I noticed the manual online at Axxess' website doesn't even list this option, though the paper manual my unit came with does) Another stupid, unnecessary error.Last - When you begin the remap process by holding down Vol Up, make sure you then jump to #2 in the remap button legend. So right after you let Vol Up go, you've completed the first command and you're now reprogramming #2 - Vol Down, not #1 Vol Up - that was done once you began the remap process.Make sure you see the LED light for each button as you step through the remaining 17 functions. It's very easy to miss one if you're not looking. Also, see if you can find out any information about your specific receiver's supported functions. They don't always work as the Metra manual indicates. For example, the "Off hook" function on my Sony MEX-N5000BT will actually accept calls, hang up, and initiate the voice dialer. Metra's function list has these as 3 separate functions. (On-hook, Off-hook, and Push to Talk) I actually prefer it this way, but it took trial and error to figure out that I didn't need those buttons separately.It took way too much effort and time, but I now have this set up exactly the way I want in my car. If Metra would just fix the bugs and improve the manual, this product would get 5 stars from me. (Lowering the price would also help, though they have no competition here - so that's unlikely)
User
Pros : Some of the features work. Cons : Tech support is almost non existent.
Installed on a MOMO steering wheel with a Power acoustik head unit. I did not bother using the strap. I installed it on one of the steering wheel spokes.PROS: wiring and instalation was easy. Sycned up easialy with the head unit. Instructions for wiring are easy to follow (but no Diagram)CONS: Instructions for programming are not easy to follow. Remapping function does not work!!! (this is why I gave it 2 stars instead of 3). The Source button(in the center) is higher than the rest so trying to change tracks or volume is a pain because you always end up hitting the source button instead(wish the ramapping function worked so I could disable it). It is not that attractive they could have at least had a chrome bezel or something to make it more astheticly pleasing. This item is supposed to be USB updatable but there are no instructions or support for how to update it and the homepage for the company is not easy to navigate or understand.Overall: not worth the money especially since there were so many CONS.
User
Great product but directions and tech service fall short
Works great, although reprogramming buttons was a bit of work. The directions don't tell you, but you have to hit reset button to make it work and if you need to change it, you have to do that again, but then it works fine. Directions are lacking in clarity, but that is normal when they are written by the engineers who think we should know everything. Called for technical service and the rep kept telling me all the things I did wrong even though I hadn't done anything wrong, however, that was no surprise because previous reviews had said that tech service wasn't very customer oriented.
Common Questions
Trustpilot