Desertcart purchases this item on your behalf and handles shipping, customs, and support to Australia.
๐ ๏ธ Smooth surfaces, stronger results โ the proโs secret weapon!
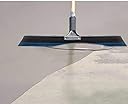
The Bon Tool 15-432 Wizard Squeegee features an 18-inch flexible rubber blade designed to smooth sprayed, rough, or uneven cementitious surfaces. Its ergonomic broom-threaded wooden handle ensures a comfortable grip and extended reach, making it ideal for fluid overlays. Engineered for durability, this tool withstands demanding conditions and is highly rated by professionals for delivering flawless finishes.

| Asin | B008JBQCVS |
| Best Sellers Rank | #143,675 in Health & Household (See Top 100 in Health & Household) #363 in Household Squeegees |
| Blade Length | 18 inches |
| Blade Material | Rubber, Rubber, Rubber |
| Brand Name | Bon |
| Color | Blue |
| Customer Reviews | 4.3 4.3 out of 5 stars (973) 4.3 out of 5 stars |
| Global Trade Identification Number | 00743153154328 |
| Handle Material | Wood, Wood |
| Included Components | Bon Tools - 15-432-B8 |
| Item Dimensions W X H | 1"W x 1"H |
| Item Type Name | Bon Tools - 15-432-B8 |
| Item Weight | 10.6 ounces |
| Manufacturer | Bon Tool |
| Manufacturer Part Number | Bon Tools - 15-432-B8 |
| Model Number | Bon Tools - 15-432-B8 |
| Number Of Items | 1 |
| Size | 18-inch |
| Style Name | 18-inch |
| Unit Count | 864 Count |
| Upc | 743153154328 798167810876 |
User
First timer + AWESOME TOOL !!
Finally got to use this the other day after putting up over 50 sheet rocks, tape and mud the joints. WOW it's so easy to use. Took a couple of tries to get the hang of it. Never skim coat before but wanted save $ doing it myself ($3K to have some one do it).The hardest part as thinning down the joint compound to the right thickness and applying it with a roller. Loading up the roller to have enough mud makes it heavy so your arms will get tired. I started with a small 3x3 foot area but soon was doing half sheet of 4x8. It took about 10 mins to roll on the mud, making sure an even coat. I was afraid the mud would dry so I mist it with a hand sprayer. This actually worked out well because by the time I was ready to use the trowel, the mud has set up and wiping it down was easy and smooth. Took a couple of tries to get the smooth finish ** NOTE ** angle and pressure are IMPORTANT !!Any spot that needed re-touch, I sprayed with water, then wiped. The tool is very forgiving especially where there are deep scratches from lumps in the mud, just glop on some mud and wipe smooth.Only done one coat for 6 sheets. Still have 44 more to go and more coats so hoping this will not jinx it. I ordered a 14" one to get into tight corners. The 26" is too long.UPDATE: Finished first coat of 50 sheets and still no complaints, took longer than I expected because of school starting and nice weather. Works great. Just remember to wipe the blade down often, have a 5 gallon bucket of water and a sponge close by. Most frustrating issue has been lumps in the mud from dried-up stuff falling in the tray. Nothing worst than seeing deep gouges as you pull across. Since I can't change roller and liner each day, just have to live with it by rolling and wiping again.
User
THIS IS ONE GREAT TOOL
Okay I'm a pretty good DIYER in my own mind but have always shyed away from Sheetrock. My project was removing multiple layers of wallpaper from a bathroom wall and there was a lot of Sheetrock paper tears due to the original contractor failure to properly primed the walls and paint the walls. Therefore in order to repair the large number of tears I preped the walls with a sealer made just for damaged sheet rock.This is where the MAGIC TROWEL came into play when it was time to skim all the walls with Sheetrock mud. I saw the tool highlighted on a YouTube video and decided to give it a try. WOW! Did this make the smoothing of the mud easy and leaving a nice level coat. I applied two coats using the tool and as a personal tip found regular Sheetrock mud thinned was better than the low sand version because it dried with a harder finish and not subject to denting. I had several varying Sheetrock knives yo to 10 inches, but this squeeze style worked beautifully. One more tip, like one of the other posters take off the blade guard before you use it!!! I used it for about about 10 minutes when I wiped off the blade and pulled the guard off! What a good laugh I had at that one! I also bought the Hyde Tool 09170 dust free sander attachment and like other reviewers this also money well spent. I had very minimal dust with this tool! BUY THEM BOTH!
User
A must have for skim coating drywall!
Take it from a perfectionist/homeowner/amateur-painter, this is THE most important tool you can buy for drywall skim coating. I have tried standard trowels and this by far makes the job much easier! This is how I use it: I use water to thin the pre-made drywall mud to a thick pancake batter consistency (I make batches in a separate 5 gallon bucket with a separately purchased easy screw-on lid to keep it from drying out). From there I scoop it into a typical metal mud pan, spin a typical paint roller by hand to coat it thickly, roll it on the wall a section at a time, mist it with water, and use this fabulous trowel to smooth it over the wall. It takes a little practice to keep from scraping a trail with one of the tips, but with a bit more pressure at one end, it works beautifully. I was unsure what length to purchase and was very happy with the 22" length. I found that using it without adding a handle gives me great control over the amount of pressure that I apply to either end. Highly recommended and worth every penny!
User
I used this to skim coat an entire 32x15 foot living room in a couple of hours and it worked great. There is almost no way to ge
Beware the 1 star and 2 star reviews.... Most don't seem to know what they are doing.I used this to skim coat an entire 32x15 foot living room in a couple of hours and it worked great.There is almost no way to get a perfectly glass smooth surface the first time around without practice.The steps to getting a really good finish:1) Joint compound thinned to the consistency of mayonnaise. You want it thinned to the point that its barely holding it's shape on the knife but not going to roll right off the wall.2) I apply the compound with a 10" or 12" knife just trying a good coverage on the wall. I leave about a foot from the bottom of the wall completely bare.3) After a quick even out with knife I take a cheap roller w/pole and roll down from ceiling to floor with a good amount of pressure. This serves to scrape away the excess compound and give you a pretty nice even layer to trowel. The excess compound fills in the last foot that I left bare and prevents me from having to scoop a lot of compound from the bottom of the wall.4) Now using the trowel I start at the top left of the wall and lightly pull it down from ceiling to floor. I work my way from left to right ever so slightly overlapping the previous run. Always, always, always dip the entire trowel in a 5 bucket of water and rinse the edge after every couple of strokes. If ANYTHING accumulates on the edge you end up with wavy results. I actually rinse and clean the excess after ever stroke and thoroughly clean the edge. having a moist trowel edge helps immensely.5) Wait until it dries.... move to other walls...6) After drying there ARE going to be slight waves in some places. I knock down the obvious, rare high spots with a knife. and then go right to my next really, really thin application of compound. I don't even bother sanding. When dragging the trowel from ceiling to floor your wavy lines will run vertically... so I simply take a 12" knife with a small amount of compound along the entire edge and lightly scrape/pull from top to bottom on the previous layer. This fills in any waviness really well. This step literally should take maybe 2 minutes for a 8'x12' wall and should dry really fast as you're only adding just enough compound to fill in the tiny waves.7) At this point I'm lightly sanding the entire wall and it's almost a mirror finish. I use a light to inspect for defects and I usually have to do one application just in a few spots where there are issues.
User
If the blade seems too stiff or not smooth enough make sure you remove the hard plastic protective cover
I bought the 28" version of this and was disappointed when I first started using it. I'm using to skim coat walls and cover existing knock down texture. The blade was neither as smooth or as flexible as I expected but it worked well enough that the results were better than I could do with a metal trowel.It worked well enough enough I bought the 12" to work in smaller area despite my initial disappointment.As I was working with the 12" version the blade appeared to come off but I quickly realized the blade was still attached and what had come off was a protective plastic guard that goes over the blade. The protective plastic is the same color as the blade and when it is on the cover meets the hard plastic base at the same point as the rubber blade so it isn't obvious that there is piece to remove.I had done my entire previous project using the protective cover on the 26" trowel. With the cover the results were acceptable but I didn't see that this really deserved amazed reviews that I've seen here and elsewhere. Once I removed the cover I can see why this get's the amazing reviews that it does.Bon: if you see this change the color of the blade cover or add a sticker or something that makes it clear that you need to remove something.
User
Works OK but, not as well I as it was made out to work
the reviews on other different size squeegees were somewhat accurate. This item might work better with a 20 min mud or 45 min mud due to the texture. Regular joint compound has more of a sand-like texture, wich makes it a little difficult to remove excess. we tried thinning down the compound and more bubbles came up. so bottom line is that the product does smooth the mud well, however is too flimsy to remove any excess mud. stick with regular 12 or 14 inch drywall CURVED trowels. with the curve facing inside work the compound in. if you already have any texture on the walls, you WILL have to do at least 2 coats.
User
Makes the job so much easier!
Great Tool! I'm not an expert at drywall finishing, but I've done enough. I ordered the Magic Trowel after removing wallpaper in my living room and realizing that the entire wall surface was going to require a skim coat of drywall mud. To make the job even more interesting, there are two 6' long cast iron (1930โs) radiators running along the walls and I can barely get my arm behind them โ never mind move around back there to get a nice, smooth troweling job. This tool allowed me to attach a standard broom handle to it and get behind the radiators. Sanding will still be required, but much less than if Iโd done this job any other way. I didn't thin the mud like some people suggested. I used it straight out of the bucket. On the rest of the wall surface I really noticed how easy this tool makes the job. When skimming with a regular drywall tool, itโs easy enough to make one nice smooth pass but when you make the next pass, the edge of the tool digs into the wet mud on either side leaving lines. But the magic trowel doesn't! The angled edges are soft so it blends one pass into the other smoothly. I found that I got some bubbles and streaking at first, but if I kept working the mud, they went away. Some light sanding is still necessary because it does leave a slightly rough texture to the mud, but overall this tool will greatly reduce my time spent sanding โ yay!
User
NOT FOR DRYWALL USE!
This squeegee looks and feels nice and solid. I imagine it's fine for spreading floor epoxy, which I think levels out on its own as it's curing? There's a picture on the listing showing this troweling tool together with a drywall mud stirrer for use with a drill, and a drywalling mud pan for use when applying drywall mud (joint compound.) One might assume this tool would be perfect for skimming the joint compound smooth. One would be wrong. The blade edge is not perfectly smooth and so leaves noticeable lines in your drywall mud as you're trying to smooth it out all across the width of the blade - on the very first use. Pointless to try and smooth out the lines - that just creates more ridges. Again, probably great for floor epoxy. Not so much for smoothing joint compound.
User
Top banana
This is indeed a magic trowel. I had a terrible wall with plaster holes after removing woodchip. Couldn't find my trowel to put P.filla plaster repair on so used hands! This trowel made my wall smooth enough to paper or with a second coat, paint. Top banana.
User
Excellent tool
Excellent product! makes the plastering so easy and glass like finish
User
Great for self leveler
Perfect tool for self leveling cement!
User
Works like a charm!
This is a magic tool indeed! This saved us a lot of elbow grease when skim-coating the walls of our daughter's bedroom. I soon learned that it is better to do only one "pass" with the trowel instead of going over several times as it then creates small grooves, which can however be easily sanded and smoothed out when we apply the next skim-coat. I am very happy with the results. Thank you!!
User
As described
Does the job well.
Trustpilot
1 day ago
2 months ago