
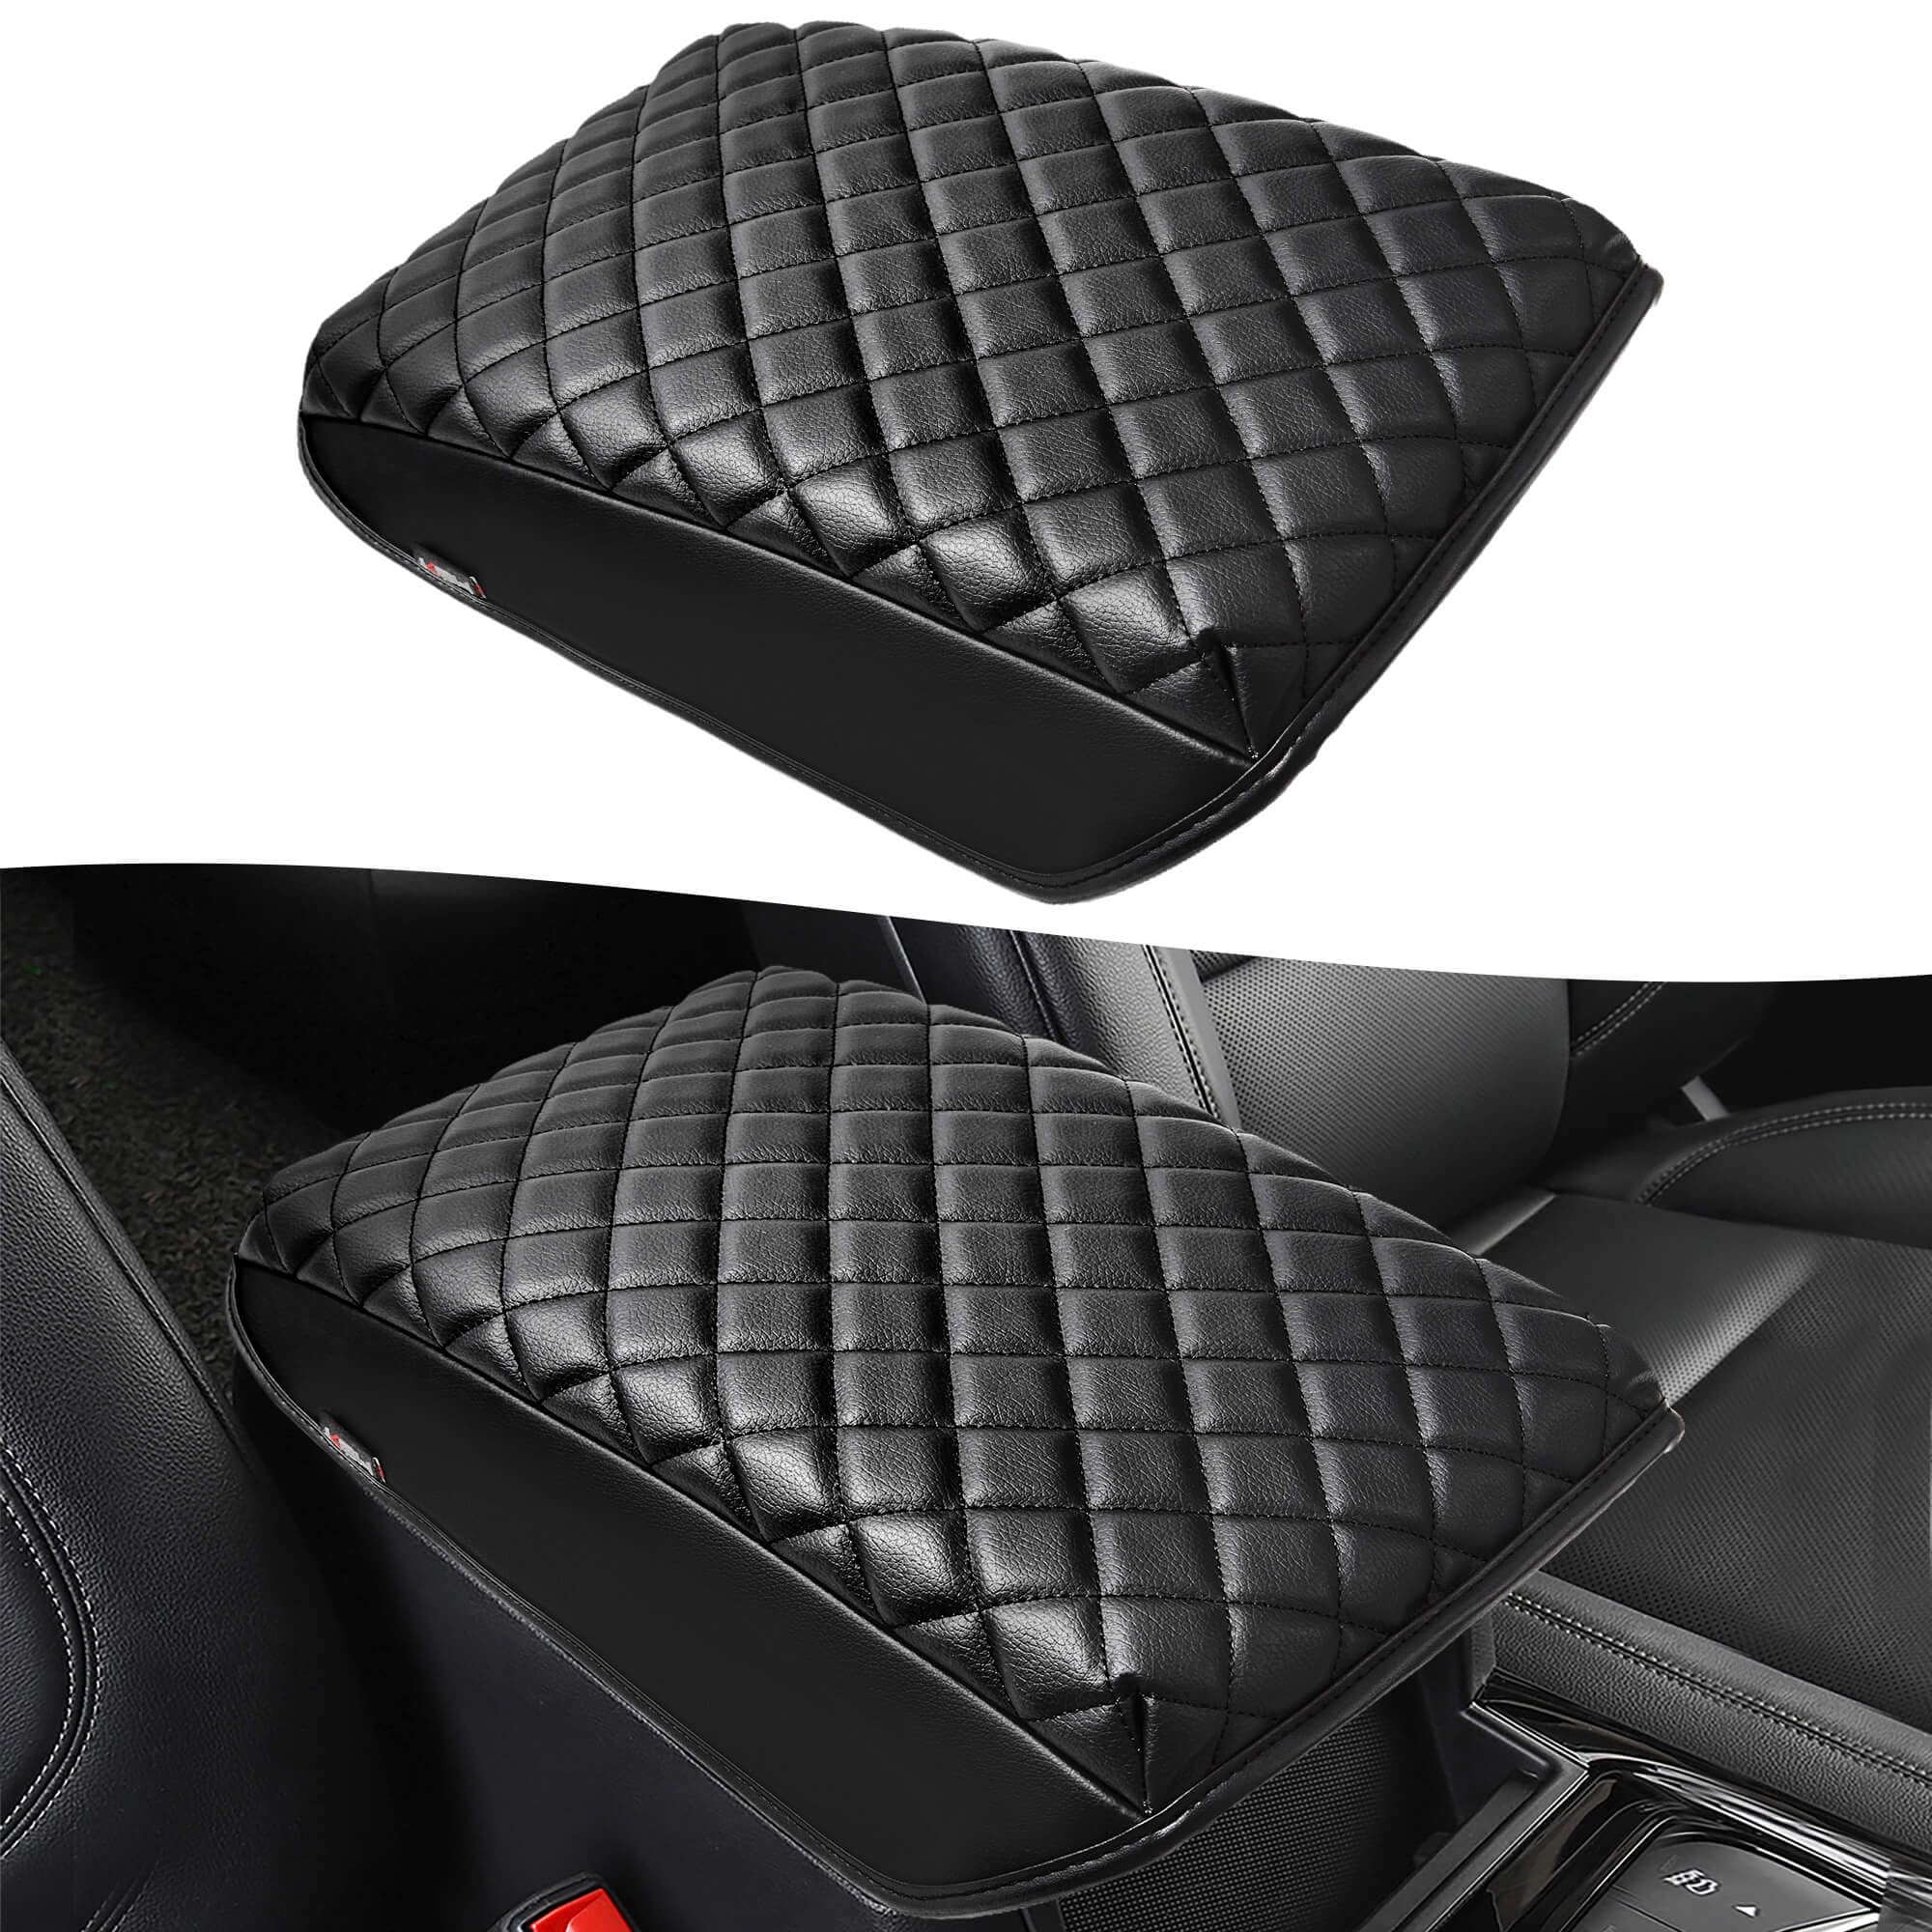

🚗 Elevate Your Drive with Style and Comfort!
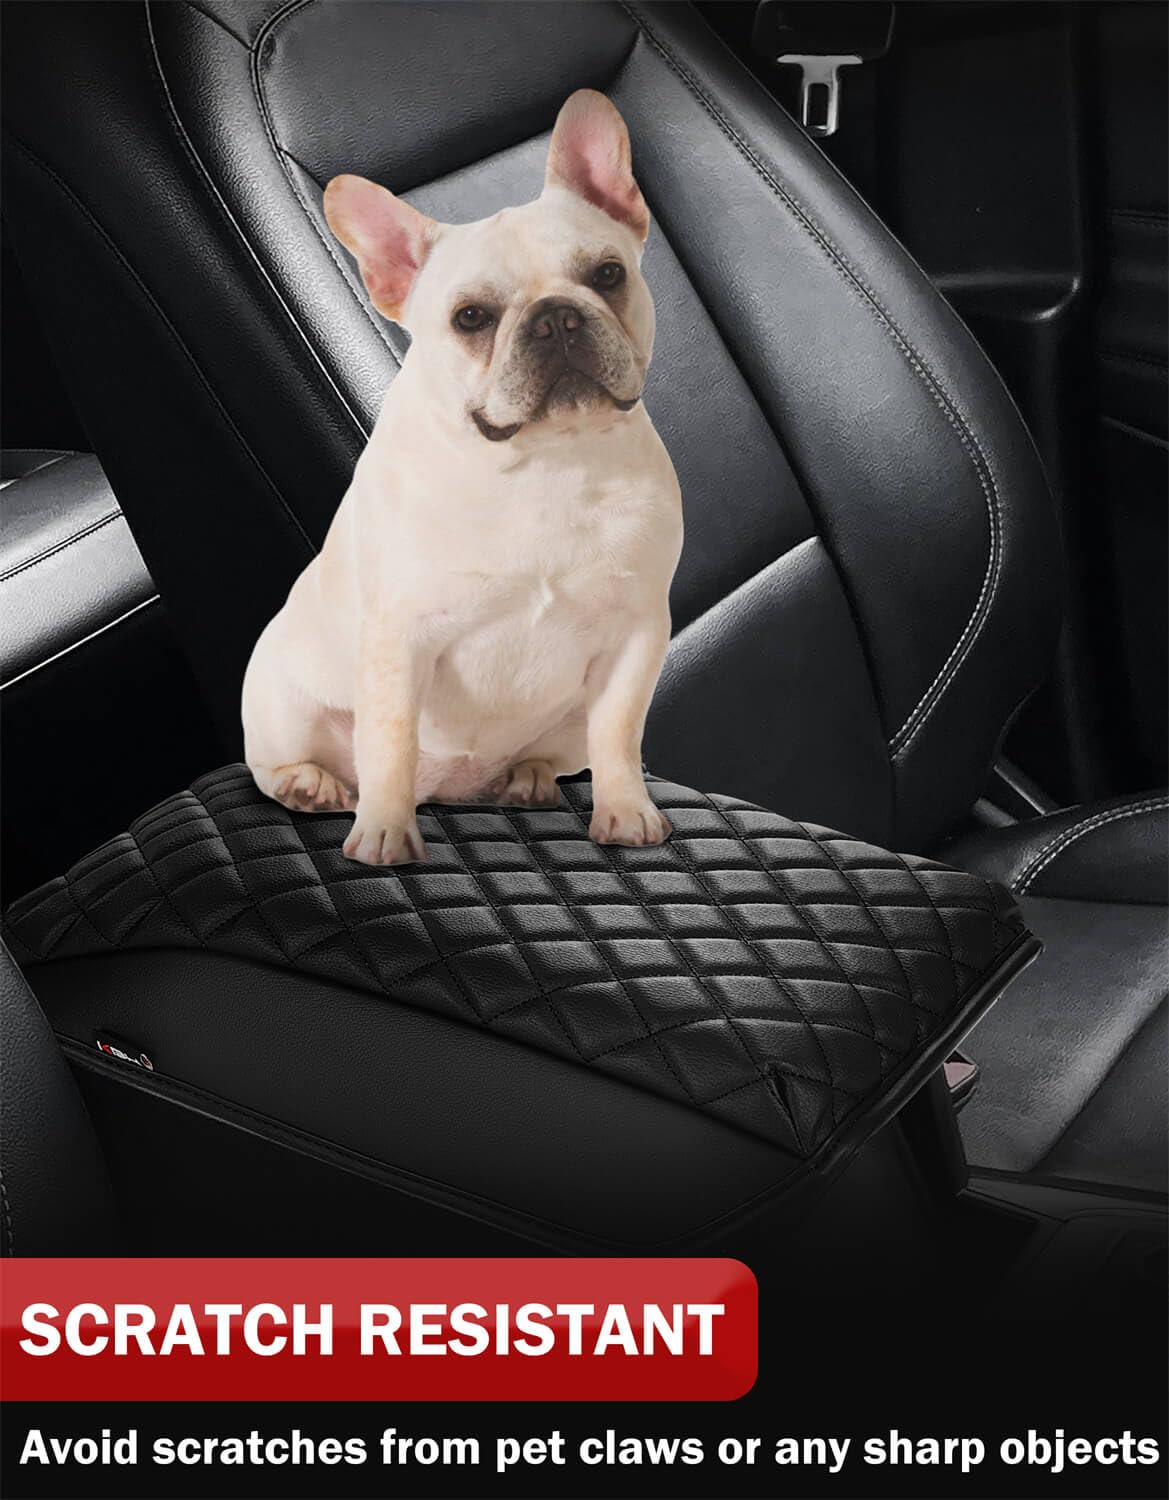
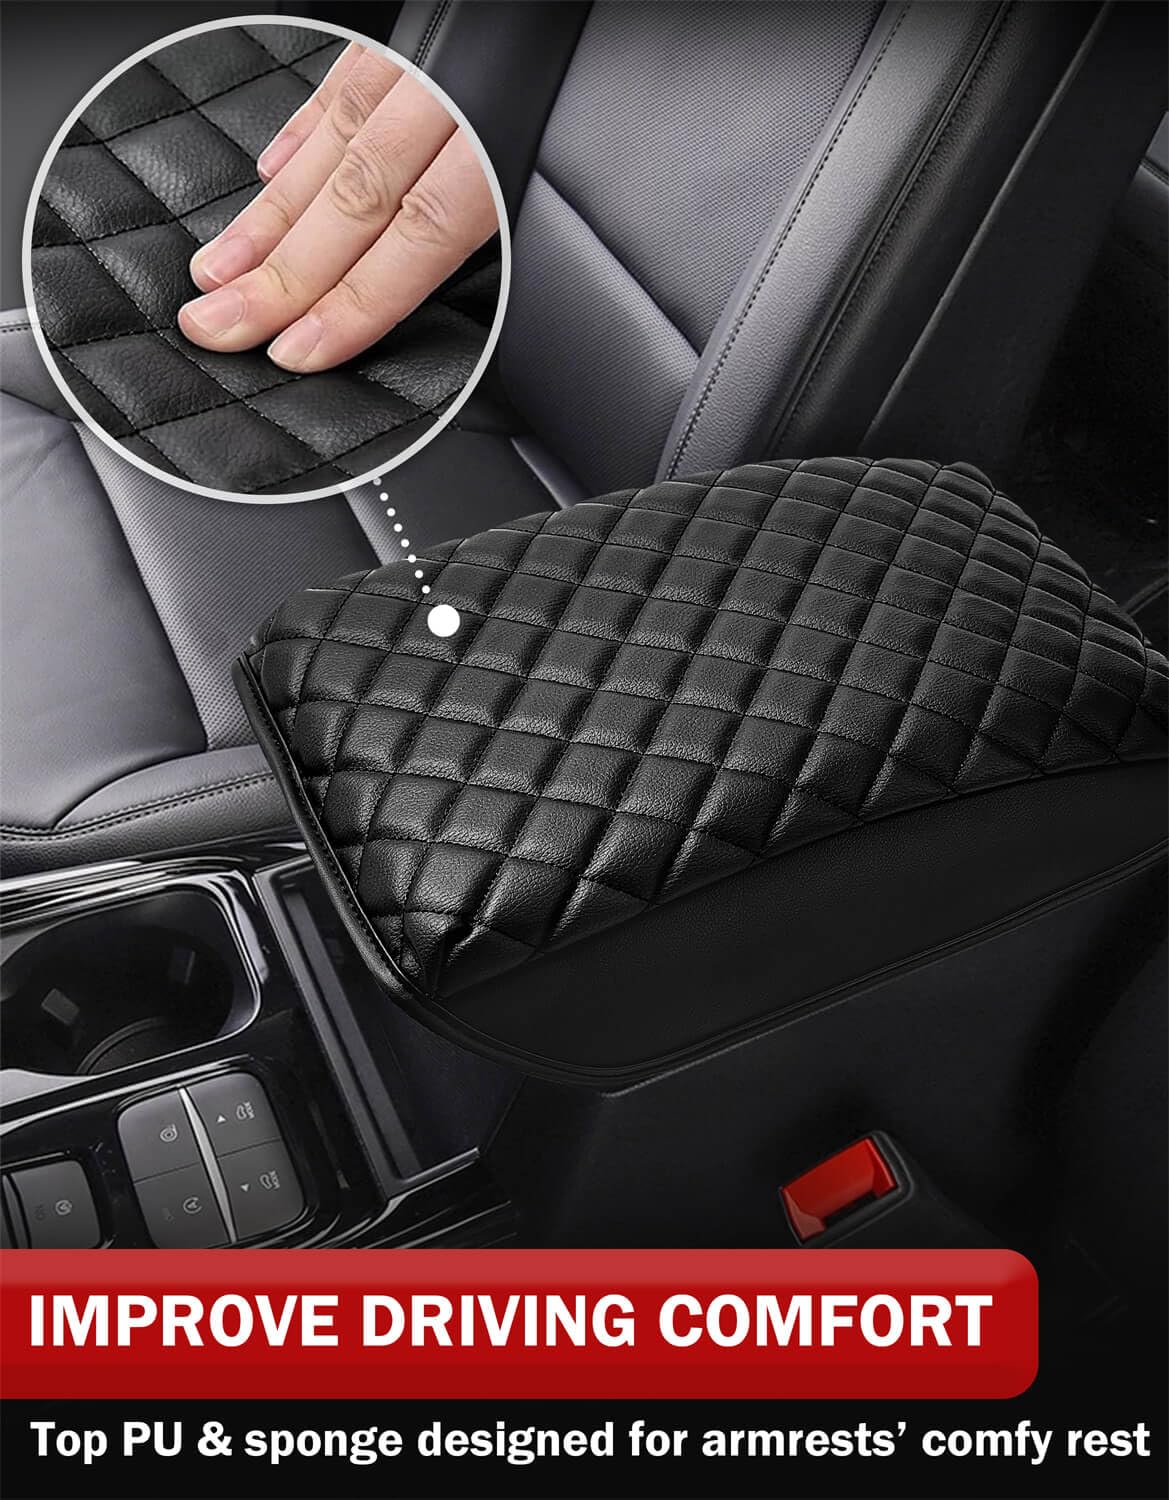
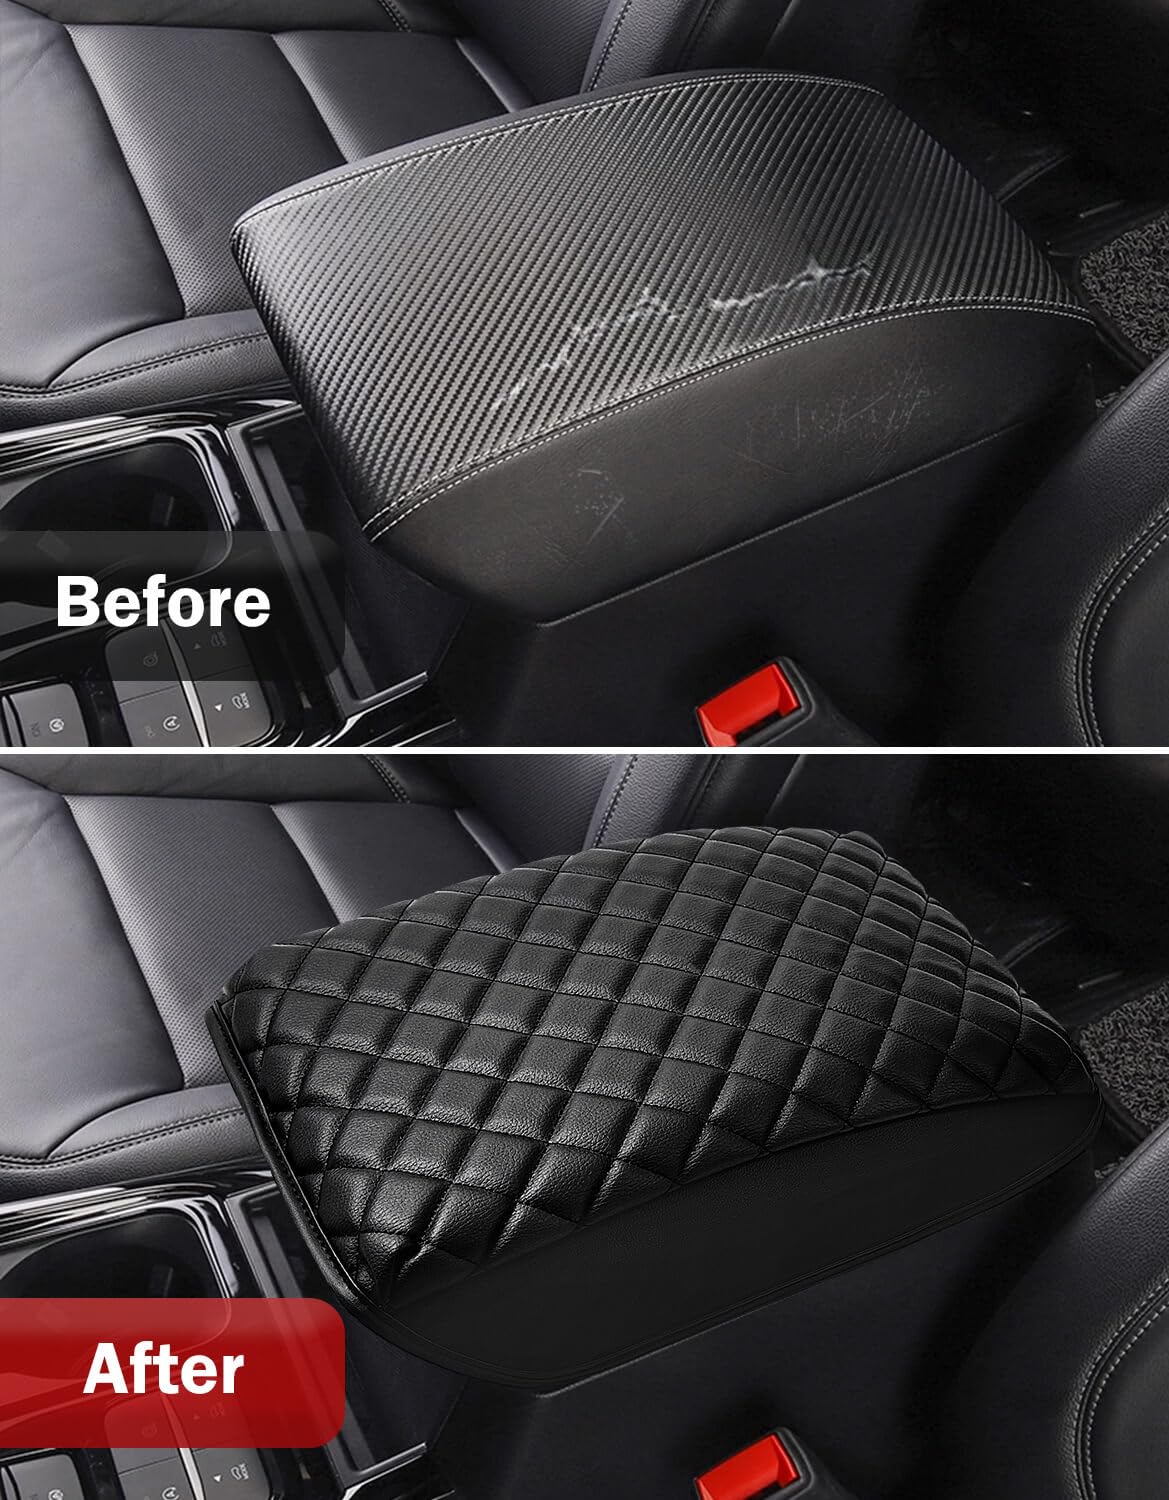
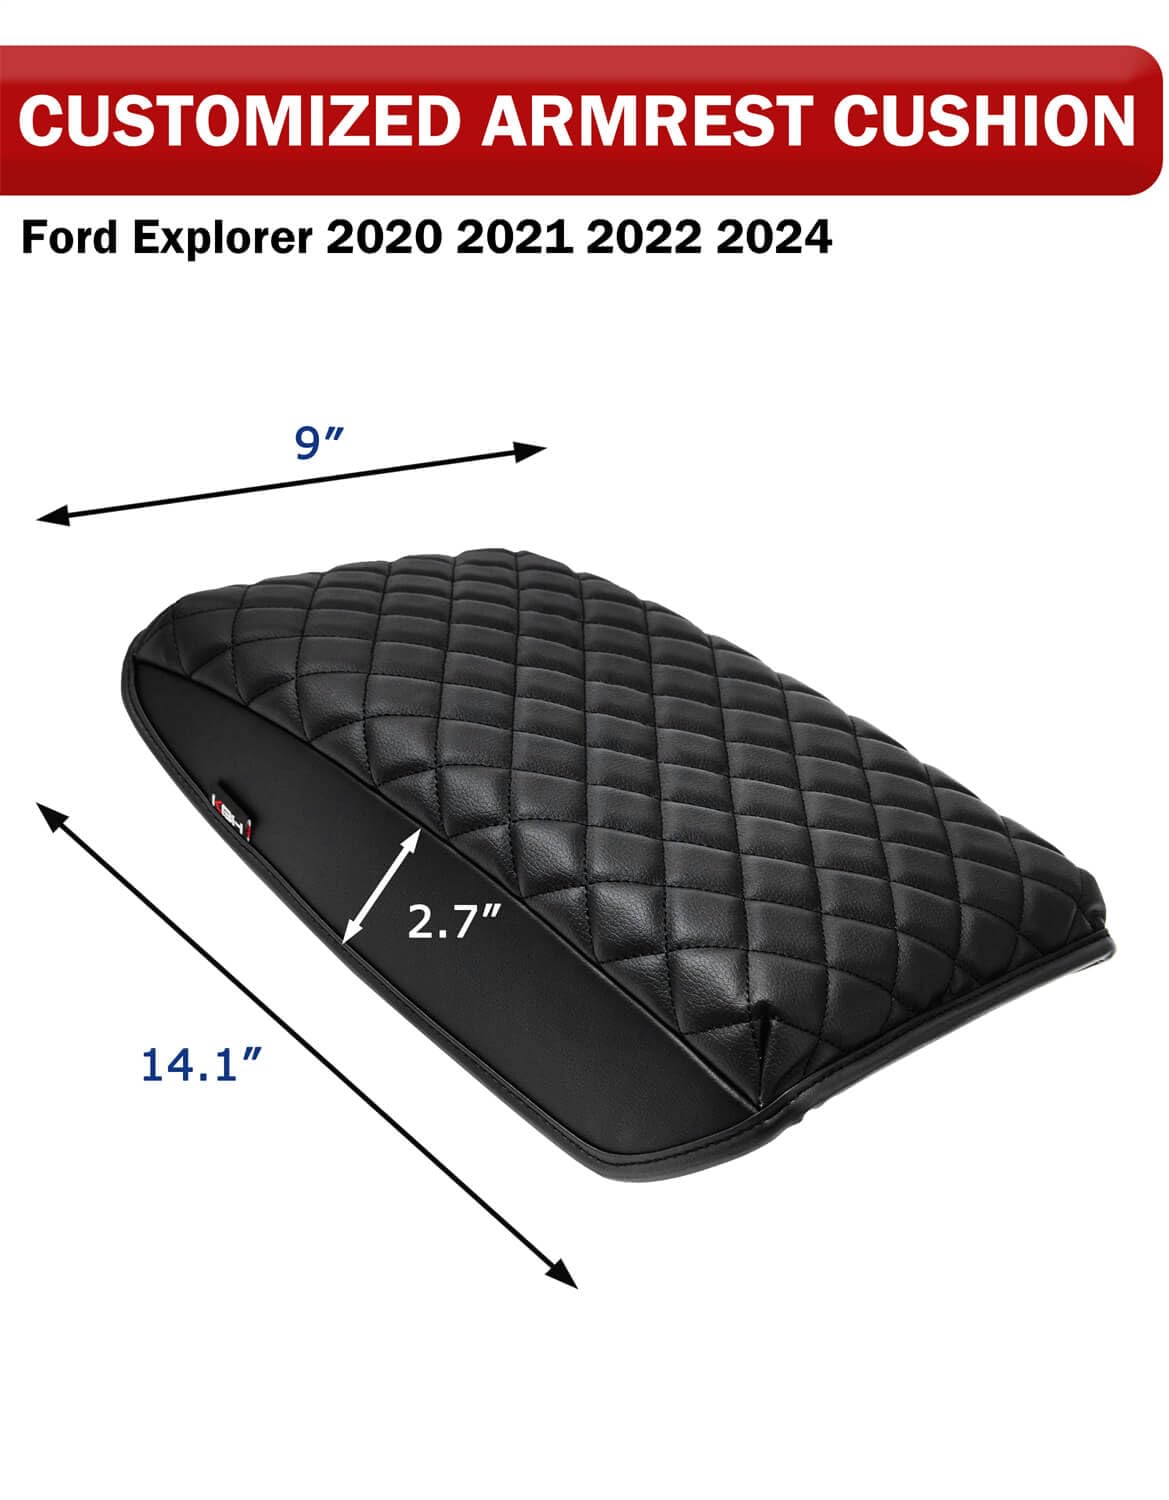
The Car Center Console Armrest Cover for Ford Explorer (2020-2024) is a premium vinyl leather trim cushion designed to provide comfort and protection for your vehicle's center console. With its easy installation and durable, scratch-resistant material, this cover ensures your console remains clean and stylish while offering support during long drives.
| Manufacturer | KBH |
| Brand | KBH |
| Item Weight | 6.4 ounces |
| Product Dimensions | 15.5 x 7.5 x 4.5 inches |
| Manufacturer Part Number | PC-241-BK |
K**E
Great substitute for the OEM cover
I loved that this was a replacement cover at a fraction of the cost. The color of the stitching is dark, unlike the original, but the new one fit great and was really easy to install. There was no adhesive included and I have no idea what I’d actually use instead of staples. I used my heavy duty stapler and just bought a pack of 1/4 in. Staples. To start, I found a YouTube video of how to remove the lid from the console. Mind you, the lid is made up of 2 pieces (see pic above). The company sent a plastic pry tool that I used to separate the 2 pieces. The video I watched said “you’re going to feel as if you’re going to break it - you won’t”. Well, with that, I’d caution you to be firm, but also don’t have the mindset that it’s unbreakable, because I definitely cracked a few places where the tabs lock into place. This ultimately didn’t really matter b/c it all went back together okay. Also - be careful of the spring that holds the latch to the cover as mine almost popped out of place and I probably would have put it back in the wrong way if I hadn’t seen it the correct way.After separating the top of the lid, I was able to slide it off and which exposed the bottom part of the lid where the screws were. BEWARE: My 2014 Ford Explorer Sport did NOT use Phillips head screws. They were stars (see pictures). Fortunately, I had a set of randomly shaped drill bits and was able to quickly get it unscrewed. After unscrewing, I was able to use a flat head screwdriver and needle nose pliers to pry off the old staples and eventually the old cover. I’d suggest before removing the old cover, double check which direction the new one should go to fit best. The new one slid over the plastic and foam easily and I was able to start stapling the underside in one corner and worked my way around. I tried to follow the same “line” that the original one did, but sometimes that didn’t work out. This *probably* would have been easier with an upholstery stapler as other reviewers mention, but mine worked fine. I found that if a staple didn’t go all the way in, which makes sense since you’re stapling into hard plastic, if I took a pair of pliers i was able to carefully pinch the staple all the way in - with an affirming “pop” when done successfully. I took out and redid numerous staples and and couldn’t tell where I had stapled.Overall I love the look and feel of this cover and love it even more for the fact that it’s not sliding around on top of the old one.If only replacing the leather drivers seat cover was going to be this easy!
D**
Looks great!
Was quoted $145 to get it fixed. I watched a youtube video on how to dissemble the arm rest, took it out in 15 mins. The hardest part was to remove all the staples. Super easy, the material is great, it looks new again! I used contact cement to glue it
A**R
Perfect.
Easy to install. Perfect fit.
A**.
Glue not included
Product was sewn to fit really well and required just a little stretching so it really does look like OEM. My staple gun didn't work great. The video and instructions tell you to let the glue dry 3 minutes but no adhesive is included. I used 3M spray adhesive which worked great and I added a few staples here and there. Very pleased.
J**B
Awesome product
This is an awesome product. Looks like the original. Easy to install. Excellent directions. Removing from car was as shown in the instructions. Used the plastic upholstery tool and a flathead screwdriver and prybar to remove the bottom plastic to access the screws which were torx head screws. The old cover had 89-100 staples holding it on. The staples were very difficult to remove so I cut the old cover close to the staples with a utility knifed and ripped old cover free. Removed all the old scraps of cover. Applied the new cover using 1/4” staples with a staple gun. Stretched the cover while stapling all the way around. I did not use any upholstery glue as it would have been a mess and the staples were easier and held better. Reinstalled to console and inserted the plastic cover. Entire process took less than an hour. It looks as good as new. Would definitely purchase same cover again from this supplier
M**S
Easy fix for worn center console armrest
Armrest had a hole in the cover where my elbow rides and while generally my 2013 Explorer looks pretty good and clean, the bad spot on the armrest was very visible. I ordered this kit and had it installed in about an hour.Pros:1. The new cover is sized pretty much perfectly and the seams line up on the sides neatly right where they should be.2. There are instructions on how to shrink it a bit with a heat gun to tighten it up, but I found that pulling it tight during initial install was all that was needed. My install is nice and tight.3. It looks close to the OEM one. The texture is a little different and the color might be a hair darker, but once its installed it looks great.Cons,1. In my opinion you'll struggle getting a nice tight fit if you try to glue it and I'd recommend staples. I had to run and get some 1/4" leg staples for my staple gun but once I had them, being able to pull it tight and then immediately secure it with a staple made the job a lot easier.2. A little better instruction about getting the interior liner off with a few pics would go a long way. Mine was tough to get unsnapped and I ended up needed to use a flat blade screwdriver to get the first few connectors snapped loose. I actually broke one of the connectors due to putting the screwdriver in the wrong spot. If there had been a few more pics of the armrest with the interior part removed that would have helped me. Even with one broken connector the interior plate snapped back in solidly.3. The pics I had showed the armrest out of the car with the hinge attached. But for me that would have required pulling the liner of the console box to get to the hinge screws on the console side. It's way easier to just unscrew the armrest from the other side of the hinge. Most people probably figure this out, but once again a few more pics or more accurate pics would be helpful.Overall, a way better deal than several hundred for an EOM replacement and I'd recommend it to anyone needing to fix this cosmetic problem.
T**T
Misleading
I ordered the item believing it was the replacement part itself, not just the replacement piece of padding. I am not an upholsterer and cannot do the replacement myself.The add was misleading, at least.Not happy, at all, with this purchase.
N**A
Good
Good quality, strong, and looks good. Perfect for my car.
Trustpilot
2 weeks ago
1 month ago