


🚗 Elevate Your Drive with Cutting-Edge Tech!
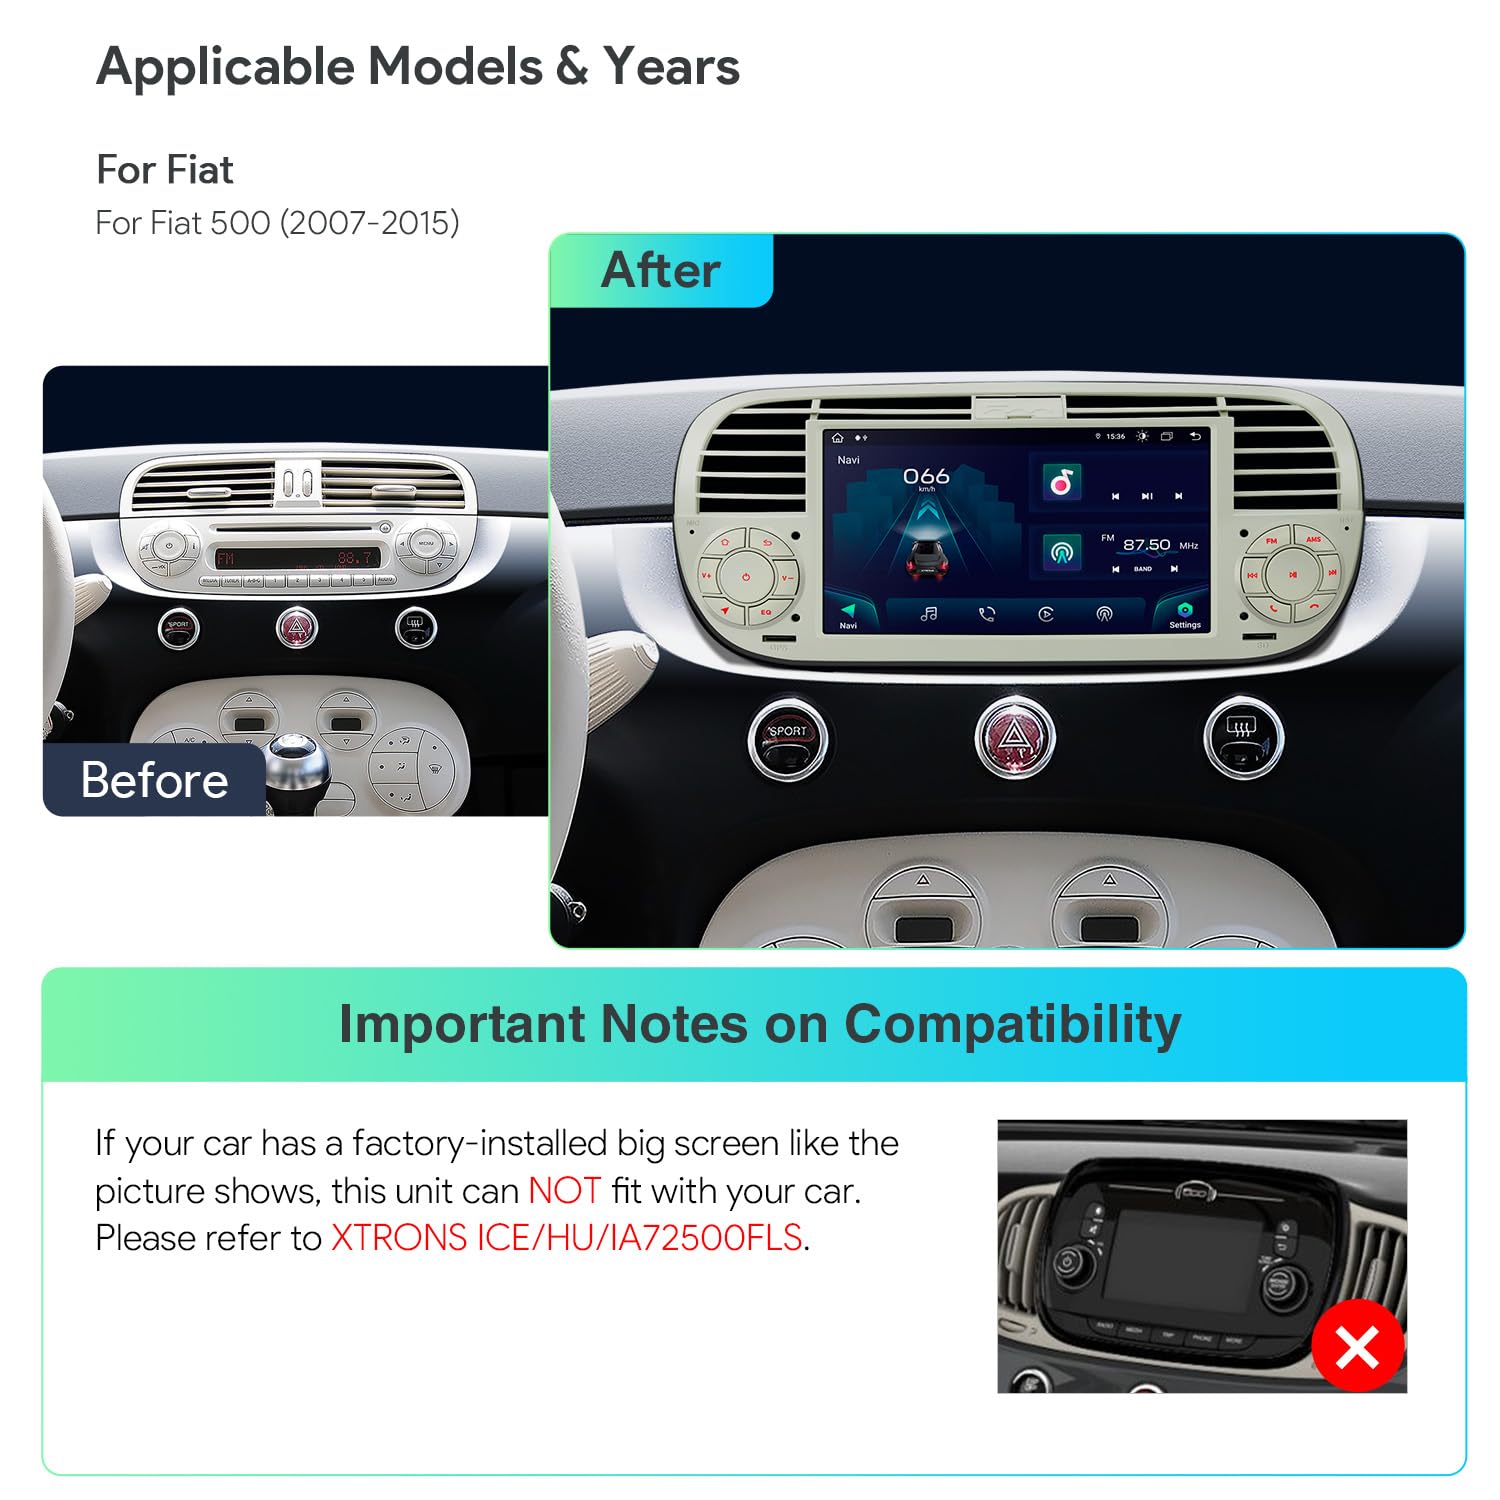
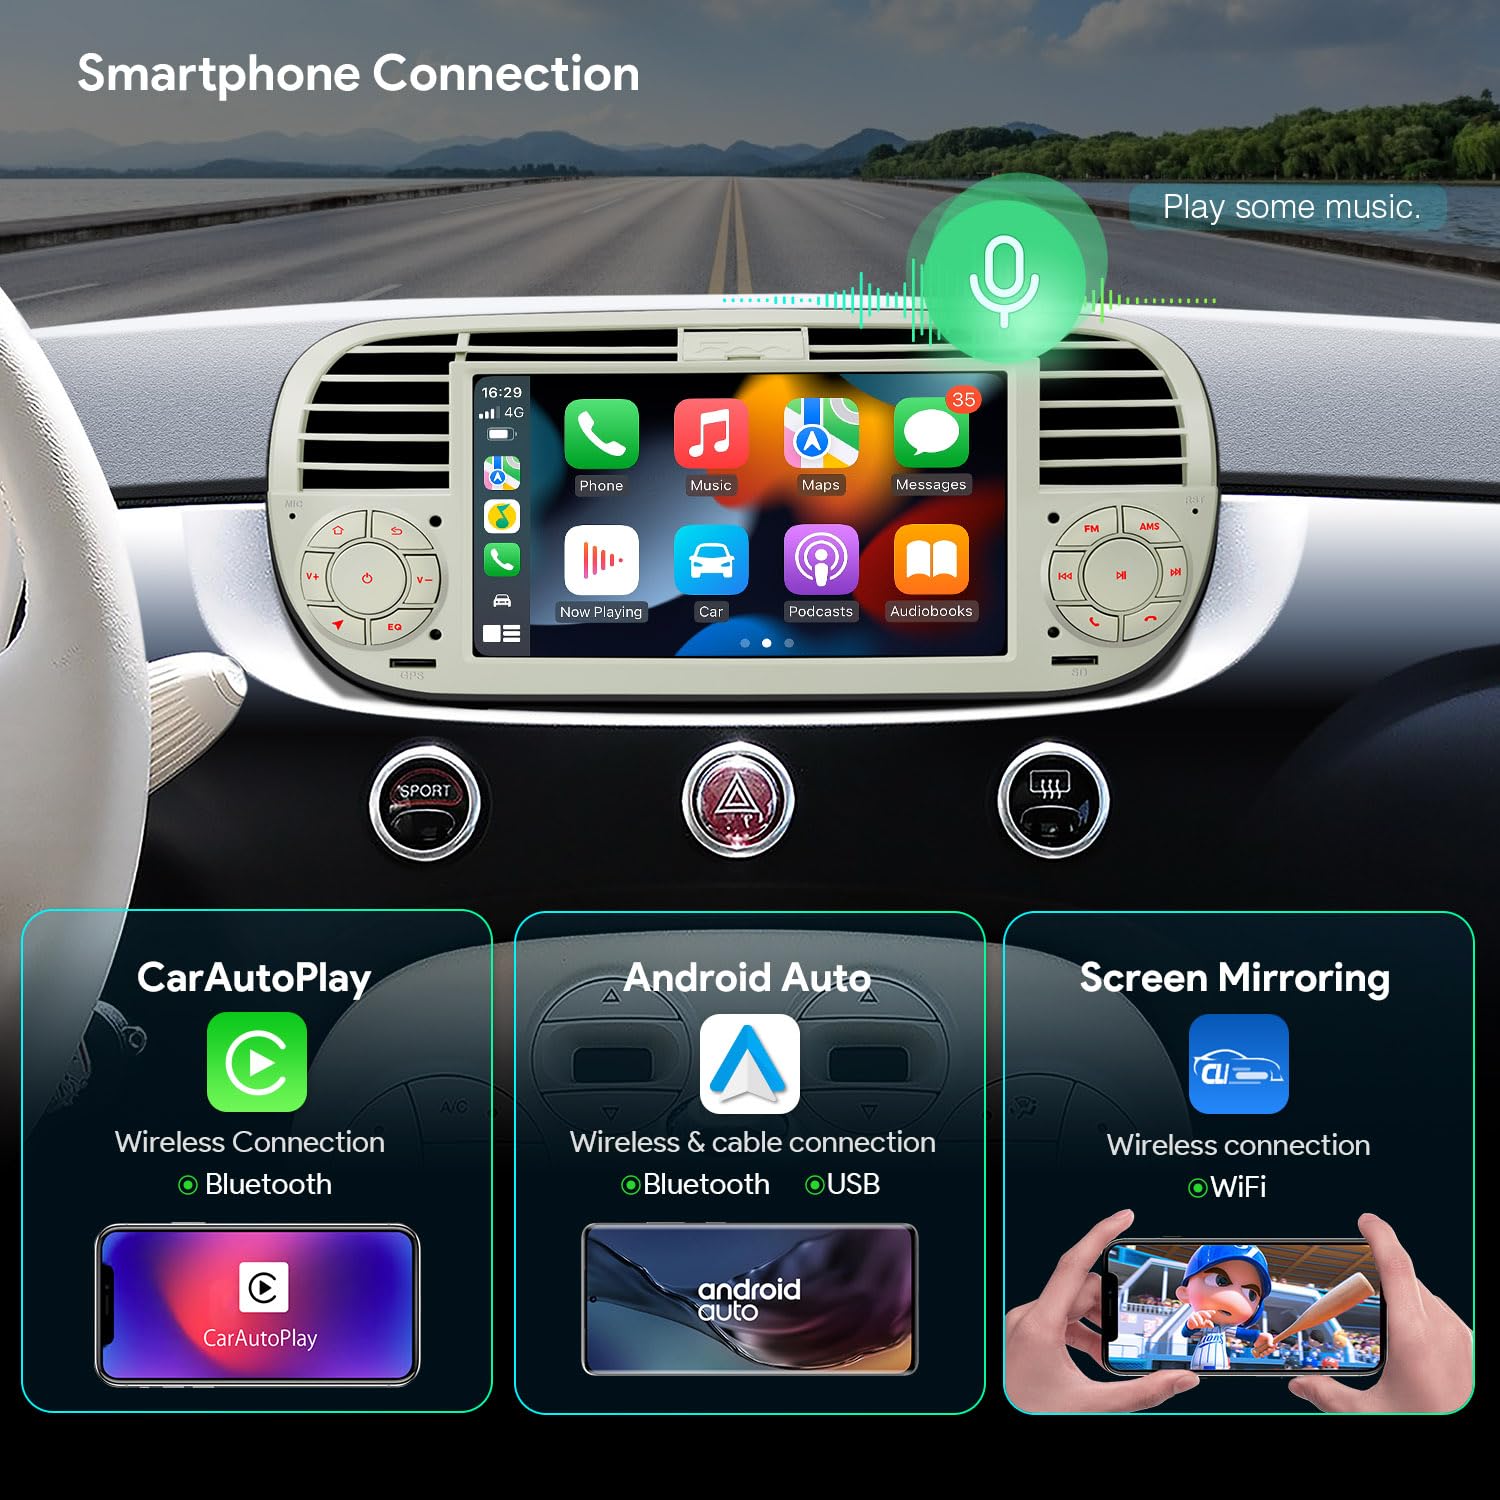
The XTRONS 7 Inch Android 13 Car Stereo Radio Player is a state-of-the-art vehicle head unit designed for Fiat 500 models (2007-2015). It features the latest Android 13.0 system, a powerful octa-core processor, and a premium dual-layer G+G screen, ensuring a seamless and visually stunning user experience. With built-in 4G wireless GPS navigation, support for both Wireless CarPlay and Android Auto, and a robust 1-year warranty, this car stereo is the perfect upgrade for tech-savvy drivers.
A**R
Excellent product ! Great price ! Fast shipping!!
Excellent car stereo ! Featuring wireless apple car play for my daughters fiat 500. Hubby managed to fit this himself and all functions working as advertised . We'll worth the money & twin daughters are over the moon as they now have full access to their music and all other functions. Hubby fitted himself with no problems. Only criticism would be lack of instructions, however through looking on you tube and other buyers on here giving guidance he was able to fit first twins car no problem ( 2014 fiat 500) and 2nd twins car ( 2015 fiat 500) despite this model also having blue and me function and expecting this to be slightly more difficult it fitted with no issues,! Great product , price and fast shipping! Would buy again !
M**N
Works fine but no fitting instructions
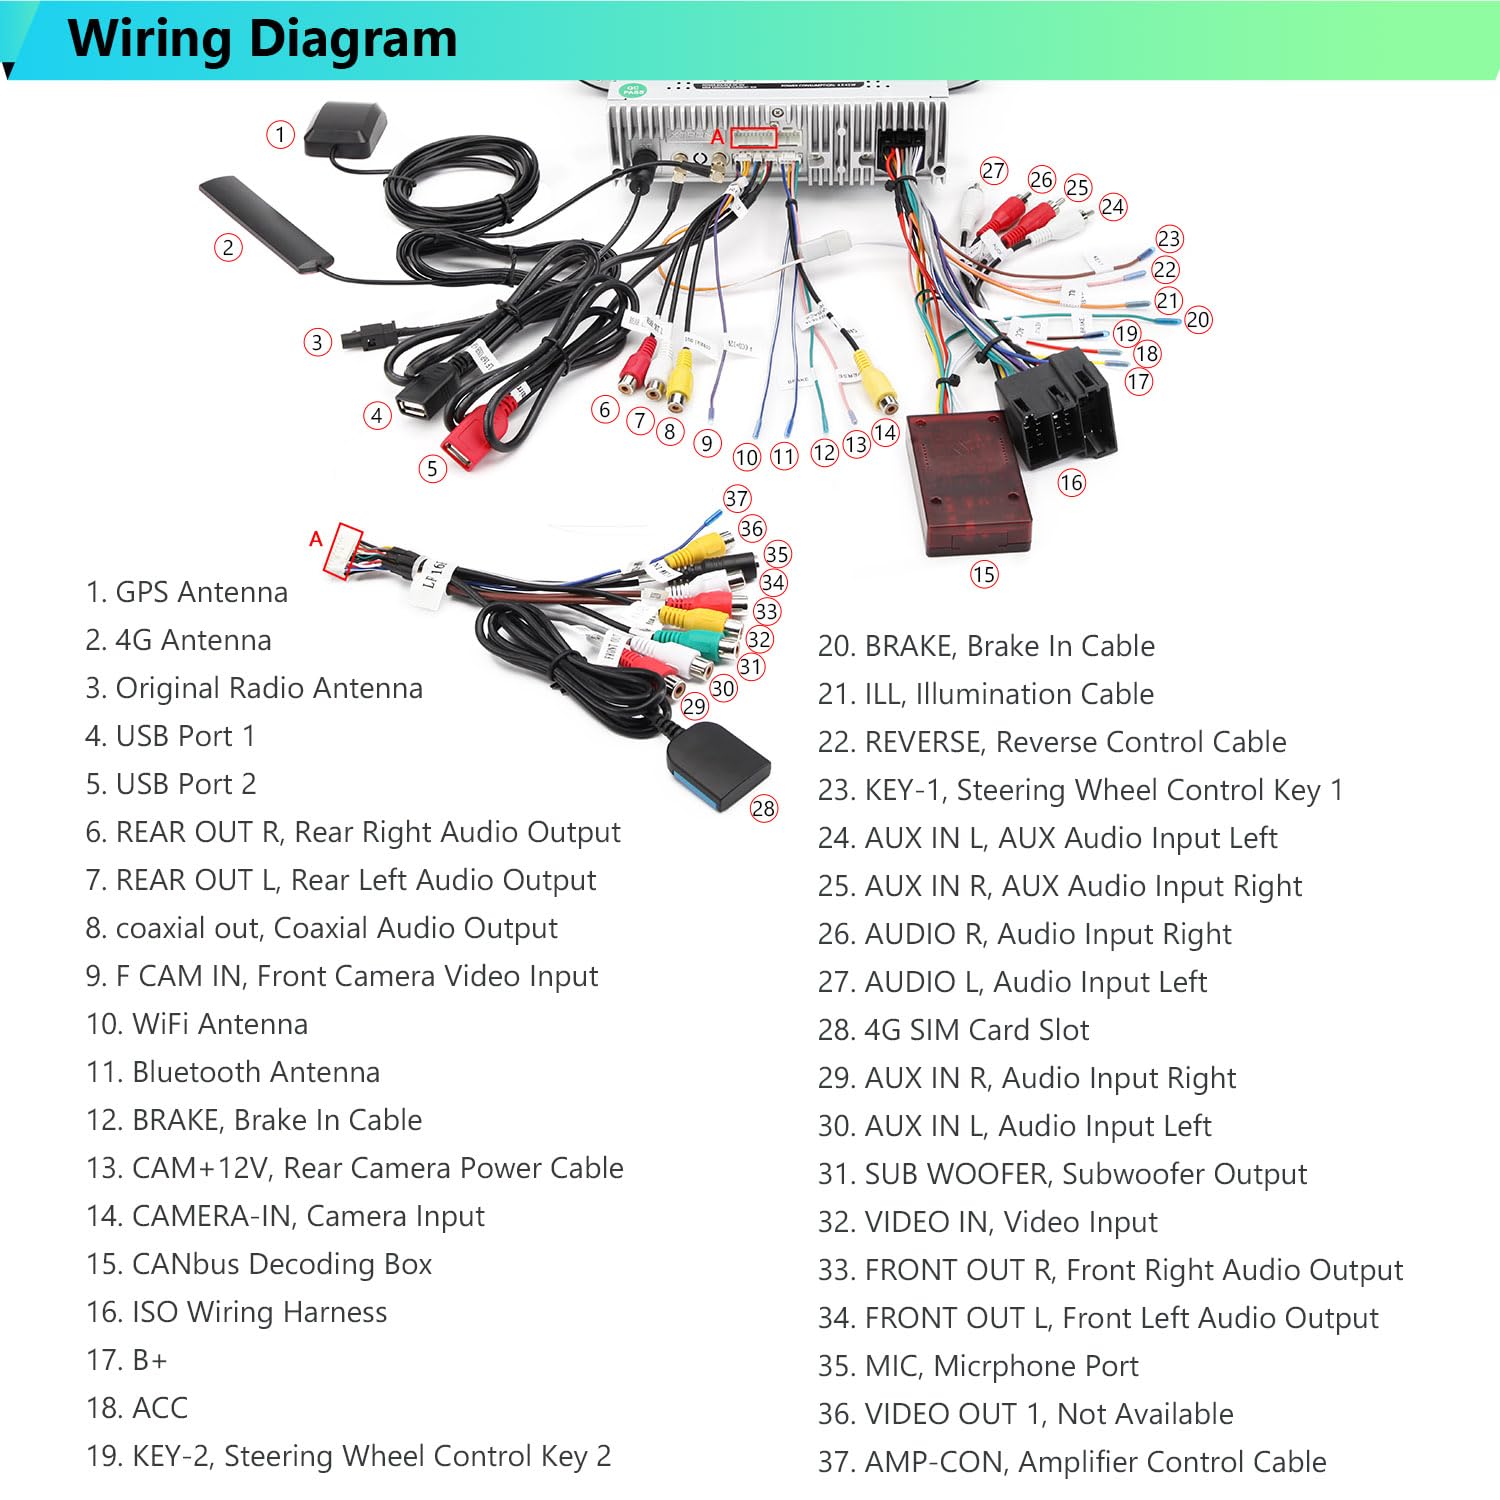
A good alternative to the factory fitted radio unit. Easy to pair with both Android Auto and iOS CarPlay, and so to use Waze, Spotify etc. It's designed for left hand drive though, so the volume buttons are the wrong way round, and the phone mike points the wrong way. Only works when ignition is on.Fitting help for other buyers:1. Use metal prongs to remove the original radio. The holes are behind the blank buttons, pop them off with a small screwdriver.2. Remove the two screws holding in the air ducts. Pull out the air ducts and remove the black back section from the front trim-coloured section. Push the black back section back into place in the dash.3. From the original radio, pull out the aerial and the block of wires.4. From the pack of wiring that came with the Xtrons, find:- the metal aerial adaptor- the CANbus box (red plastic box with one set of wires coming out)- the ISO wiring harness (biggest set of wires - the one that has a terminal block to match that which you've just removed from the original radio)5. Put the metal aerial adaptor, then the car aerial, into the back of the Xtrons6. Plug the ISO harness into the back of the Xtrons, and the wires from the Fiat into the other end of the harness. Each will only go in one place, so you can't get it wrong7. Plug the red CANbus box into the harness - again it'll only fit one of the offshoot terminals, you can't go wrong8. Turn on the ignition and then the Xtrons, to make sure it works (doesn't work with the ignition off, or at least mine won't)9. Push the wires back into the dash, then push the Xtrons into the metal housing. It might take some rearranging of the wires. It will click in place when it's far back enough.It could take you 15-20 mins if it all goes well. The number of wires is daunting but once I realised each terminal block can only fit in one place, it got a lot easier. Thanks to the reviewer who told us about the red CANbus box being required, I spent half an hour trying to work out why it wouldn't power on and was about to send it back.
E**.
Easy to install just do your research!
Me and my friend who have absolutely no knowledge or business installing car stereos, installed this with such ease!! I was skeptical after reading some reviews and it being reasonably cheap but Aslong as you do your research, watch videos and follow someone’s very helpful tips in the reviews (the guy who did a chart of all the wires and their jobs saved so much time so thank you for that) it’s honestly NOT difficult. It’s overwhelming at first due to the mass amount of wires provided but you really don’t need the vast majority of them. Installed in about 1 hour. I Only purchased for apple car play (which works perfectly btw) as my abarth didn’t have an AUX that worked correctly but even the system that’s not CarPlay is so good! It’s all completely wireless so don’t start feeding wires under the dash like some videos on YT suggest. So happy with the result, it looks as if it’s factory fitted minus a small gap underneath but barely noticeable, oh and it looks amazing! Thanks!
C**P
Really good stereo upgrade
I had the standard fiat radio in my 2015 model and was sick of the limitations - not to mention my Bluetooth always patching in and out when listening to music. This Xtrons stereo is just the perfect upgrade that my car needed! Not to mention it’s a lot fancier than what I had previously! The sound quality is unreal - something I didn’t think would change but it has.My only critique is the complete lack of instructions on fitting the stereo. We couldn’t even find any YouTube videos to help but thankfully my clever chap worked it out in the end!Would definitely recommend this to anyone who’s thinking about it !!
S**N
No installation instructions at all.
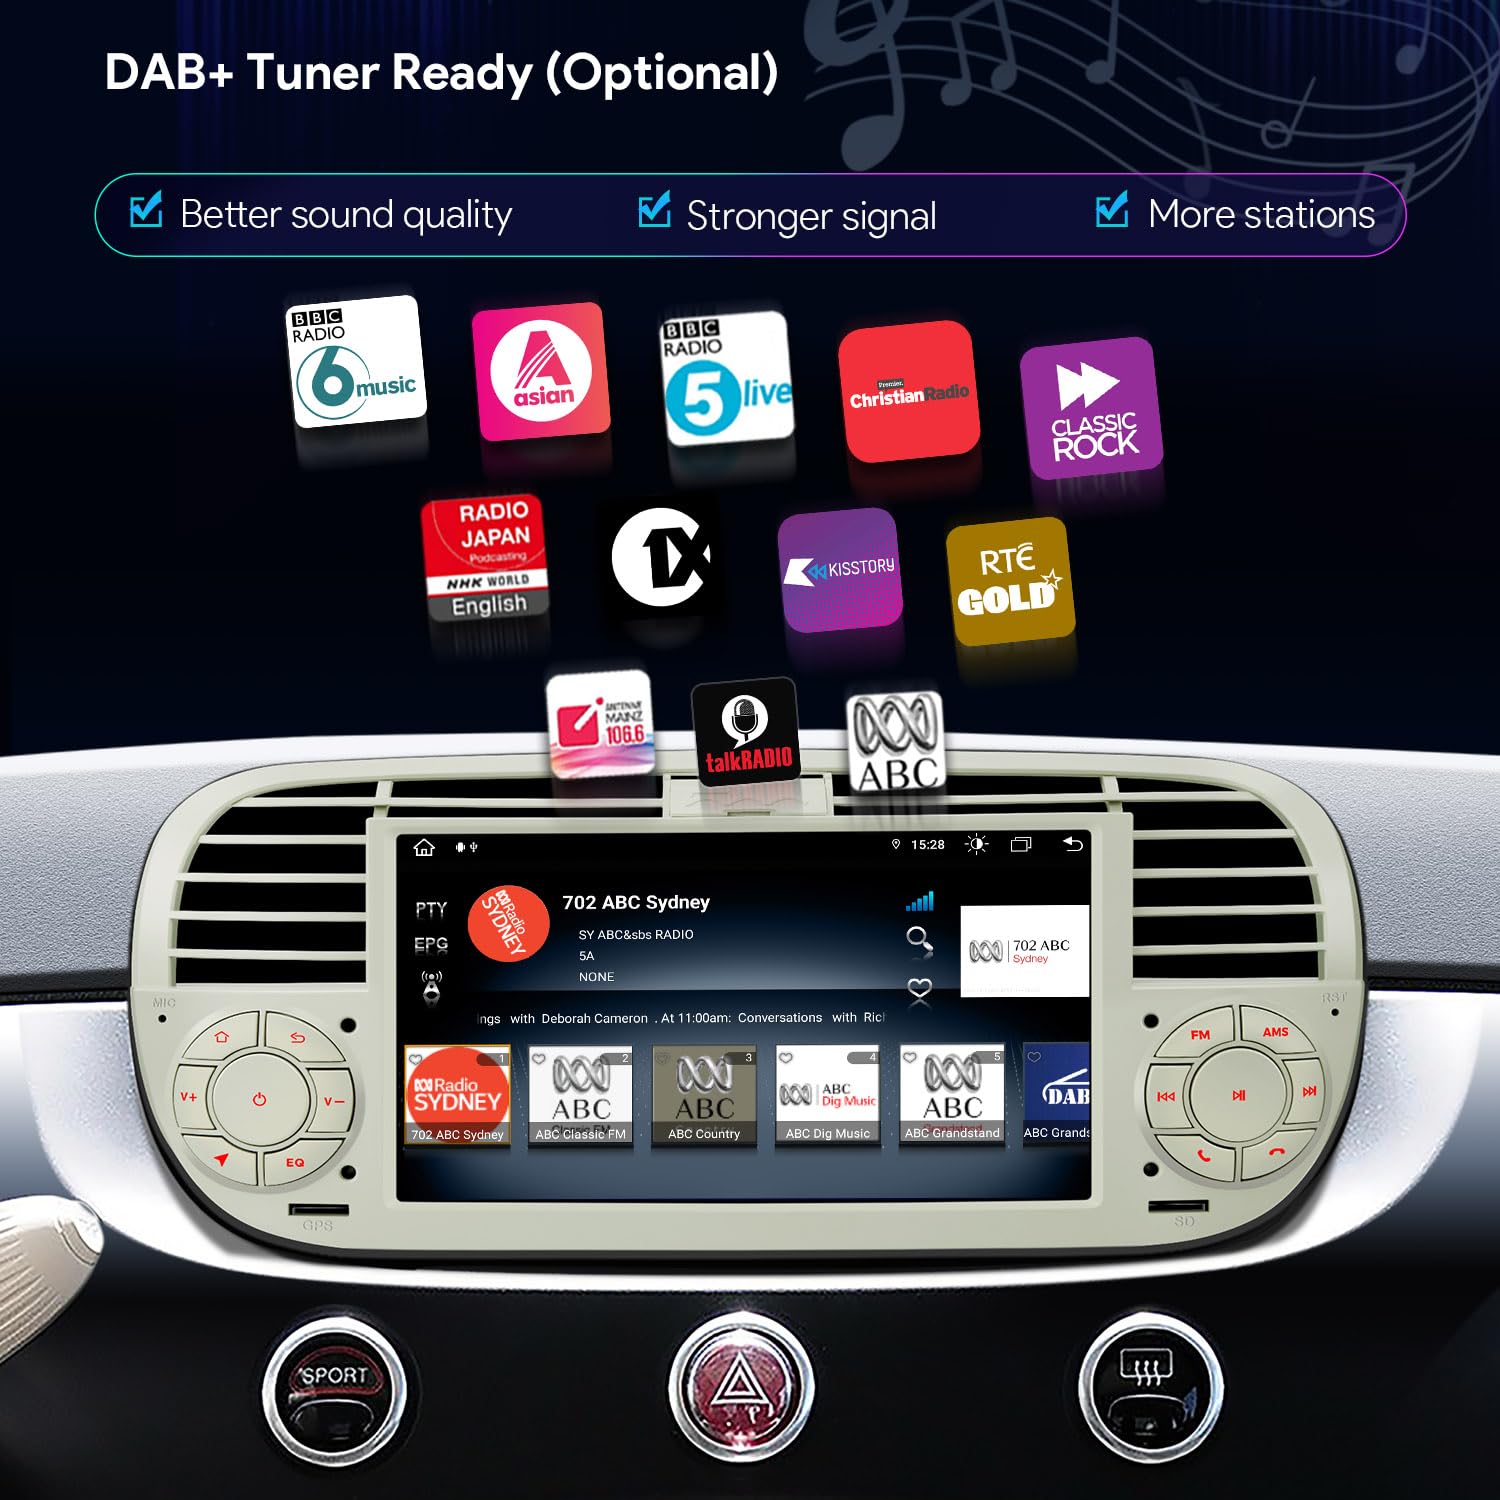
Thoroughly disappointed with this product, absolutely no instructions to install, had to use YouTube, thought I had ordered it with dab as standard only to find out after installation that there is a strange lead and plate that you have to try and install by dismantling interior trim, I am currently left with a useless device that I can't even get out to return for a refund as the keys I bought to remove the Fiat 500 std unit don't work on the xyron.Thinking of contacting Trading Standards.
S**Y
Good unit
So far this is a great piece of kit for the Fiat 500. It looks like it was fitted as standard OEM equipment. This unit can definitely be fitted yourself as long as you have the basic idea on what needs to be done to complete. So I will try help you out below.Fitting manualThe manual gives you a good idea how to work it when it’s fitted, however the info about wiring it in is sparse to say the least. I’ve attached an easy to understand screenshot to help you out. I’ll do a quick install paragraph below if enough space allowed on this review.Remove the old unit, pin slots are under the blank buttons. Remove the wires. Two screw remove the vents. Split the fascia off the vents, refit the rear section. There are a lot of wires included, vehicle dependent which you need, check the picture above. I installed the main wiring that plugs in to the existing plug, canbus box, gps Ariel and Ariel adapter. Wasn’t bothered about the usb leads etc as it’s wireless. Test the unit works and pair your phone to make sure CarPlay etc works. All ok fit it in the dash and don’t trap anything. The vent open close can be accessed through the flap at the top of the unit.Enjoy
Trustpilot
3 weeks ago
2 weeks ago