
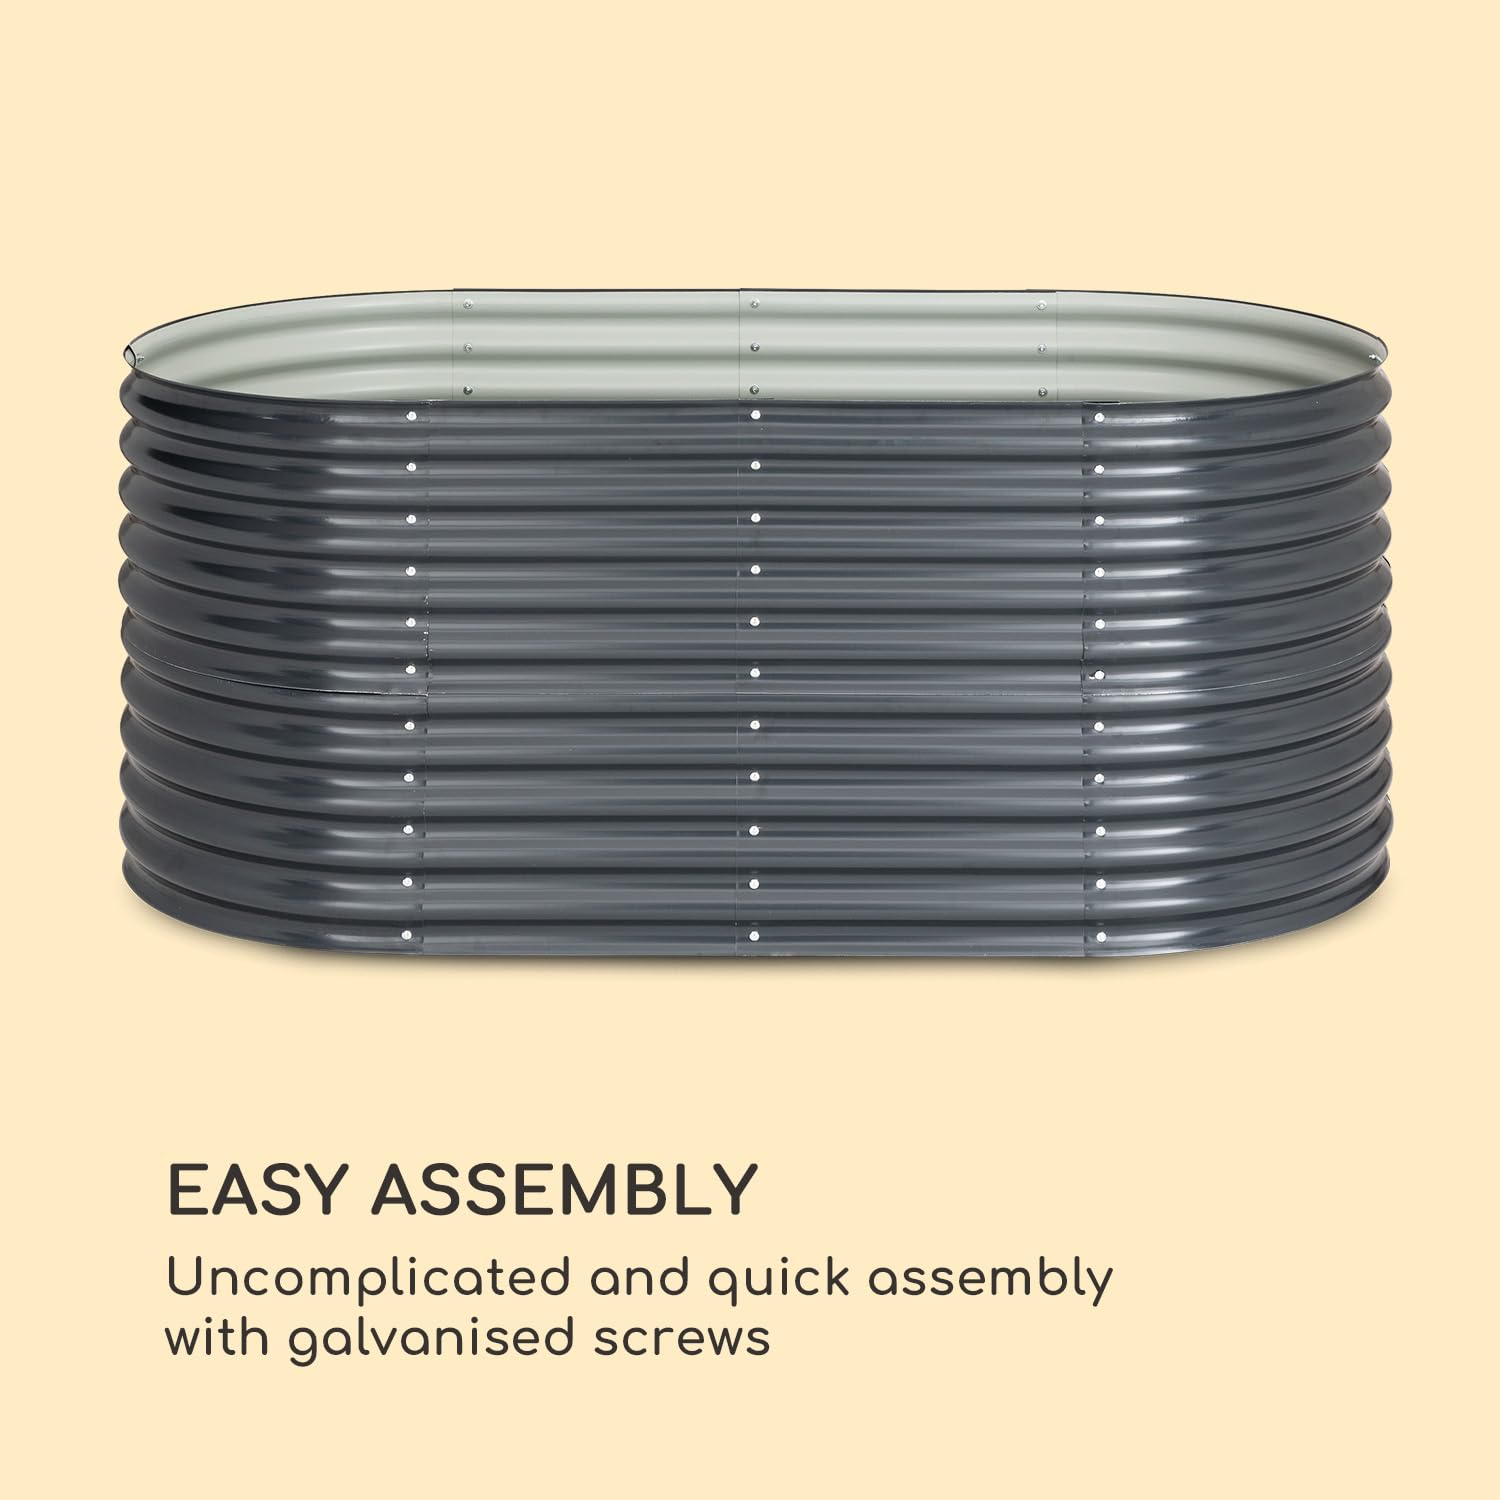

🌿 Grow Your Own Paradise!
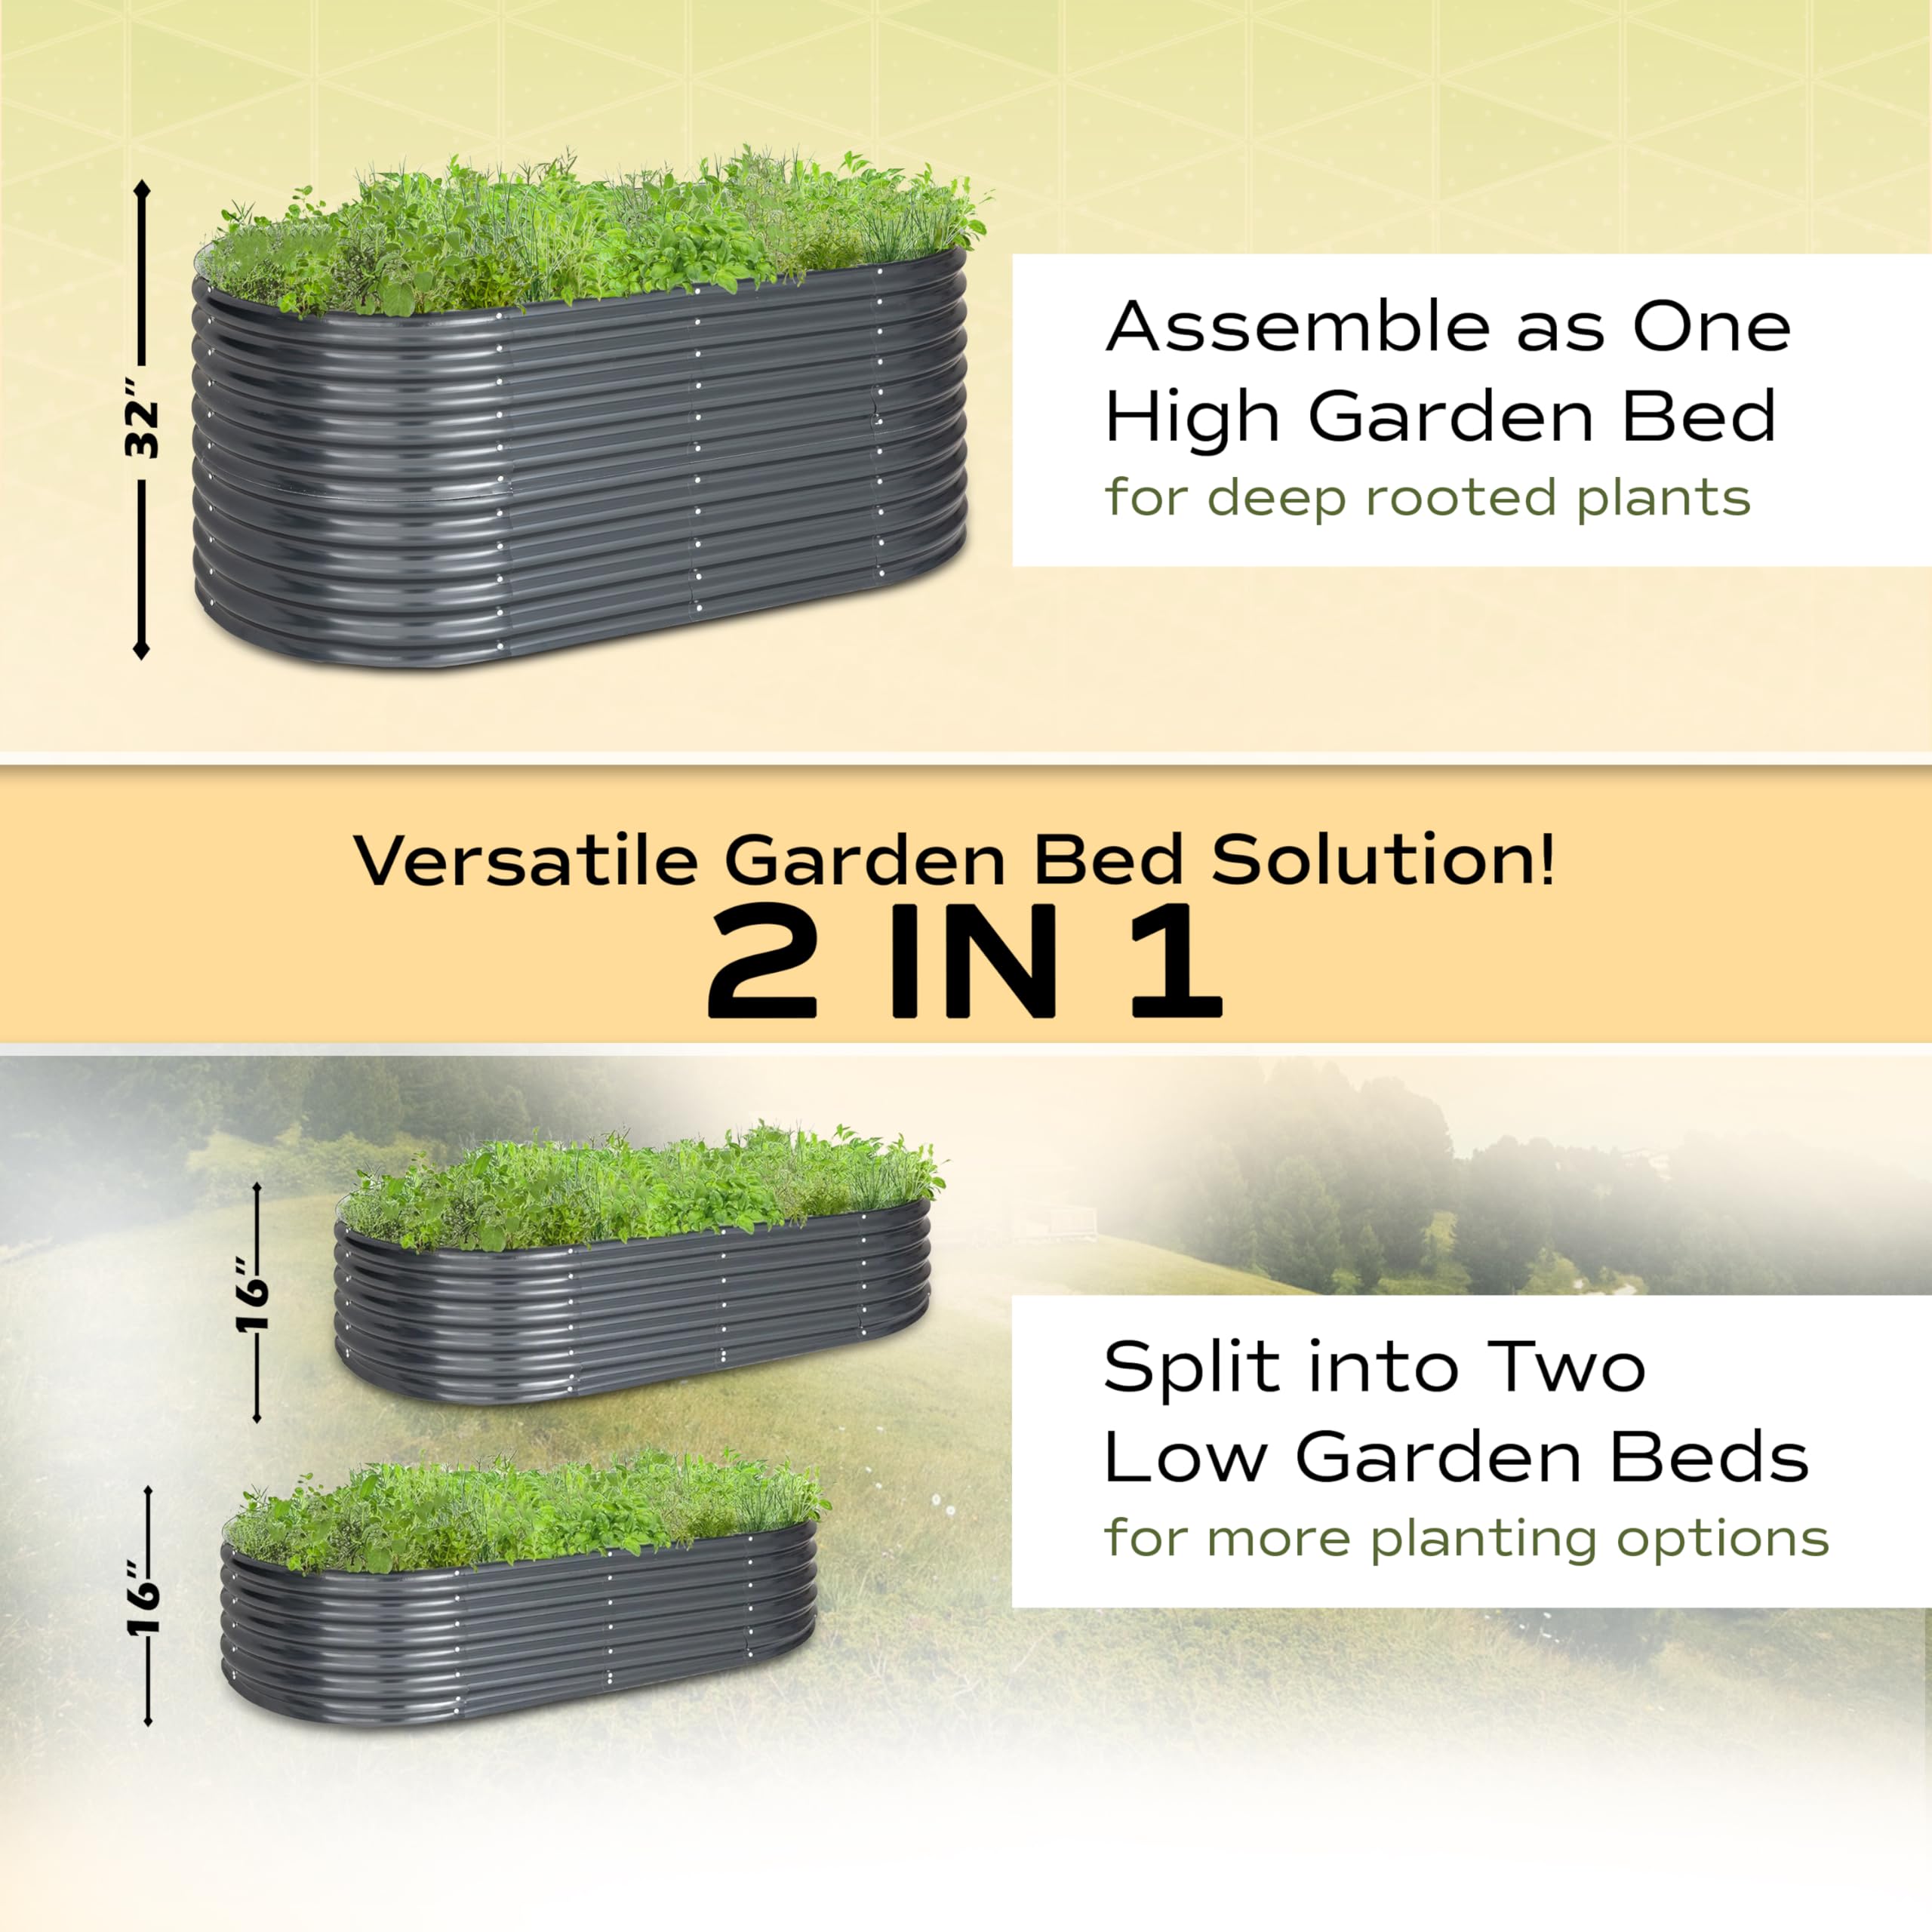
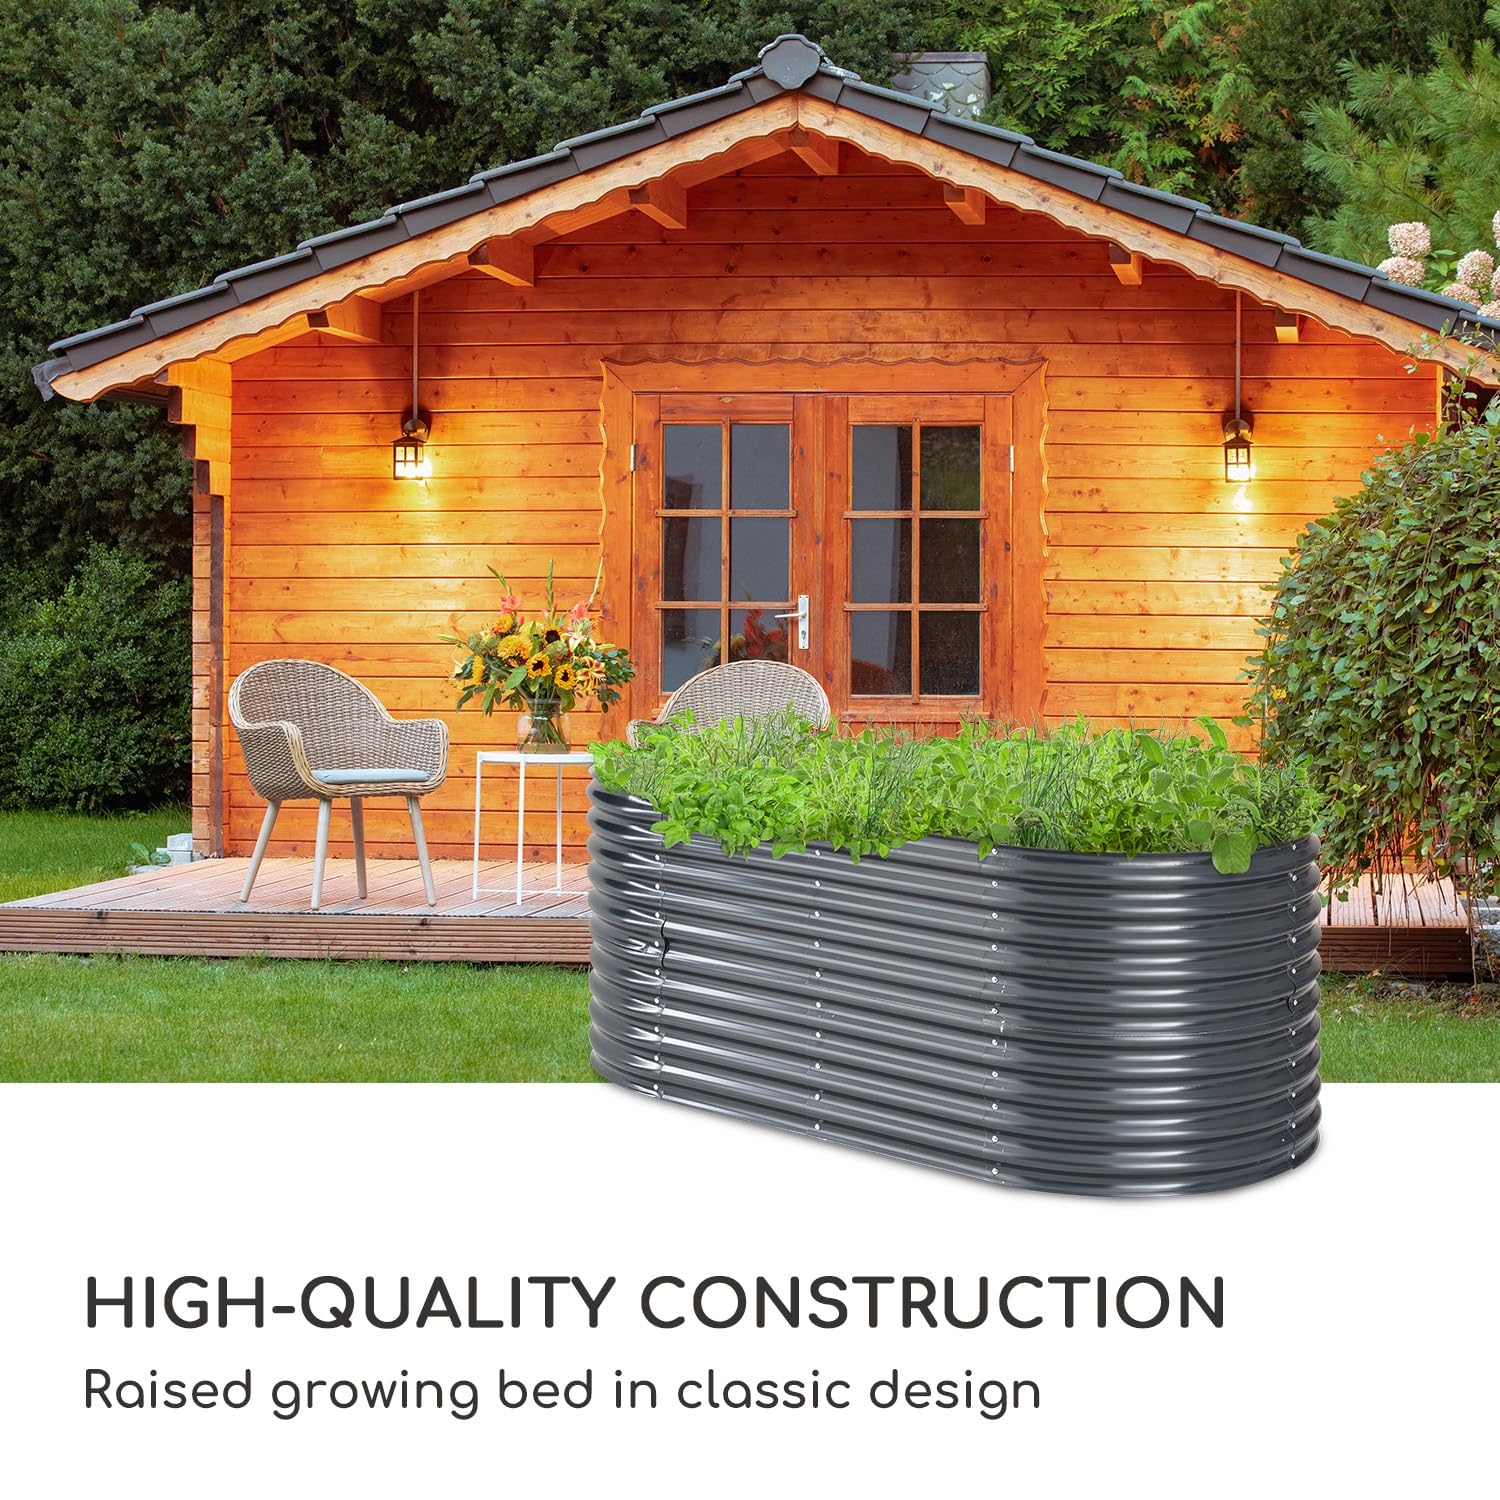
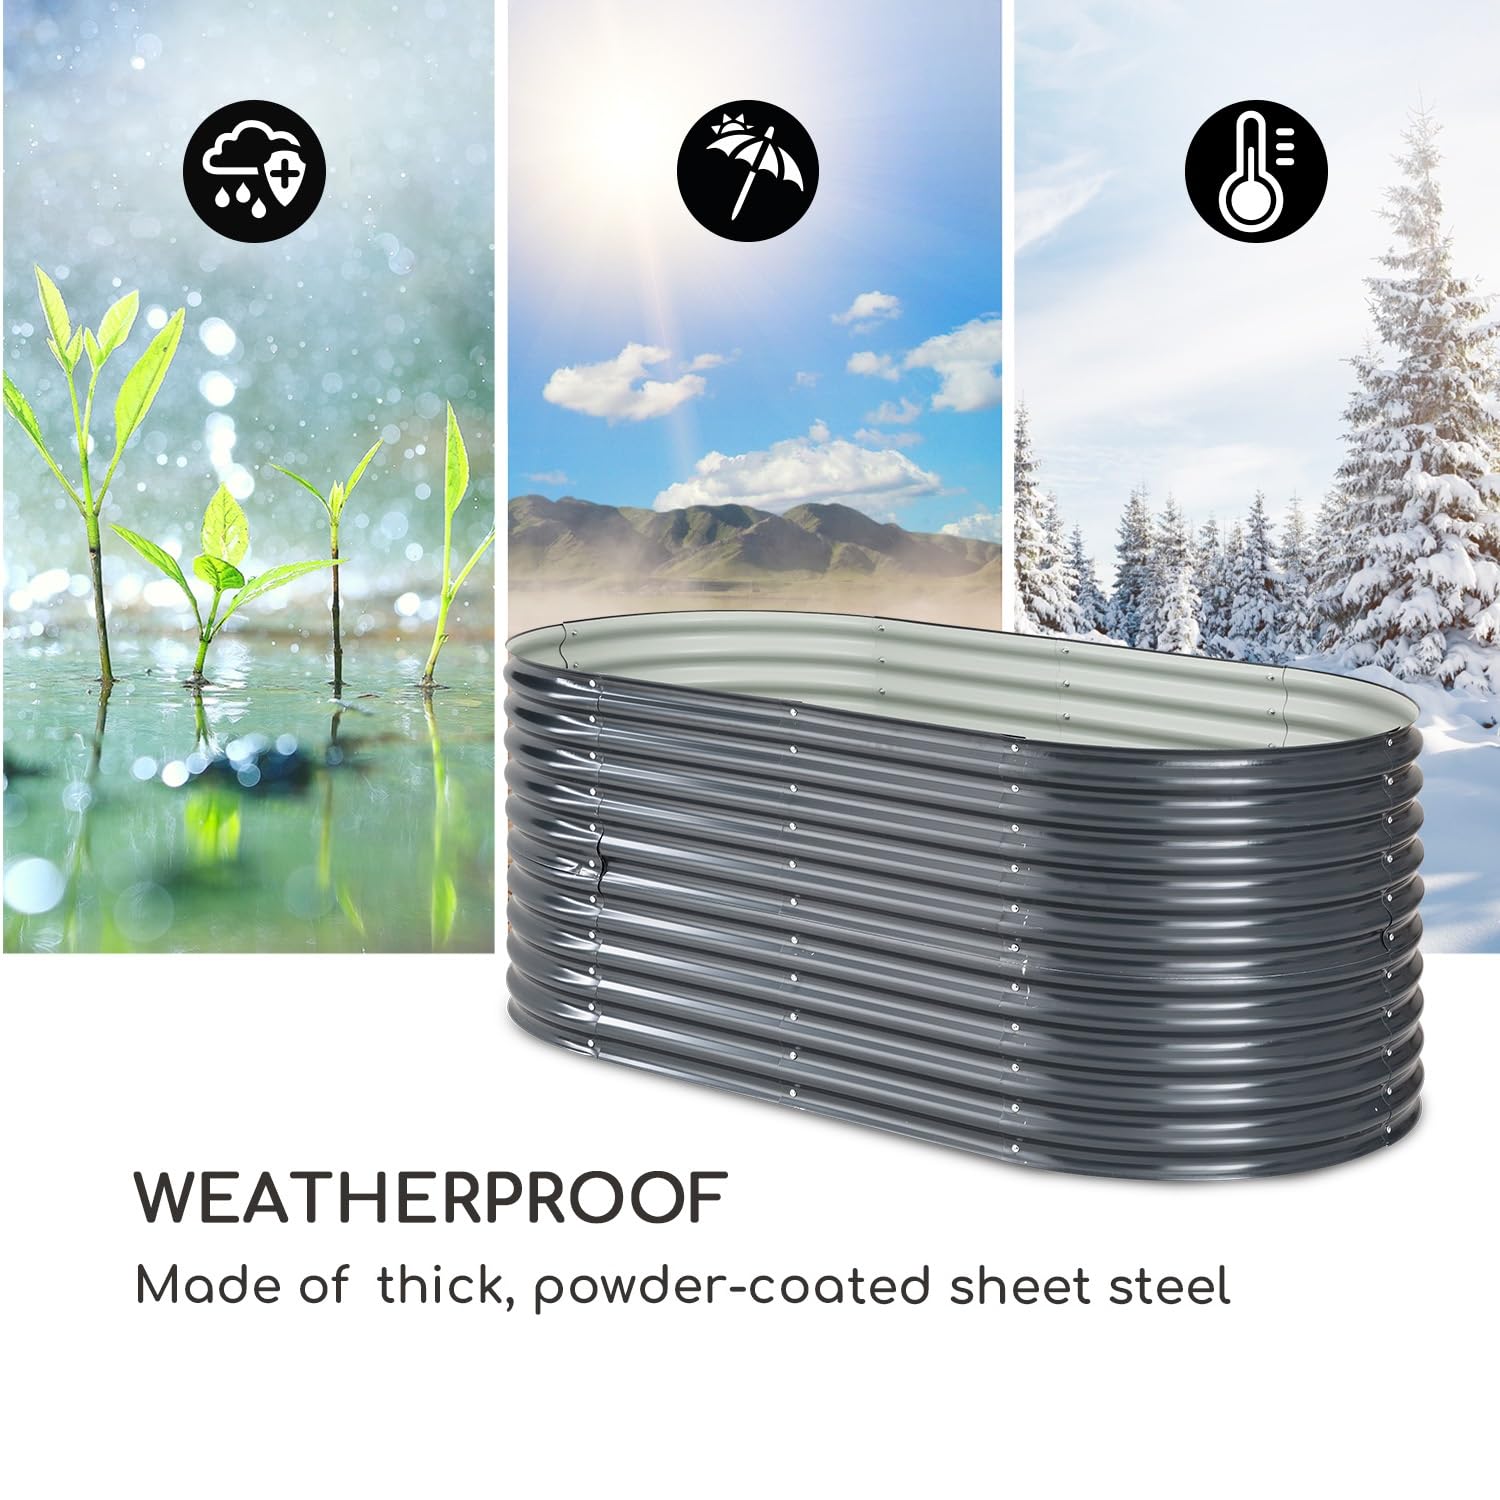
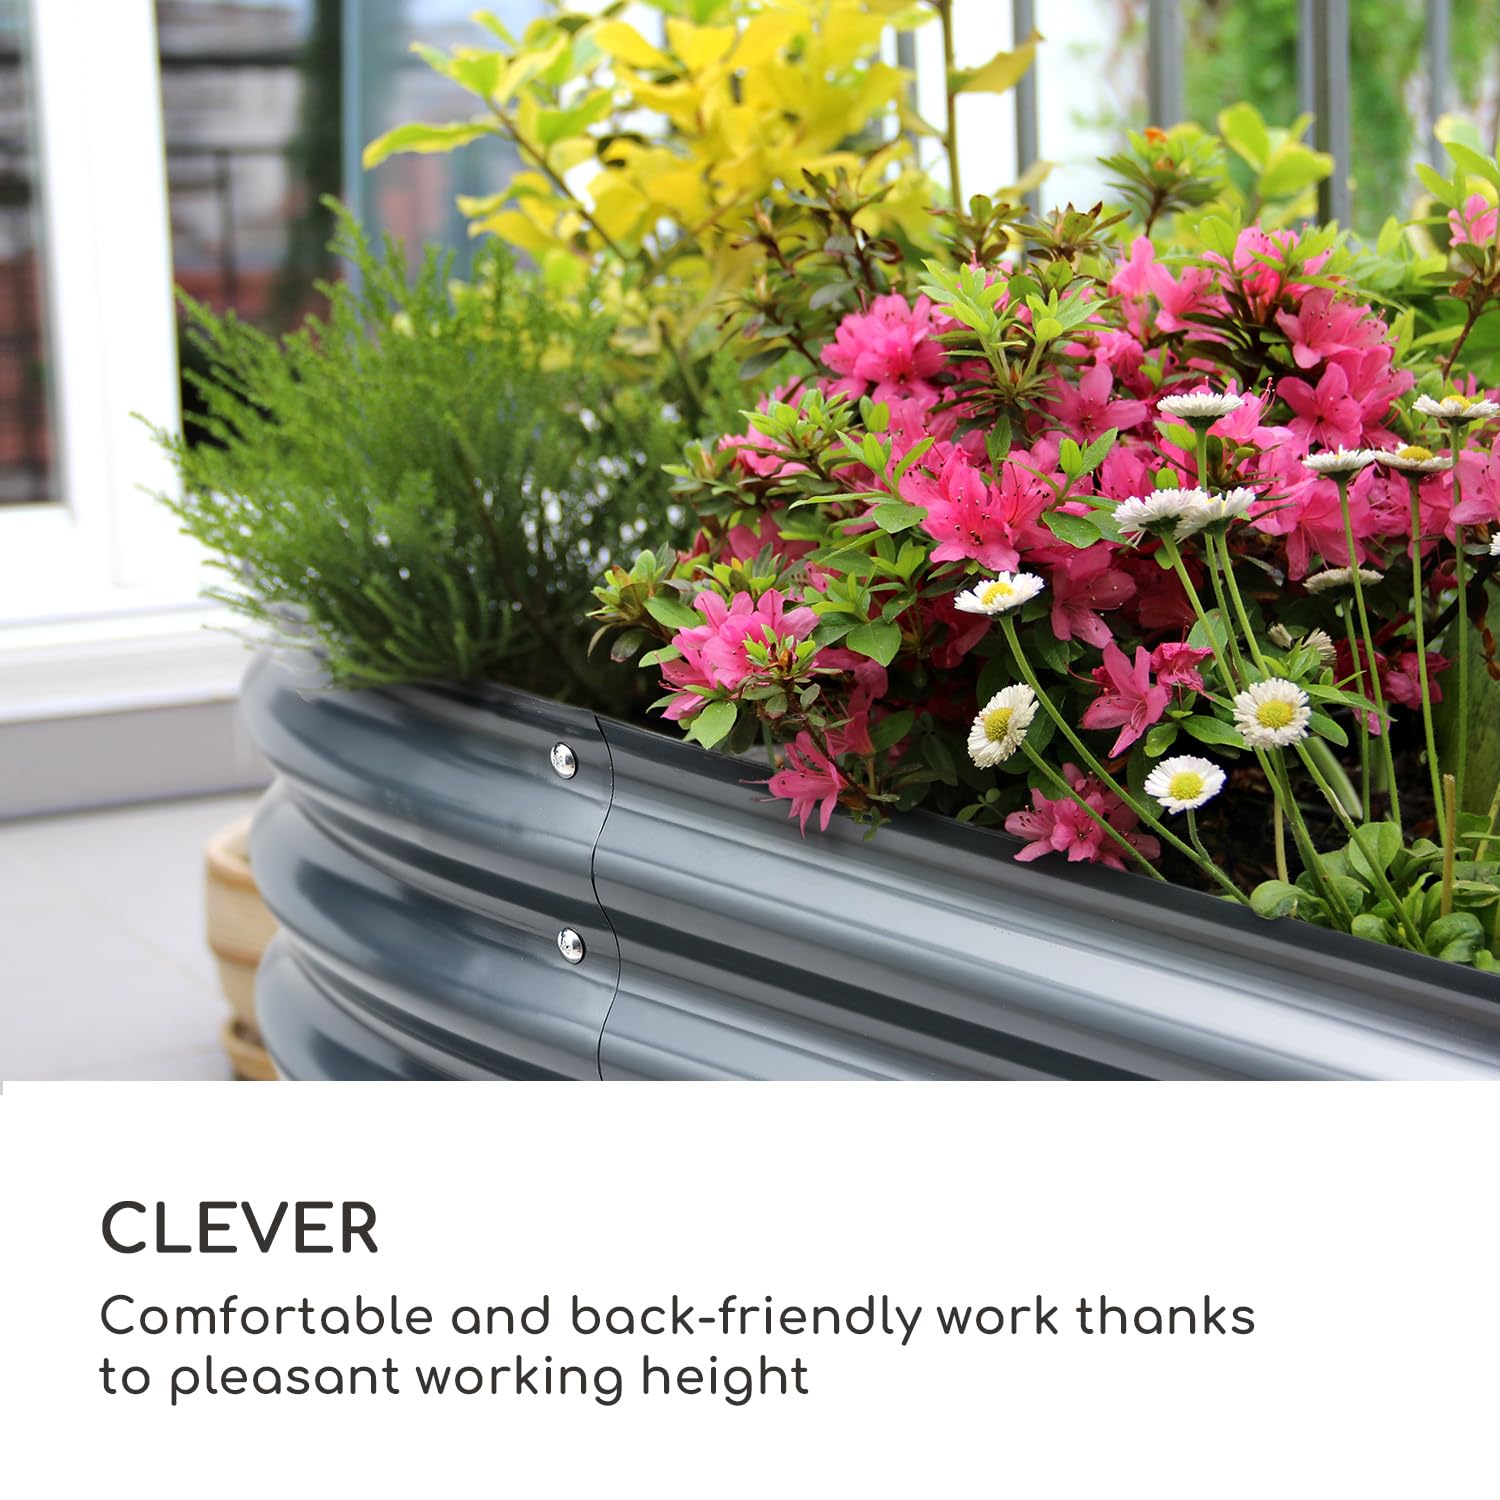
The blumfeldt Galvanized Steel Raised Garden Bed is a large, elegant planter box designed for growing vegetables, flowers, succulents, and herbs. Made from rust-resistant galvanized steel with a zinc-aluminum weather shield, it offers a comfortable working height and smart composting capabilities, making it an ideal choice for both novice and experienced gardeners.
G**C
Sturdy and good looking
Easy to assemble, nice sized planter for a raised bed garden. And the price was nice too. I bought 4 of them.
I**E
Dead Simple Assembly
Very happy with this purchase.This garden bed is HUUUUGGGEEEEEE! 6 ft by 3 ft and 2 ft high (backsaver!)Really dead simple assembly. Hubs put it together in about 20 minutes, so we had it full of soil and good stuff within an hour, watered and planted veggies all in one day. We planted so many veggies and deep enough for potatoes :)I like the fact that slugs can't get in since we have had issues in the past. Purchased the beige color and it looks great.Sturdy, well made and the largest I've seen.
M**E
Great looking bed
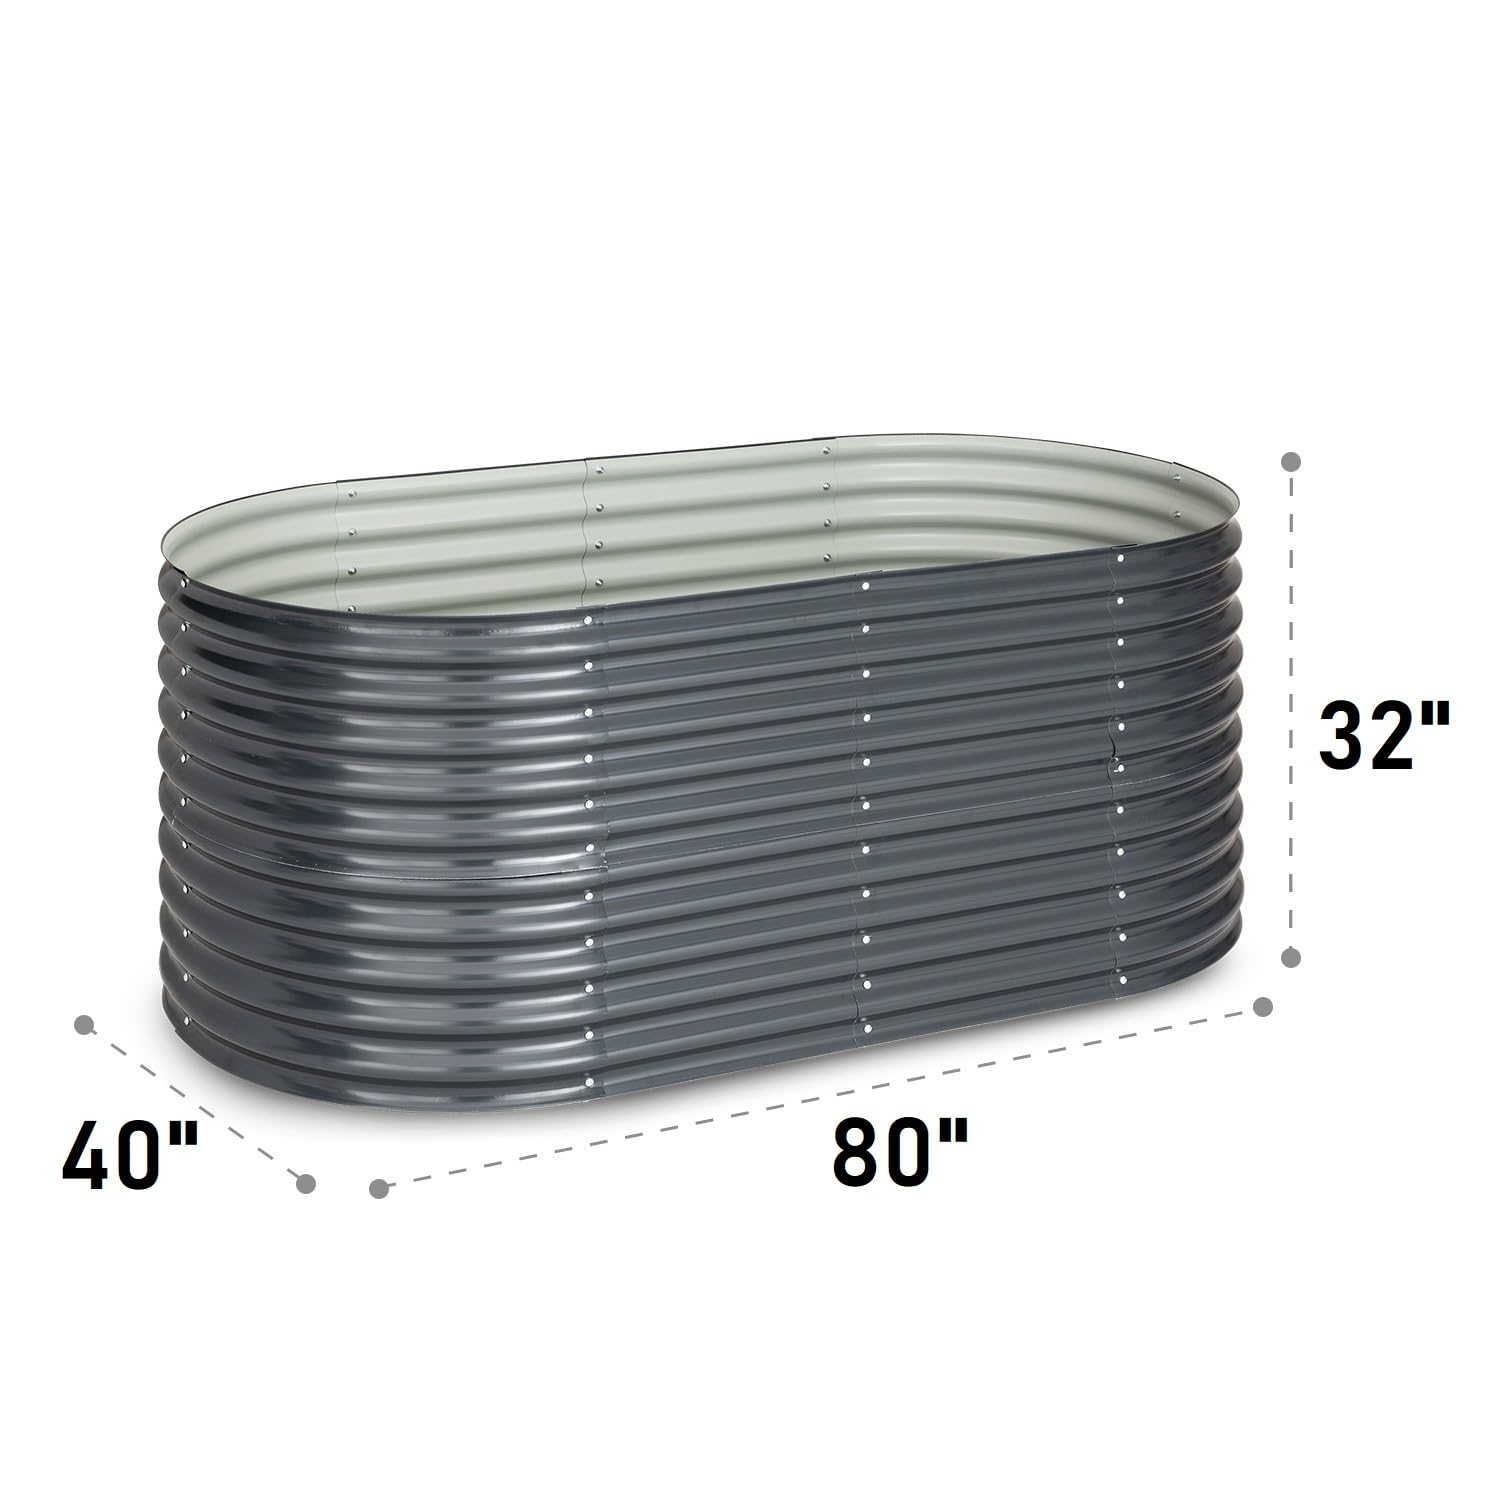
First impressions:1) Well packed but still had a corner dinged that bent the panels, easily bent back as was minimal.2) too much plastic sheeting. Yes, I know it's to protect the coating, but we are gardeners and like to avoid plastic when not needed. Paper sheets would do just as well. (Picture of the pile of plastic sheeting after removal)3) rolled edges top and bottom reducing risk of cuts. Edges were rolled after the protective sheeting was applied, making it more difficult to remove on the insides and trapping some no matter)The Blumfeldt bed is fully assembled. We'll, mostly. I couldn't get two bolts in on the ends where the top and bottom sections overlap. I'll try again tomorrow, but the three bolts on each side should hold fine if I'm not able. Otherwise, it went together easily with my only difficulty being figure ways to assemble that didn't hurt my back. I made sure to put the ends on the outside and the top section is inside the bottom so that the pressure once full will be distributed to the strongest parts.These are similar to Birdies beds that are advertised on several youtube channels. More versatile in some ways (the fact that you can make either two 17 inch tall beds or one 32 inch bed) and less so in others (the radius on the corners appears tighter on the Birdies and can be set up with a narrower profile. 40 inches for the Blumfeldt and 24 inches for the Birdies being the narrowest.)I'm definitely happy with the quality overall and we'll have to see about longevity. Cost on Amazon is $250 with shipping (it literally went up $20 right after I ordered this one) for an 80x40x32 inch bed. It takes about 50 cinder blocks to make a bed 64x32x32 inches internal, and that will run you $75-100 depending on the block price. The Birdies beds are $300 for a bed 83x43x30 plus another $100 for shipping.So far my only real complaint again is the radius of the corners. It wastes a good bit of space and pushes the minimum depth to 40 inches, which if placed against a fence or wall is a bit of a reach.
M**N
Wonderful product!
First thing I want to mention is that these corrugated raised beds are awesome but they are difficult to put together. The instructions that came with them are the down side as difficult at best to figure them out. With that being said, I managed to put two of these I ordered together by myself. It would be best having two people or for that matter even a third to assist with assembly. My help to those that read this are to assemble the curved sections first. It was my finding that when overlapping the top to the bottom to make certain that one seam is opposite the other (note photo's I have on here. All long bolts (a total of eight) are used in the center areas where all four pieces share the same hole in the middle. I also recommend that any if the smaller bolts are fastened very loosely and not torqued down until all panels have a screw bolts thru them. Then work your way slowly tightening them down little by little. This way the configuration remains tight. Also the side panels when attached to the curved ends should be fastened to the inside and nit the outside. I pulled a car out of the garage and worked on it assembling my garage floor. It also helped to have a telescoping magnet because I guarantee you'll be dropping parts all over the place. Washer are placed on the screw bolt from the outside. It took me roughly a little over three hours to build each one correctly but was very happy with the finished result. Now waiting for it to warm uo here in CLE so I can fill with amended soil and begin planting.
D**A
Getting ready for next spring
this smaller garden bin is going to be for potatoes this spring, right now I have my garlic planters sitting in it for this winter. I will load it up with more good planting soil in the early spring. This was the first garden bin I purchased and assembled. It is quite sturdy and has a good coating that will protect for many years. It is sitting on an old disabled power vault which I covered with the blue tarp, but it keeps the bin nice and level.The price was very reasonable, and it was shipped right away. The packaging was very sturdy and not damaged at all. It is well worth the investment if you love gardening, growing your own food and flowers.
H**T
Perfect size for a raised garden bed.
I bought 5 of these and every year I am so glad I did. Raised beds are the way to go and these are sturdy and perfect in size.
T**U
At $170 these are worth it...
Likes -I got this for $170, which is a price inline with what they are worth... If the price is higher wait...Well constructed and shpuld stand up well to even acidic soil... Best part is, i didnt stack them and got 2 raised beds out of this one unit!! Well worth it!!Dislikes -Didnt get enough hardware... I was short a small number of everything amd had to run to the local hardware store for $8. Worled out ok though because I got a bottle of locktite to ensire the screws dont back out.. I suggest it...MAJOR DISLIKE - The curved pieces come with plastic stuck to them amd it is basically impossible to get it off unless you own a sweatshop... No BS might keep me looking for another vender...
J**S
Overpriced, awkward assembly.
The panels are only half height.This leaves a horizontal seam around the planter. I ordered comparable raised bed kits last year and stacked them using slotted strut to make it work. This required the purchase of strut, fender washers and longer bolts with nuts. Where the slots of the strut did not align, I drilled the strut to match. This required a drill and bits.This ‘kit’ presents the same hassle. Assembled now, but no thanks.
A**E
Zuerst alles so lose wie möglich zusammenschrauben, dann klappts...!
Ich habe das Produkt vor ca. einer Stunde schnell und gut verpackt erhalten (zwei Stück 160x80x80 cm Silberoptik) und gleich mit einem Helfer mit dem Zusammenbau begonnen.Die Bauanleitung ist, wie heute üblich, nur bebildert, eine nähere Beschreibung über Reihenfolge und Technik gibt es nicht. Das ist auch nicht nötig, weil der Zusammenbau an und für sich selbsterklärend ist und man mit ein bisschen technischem Verständnis und handwerklichem Geschick zurecht kommt, aber......in einigen Rezessionen ist davon die Rede, dass die Löcher nicht zusammenpassen. Das stimmt so nicht, weil alle Teile von guter Qualität und maßgenau sind, mir ist aber klar, wie solche Beurteilungen zustande gekommen sind, nämlich so...Beim ersten Bausatz haben wir zuerst beide Ovale jedes für sich fix verschraubt und lediglich jeweils eine Lochreihe, wo der obere und untere Teil zusammengeschraubt werden, frei gelassen. Das ist auch problemlos gegangen. Beim Aufeinandersetzten stellte sich dann aber heraus, dass das Übereinanderschieben der beiden Ovale nur geht, wenn eines auf einer Seite noch offen ist, was eigentlich auch logisch ist, aber naja ;-).Also eine Seite wieder geöffnet, aufgesetzt und mit dem Aufeinanderschrauben begonnen (dafür sind, selbsterklärend, die langen Schrauben vorgesehen). Mit etwas Abmühen klappte das dann auch - bis auf die letzten zwei Schrauben - die Löcher der Bleche passten dort überhaupt nicht zusammen, was aber auch nicht verwundert, weil hier immerhin vier Löcher übereinander gebracht werden müssen. Unter Zuhilfenahme von mehreren Schraubendrehern, mit denen wir die Löcher vor dem weiteren Verschrauben quasi "aufgefädelt" haben, ist es dann schließlich doch gelungen - aber es war ein bisschen eine Murkserei.Beim zweiten Bausatz haben wir das dann anders gemacht:Zuerst wieder die Ovale jedes für sich zusammengeschraubt - ABER!!!!!!! - die Schrauben wurden nur lose fixiert (so, dass die Muttern nicht abfallen). So funktionierte auch das Übereinanderschieben des oberen auf den unteren Teil ohne offenlassen problemlos. Dann wurden die langen Verbindungsschrauben angebracht, alle aber auch nur lose, sodass die Muttern nicht herunterfallen - was soll ich sagen: Dadurch, dass die Teile noch gegeneinander beweglich waren, war der Zusammenbau fast nur noch ein Klax, jedenfalls kein Vergleich zum ersten Versuch - lediglich bei der letzten Schraube mussten wir nochmal den Schraubendreher zu Hilfe nehmen und - weil das einfacher war - diese mit dem Akkuschrauben "eindrehen", weil drücken nicht gegangen ist (Gewinde ist gehängt).Dann wurden nacheinander alle Schrauben der obersten, dann der untersten, dann der mittleren Reihe festgezogen (10er Ringschlüssel und Akkuschrauber mit PH-Bit), danach folgte der Rest.Super Teil, sieht schön aus und ist stabil.Apropos stabil - am Besten sieht man sich ein gutes Video an, wie man Hochbeete richtig befüllt, dann gibt es da auch keine Probleme.Falls jemand trotzdem das Gefühl hat, dass es noch eine Verstrebung braucht, würde ich das mit Gewindestangen, großen Unterlegscheiben und z.B. einem Brett zur Verteilung der Kräfte bewerkstelligen, aber ich denke nicht, dass es das braucht. Sonst werde ich das hier noch reinschreiben.FAZIT: Erst alle Teile LOSE zusammenschrauben - je lockerer, desto besser - dann Ovale aufeinandersetzen, lange Schrauben einführen und Muttern locker aufschrauben. Sind alle Schrauben, Unterlegscheiben und Muttern an ihrem Platz alles festschrauben. Um Verspannungen klein zu halten, am Besten zuerst alle Schrauben ganz oben, dann ganz unten, dann in der Mitte und danach den Rest festschrauben - alles schön und stabil.Update: Beide Hochbeete sind nun angelegt. Alles super stabil. Irgendwelche Vertärkungen und Streben sind unnötig. Das Hochbeet hält auch so und bleibt stabil. Der Aufbau der Füllung erfolgte in Schichten. Videos dazu gibt es genug im Netz. Weiterhin somit 5 Sterne und Daumen hoch für das Produkt 😊👍🏻
M**Y
Solid, pretty easy to assemble, looks great and does the job.
I wanted a waist-high raised bed after getting inspiration from a YouTube channel ("self sufficient me"). That channel recommended a particular brand that's not available in the UK or at least not this size. This looked to be the closest alternative. As you can see from the photos it looks great and is very sturdy. My wife and I put it together without too much difficulty. One tip - put the washers on the inside rather than the outside! I was a little annoyed that the panels didn't line up perfectly but really it's not a big deal. I bought separately off Amazon some black rubber trim which fits perfectly and smooths out the bits where the panels are slightly out of line. I bought this trim "Standard black rubber car edge protective trim 14mm x 8.5mm FITS 1mm - 3mm".To fill the bed I followed the "hugelkultur" approach as learnt on the channel. I filled it with logs, branches, some turf I'd removed etc leaving a 30cm or perhaps slightly more for a mix of compost, good soil, rotted manure.The bed was shipped from Germany. I've since planted a variety of seeds and plants and everything is growing really well. It's an investment for sure but worth it in the longer term. It's so easy having the bed at waist level. This won't be the last one I buy.
L**.
potager carré
très bien , montage facile hormis le papier collant sur les faces internes et externes qui est une horreur à enlever patience++ Pas de soucis pour l'enlever sur le bac de 1.80 par contre
S**E
Schönes Hochbeet
Aufbau relativ einfach.Gute QualitätSehen gut aus
E**6
Facile à monter
Facile à monter, vu que c'est 2 éléments à superposer pour obtenir la hauteur, je les ai divisé en 2 et du coup j'obtiens 2 bacs de la même dimension seulement moitie plus bas ce qui est bien pour les plantations hautes comme les tomates.
Trustpilot
2 weeks ago
1 month ago
