


🔍 Secure Your Space, Anytime, Anywhere!
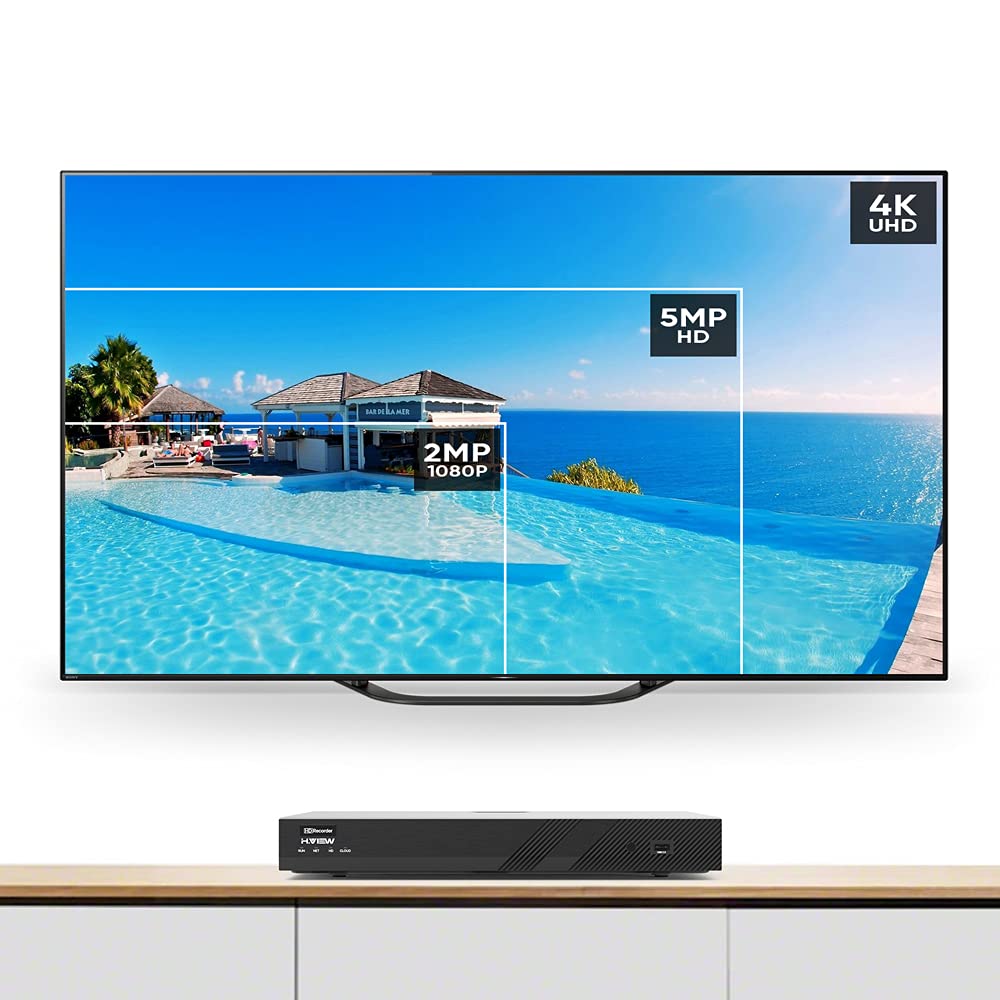
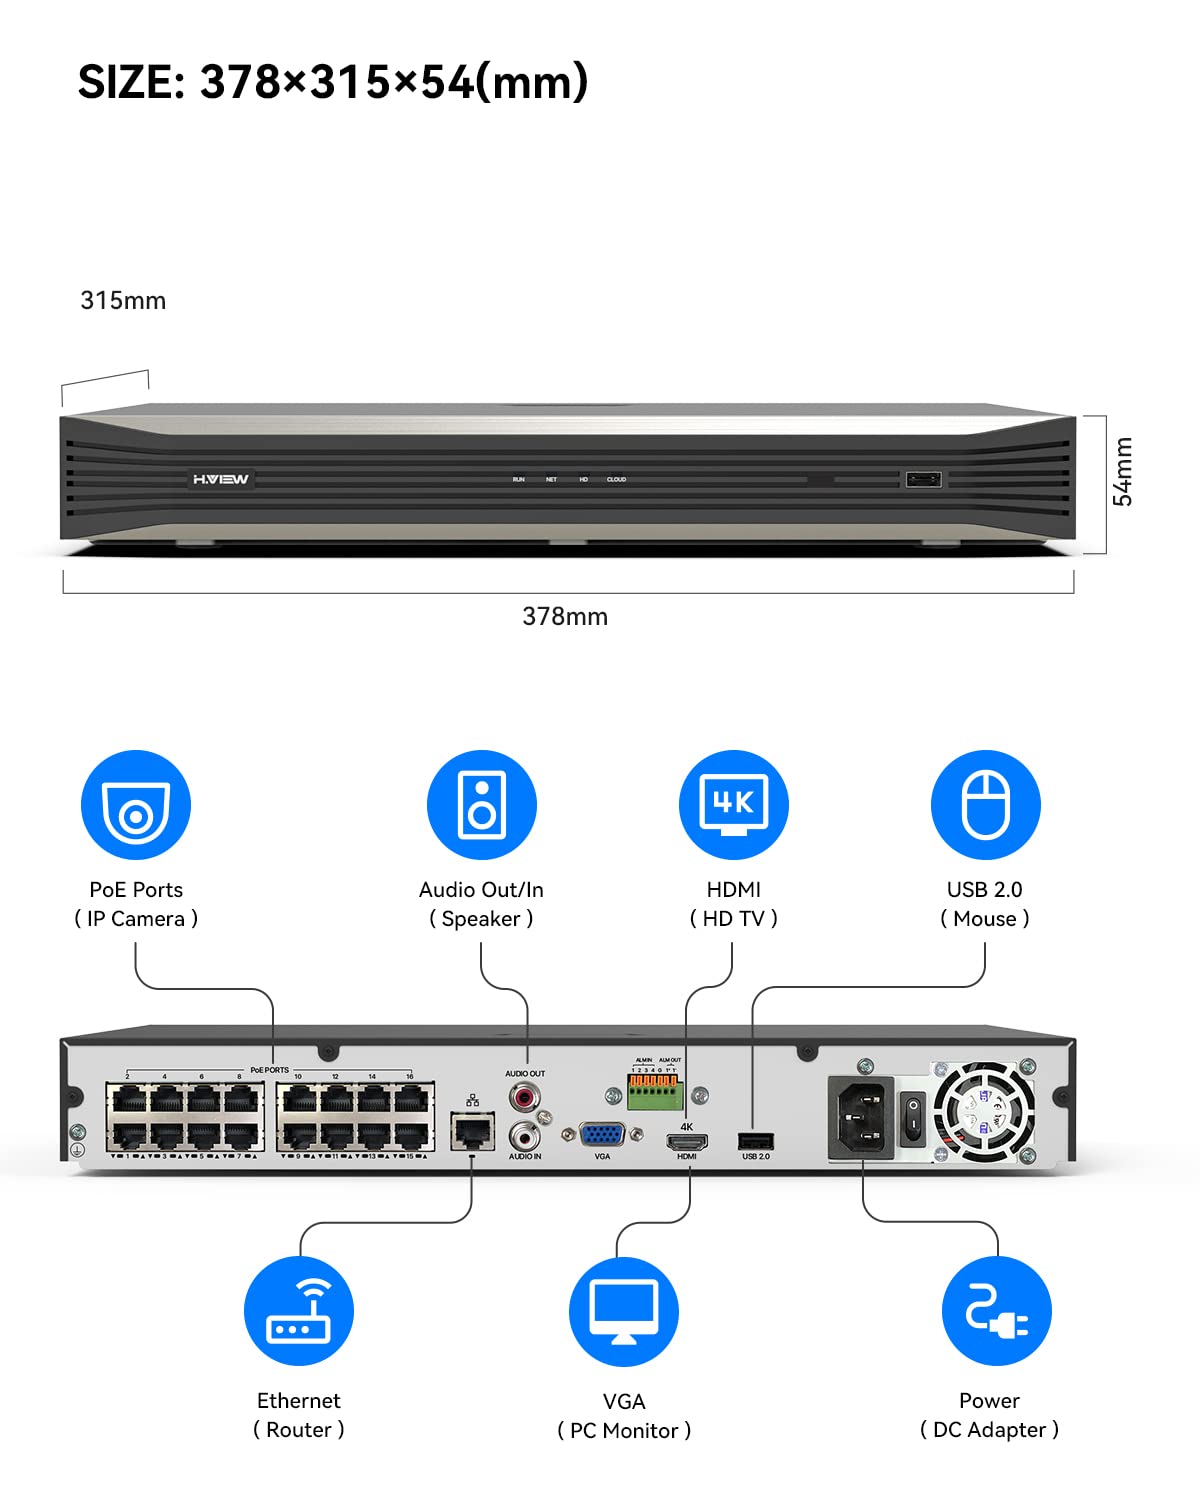
The H.VIEW 16ch Network Video Recorder is a powerful surveillance solution that supports up to 16 4K IP cameras, offering extensive storage capabilities of up to 20TB. With features like remote monitoring, intelligent power management, and user-friendly setup, it ensures reliable and high-quality video surveillance for both personal and professional use.
F**Y
Best ONVIF compatible NVR out there!
The media could not be loaded. (I uploaded the photos in order from 1 through 18 hoping they would display in that order, but unfortunately, they are all out of order in this review! I have no idea how that happens but I am truly sorry!)My history with Video Surveillance:I’ve been using video surveillance equipment for several years and with various types of systems. I have had a computer software system at my home for several years using BlueIris which is really extraordinary, although very complicated, and uses up the computer resources like nobody’s business. I’ve had an old Win 7 machine that the software just nearly killed every time I used it. I was able to test the software on a super fast computer at my job with an i9 processor, some 4TB SSD drives with 64 GB of RAM and it was a breeze. The computer never gets over about 8% resource usage. But, I can’t afford to pay over $3,000 for a home computer dedicated to video surveillance!I’ve tested a couple other NVR’s and had varying success with them using my ONVIF cameras. I have several SV3C cams and an HOSAFE Pan/Tilt camera that also has auto tracking. In fact, the one NVR I expected to work the best, made by the same folks who make the BlueIris software, didn’t like my cameras at all. It says in the small print that you may or may not have any success using other brand cameras, which I get. They all want you to buy their brand to use their NVR.H.View SetupIn my research looking for ONVIF compatible NVR’s I found H.View and their claims to work basically with any ONVIF cam got my attention. I ordered and just received my H.View NVR yesterday and also the Seagate 2TB surveillance hard drive. I installed the hard drive using the cables (power and data) provided by H.View and plugged in the ethernet cable from my router, the HDMI to my TV, a wireless mouse dongle, and the power supply and turned it on. If the last sentence gave you a hot flash, I understand, and I wouldn’t want any of you to pass this unit up because of this! It is very easy to install the hard drive, and even if you just can’t make yourself do it, you probably know someone, a grandchild, your neighbor, who can do this for you. So please don’t eliminate this machine for that reason!Let me preface this by saying I already have my current five cameras, all WIFI, connected wirelessly to my router, all of them have static IP’s which I have made a list of, to be able to add them as easy as possible, and my router is not on the internet. It is a closed network, and for now that’s how I want it. I don’t have any need to connect remotely at this time. As for the wireless mouse, so far all of the NVR’s I’ve tested had no problem with the wireless mouse, which was paired years ago using the surveillance computer that the NVR is replacing. Once paired by the computer, the mouse and dongle just seem to work as a mouse no matter what I plug the dongle into. I highly recommend the wireless mouse, by the way. I can sit on my couch and work through all the screens, read everything just perfectly and operate everything I need to using just the mouse. If you choose to use it, the H.VIEW NVR comes with a wired mouse.1st Time Power UpWhen I powered up the device the first time it came to a startup splash screen saying H.VIEW and then started the setup wizard, with language etc. I turned on the mouse and it worked immediately. I set the IP address to Static during the setup wizard, and once I set a new password from the default, I also added a security pattern to use to log in. Love that it has this! Once the wizard was completed, it came to a 3x3 camera view screen with each box black with Offline camera in each box. I moved down the screen to the bottom left and clicked on Menu and selected Menu again and it came up to the Camera menu, (Photo 1). It initially showed a list of IP’s for the 8 possible POE cameras with the IP’s in the 172.16.0.1 thru 8 range. I do love that it has POE (power over ethernet) but at this time I won’t be using that feature. You can see in the image there are still a few slots available that still have the POE IP’s assigned. For my first camera I clicked on Cam Config in row one and it brings up a Modify IP Camera screen (Photo 2) where you click on Search and it brings up all the IP cameras it finds on the network. I clicked on the one with the IP I wanted to add first, then in the bottom half of the screen I clicked on the Password field and changed to the password I have assigned to that camera previously, then clicked on OK. If you close that window, on the screen behind, you will see it add the camera, then in a few seconds, it shows all the information and the camera is live on the system. As each camera shows up active you can click on the play button under the status column to view a live shot of the camera image (Photo 3). You just repeat this process by clicking on Cam Config on row two and add your next camera, continuing on each row until you have them all added. You can see back in the screen shot #1, all five of my current cameras active and ready to use.Preview ScreenThere are a few basic settings you can get to at the bottom of the main or preview screen to set how many cameras show at once. There is also a more in-depth version of these settings by clicking on Menu, then Menu again, then on System/Preview (Photo 4). You can set the monitor output resolution, how many windows and the configuration of the windows on the preview screen and more.Setting up Motion RecordingFor setting up basic recording on Motion Detection, the next step is to go to the Storage/Recording screen (Photo 5). By default it sets Normal recording (Blue) to record continuously 24/7 and you may want it that way, but I only bought a 2TB hard drive so I only want Motion Detection to trigger recording. So to remove the Normal Blue boxes, you first click on the None box at the bottom of all the colored boxes. Then draw with the mouse starting at 0 on Monday all the way to 24 on the Holiday row which will clear all the blue boxes. Then click on the green Motion box, and click and drag from Monday 0 (Photo 6) through Holiday 24 which fills in the green boxes (Photo7). (I also changed the Pre-Record (sec) to 5 and the Post-Record (sec) to 30 so that once motion is detected it saves the recording starting with 5 seconds before the motion was detected until 30 seconds after motion stops or was detected to save some hard drive space.) Then click on the copy button at the bottom of the screen and select All and hit OK which will copy the changes you made to your Camera 1 to each of your cameras. Then Apply the changes.The next step depends on your cameras and how they will function with the NVR to set the area of Motion Detection. (Photo 8) Some of my cameras just worked fine without having to adjust anything here, but you may have to log into each camera and set the motion area and sensitivity in the camera’s web interface. (Photo 9) The ONVIF compatibility of each camera with the NVR by camera model will vary. You may have to tweak the settings from the camera to the NVR to get them working like you want. My front porch cam has hanging plants and low tree branches that, when windy will keep triggering the motion so I had to set my motion areas to watch most of the picture but not the hanging plants, the tree branches and the street. Under the Alarm/Motion Detection screen I have my driveway camera set to motion trigger that will also trigger my front porch and front of garage camera to record the event. You set this by clicking on the Trigger Actions blue settings button (Photo 10) and selecting the cameras you also want to record on this camera’s motion trigger. This way if a vehicle were to pull into my driveway, the driveway cam will begin to record and so will my garage door cam and the front porch cam, both triggered from the driveway cam. Nice!Playback of RecordingsOn the bottom of the camera preview screen (show with my five camera views in Photo 11) is the playback button which when clicked will take you to the playback screen (Photo 12) which will default to the 24 hour timeline and today’s date. You select the camera or cameras you want to view recordings from at the upper left by checking the box under the select column. For Event recordings (motion events in my case) you will see the recordings shown as orange bars. You can use the slide bar (Photo 13) to shorten the timeline to larger sections of time. You can click on the Play button and using the mouse click on any of the orange bars in the timeline to view the videos that relate to the bars.Saving Videos to Thumb DriveInsert a thumb (USB) drive into the remaining USB port in back (wish there was one on the front, I really do) and then clicking on the Scissors icon to “start clipping” (Photo 14) will bring up an orange begin and end mark on the timeline. (Photo 15) It is best to drag the 24hr bar to the left and enlarge the area you are watching the clip from. Move the two orange pointers to the beginning and end of the clip you want to copy onto the USB drive and then click the Scissors icon (Photo 16 and 17) to add the new clip to the File Management Folder. You’ll see a red dot and the word “new” appear in the folder (Photo 18) once you have done this. Click on the folder and the File Management window opens. Check the box next to the clip and click on the Backup button at the bottom right of the window. The save window (Photo 19) will pop up showing your thumb drive and where it is going to save the file. You can click Backup and it will save the file as an MP4. If needed you could load the thumb drive on a computer and play the clip, and screen shot an image from the clip to give to the police etc. or give them the entire video on the thumb drive. Unfortunately, there is no way to save an image or screen shot from the play window on the NVR. I am waiting on an answer from tech support about this because the downloaded manual shows a camera icon to capture snapshots. It is not there on the NVR I received. However, there is a way to get a screen shot so I am OK with this.SummaryI am very pleased with the way this NVR works and how simple and easy it was to set up. Obviously, if you are starting from scratch and have not even installed your cameras yet, the process can take you a while. The camera installs are where the work is in the surveillance system. The rest is just “sit on the couch” easy. I’ve only had this system running for three days as I write this, and I have a couple more cameras to buy and install so I feel like I should come back and update this review after I’ve done that and used it for a few months, but I am very impressed with all the features and how well it performs so far and I feel like it is the best choice for someone with ONVIF cameras who wants to set up a motion activated surveillance system. For the price, you can’t beat it! Please watch the video I posted for more info.Likes: Price, compatibility with ONVIF cameras, simple to set up,Dislikes: No USB port on front, no snapshot capability from the playback menu.
R**Z
OK Performance. PTZ Presets Dont Work and Without Notice They Disabled VCA, Ethical Concerns
The H.View NVR used to be a feature-rich and sophisticated NVR until they unilaterally and without notice deleted the VCA features. It was done surreptitiously without warning during a software update. I'm told thru their tech support it has been discontinued it because of stability issues. So why is it still present in the menu and why does it now say the camera is incompatible vs just remove the feature!? So now you think your cameras are bad! So if you want VCA do not get this NVR. I installed the NVR in my camera test station to take the time to get comfortable with it. Read on for my impressions.SETUP: The HView NVR was evaluated using 8 cameras chosen from 12 available on the network and from 5 different ONVIF manufacturers. The NVR was connected to my home network over its single network 100Mb port which is how I use my security system (I did not use the POE network). Two 8MP, six 5 MP, and a single 1080P camera were used and 3 of these were Pan Tilt Zoom. A 4TB hard drive was also installed in the NVR. See the picture attached for the test bench. -- MODERN USER INTERFACE: The user interface (UI) is well designed, pleasing to look at, and fast to respond. There is a lot to take in and there is some learning curve to become proficient but your patience will pay off. -- EASY ONVIF SETUP: The NVR found all 12 ONVIF cameras on my network. After a short learning curve, adding or changing HVIEW NVR assigned cameras was easy, fast, and consistent. The "Search" feature also found those cameras whose IPs were outside of my subnet (192.168.0.1) and the NVR provided the capability to change the IP of the camera to within my subnet. Previously I had to access the camera directly to changes its IP address. -- SIMPLE HARD DRIVE INSTALL: The hard drive was a simple install with the cables provided with the NVR and the NVR on power-up immediately recognized and installed the 4TB Seagate drive I used. -- GOOD CAMERA PREVIEW: When installing a camera, a preview button is available that provides s small overlay window to view the camera's image. This serves 2 purposes: 1) it provides feedback that the camera is connected and operating and 2) you can see from the image where the camera is physically installed. All other NVRs I've used were never able to preview every camera as the HView NVR did. -- GREAT MULTIVIEW: There are a variety of choices for how to display the cameras. It easy to grab and drag cameras views around and place them how you would like -- PTZ WORKED WELL: I had 3 PTZ cameras connected to the NVR and each one worked perfectly from the NVR's PTZ control. -- ABLE TO CHANGE CAMERA ENCODING: Another feature, of the HView NVR was that for every camera installed, I was able to access and change the cameras encoding!. With other NVRs there is little or no capability for this and I was always forced to access the cameras directly to changes their configuration. -- RECORDING AND PLAYBACK: Mostly I just record 24/7 but there are many features to trigger recording using motion detection. My favorite playback feature was being able to speed up playback by 256! -- MOTION DETECTION: I've ventured into used the motion detection of the H.View NVR . Set up was easy but more importantly the find and view of the individual segments made life very easy to find a particular segment. There is even a search method that will sort on motion detected clips only. -- NETWORK USAGE DISPLAY: One of my favorite features of the NVR is that it provides the network throughput for its port to understand the network utilization of all the cameras. See the attached picture. -- POE STATUS: There are 8 POE ports that operate on their own subnet or a separate network than my home subnet. I could not find the power available to be distributed among the 8 ports but since I don't use them it was not important to determine. When I first set up the NVR I connected a camera to the POE port and discovered later that the NVR and reassigned the camera's IP address to within its subnet.THE BAD: -- POOR COMPANY ETHICS: They without notice deleted the features for face detection, barrier crossing etc but left the functions on the NVR so now the NVR tells you your camera is bad vs their purposeful and unannounced deletion of the extensive features. -- PRESETS DONT WORK: The presets dont work. While PTZ words to move the camera the presets dont work and will not save. A major problem with the NVR. -- TIME INTERACTION BETWEEN NVRs: I have 3 other NVRs on this network and for whatever reason, the H.View time will only report the time set in another Evetvision NVR that's on the network. There is a protocol issue here but as long as I set the time correctly in Evtevsion then the system is working well. A software bug that they probably wont fix since they are just a distributor and have no power over the design. -- ONLY 100Mb ENET PORT: The 100Mb Ethernet port was at 40% usage with fairly static camera images. I would have liked to see a 1Gb port on this NVR to avoid any video choppiness when cameras are managing a lot of motion. -- NO SNAPSHOT: There is no NVR feature to be able to take a quick picture of a camera image and save it. The workaround is to save a video and use another software program to capture a screenshot. -- VCA Doesnt Work: The features for face detection, bag left behind etc dont work with any ONVIF camera even when they are HVIEW cameras. Im told from their tech support they have discontinued this feature due to stability issues. Makes you wonder about a company that issues bad software then deletes the functions without telling you. They without notice deleted the features for face detection, barrier crossing etc but left the functions so now it tells you your camera is bad vs their purposeful and unannounced deletion of the extensive feathers. -- 256MB max Recording. The recording are split up in 256MB pieces which is a total pain to copy and put them back into a continuous video.CONCLUSION: I'm glad I spent the time on the test bench with the N.View NVR to understand its capability and performance. The company has on several occasions exhibited less then truthful behavior on their camera products and now this NVR so I will note use their products from now on which is my recommendation to you. This NVR is definitely one to avoid.
Trustpilot
1 month ago
1 month ago