Desert Online General Trading LLC
Dubai, United Arab Emirates
Desert Online General Trading LLC
Dubai, United Arab Emirates


🛠️ Fix floors like a pro—quiet, clean, and quick!
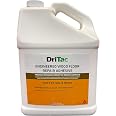
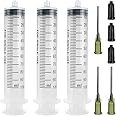
The DriTac Wood Floor Repair Kit (32oz) is a high-viscosity adhesive solution designed exclusively for engineered wood floors. It includes all necessary tools—syringe, drill bits, metal tips, and dowels—to fill gaps causing squeaks and pops with minimal visible impact. The VOC-free formula bonds layers instantly, allowing immediate use without clamping or wait time, making it perfect for both professionals and DIY enthusiasts.


| Brand | Dritac |
| Specific Uses For Product | Floor |
| Material | Engineered Wood |
| Item Form | Liquid |
| Special Feature | Engineered flooring specific application, quick and convenient process, and adhesive void correction for engineered wood floors |
| Color | White |
| Item Package Quantity | 1 |
| Package Information | Bottle |
| Item Volume | 32 Fluid Ounces |
| Viscosity | High (relative to typical lamination adhesives) |
| Water Resistance Level | Not Water Resistant |
| Unit Count | 32.0 Fluid Ounces |
| Viscosity Level | High |
| UPC | 714241300026 |
| Manufacturer | DriTac Adhesive Group, Basic Adhesive Inc |
| Part Number | RS-1 |
| Item Weight | 2 pounds |
| Product Dimensions | 8.3 x 7.7 x 4.2 inches |
| Item model number | AX-AY-ABHI-22238 |
| Is Discontinued By Manufacturer | No |
| Size | 32 oz |
| Special Features | Engineered flooring specific application, quick and convenient process, and adhesive void correction for engineered wood floors |
| Included Components | Repair Kit |
| Batteries Included? | No |
| Batteries Required? | No |
Trustpilot
2 months ago
1 month ago